Home Blog Page 37

How to use chip widget in flutter – Dynamically useCase Example

0
chip widget in flutter
FlutterChip Widget

Hi Guys, Welcome to Proto Coders Point. In this flutter article let’s learn about Chip widget in flutter. In this tutorial will understand the fundamentals of chip widget with example & then implement the same to understand real-world use-case of chip widget.

Without any further ado, let’s get started.

What is Flutter Chip Widget

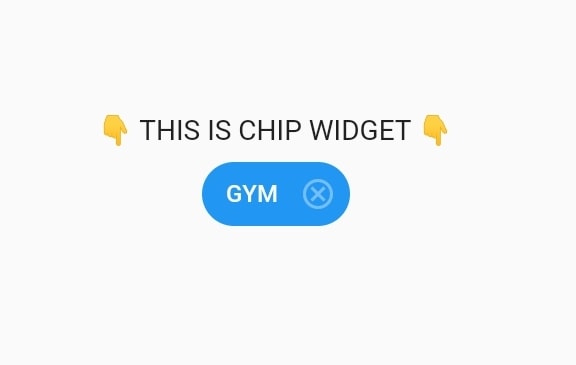
A Chip in flutter is a material design widget which is in-build in flutter framework sdk. It is a roundeded rectangle shaped compact element that hold a label & other customizable properties in it. Here is how chip looks:

Real-world use case of flutter chip widget:

  • ToDo app -> List of remembering sort notes, keeping single key note as chips.
  • Add to favorite -> List of removeable items, for Example: Adding favorite contacts to chip, creating list of favorite songs etc.
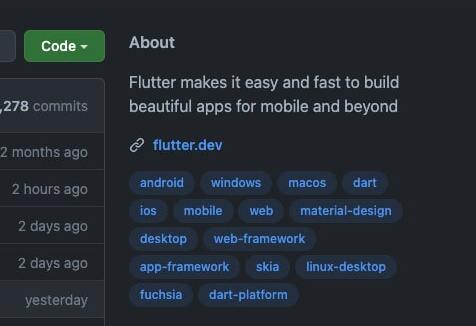
  • Post Tags -> You might have seen in GitHub, StackOverFlow etc.
  • HashTag on social media.
This are chip widgets – Example

Flutter Chip Widget Constructor

Here one property is required i.e. label. Other’s are set default and customizable.

Chip({
  Key? key, 
  Widget? avatar, 
  required Widget label, 
  TextStyle? labelStyle, 
  EdgeInsetsGeometry? labelPadding, 
  Widget? deleteIcon, 
  VoidCallback? onDeleted, 
  Color? deleteIconColor, 
  bool useDeleteButtonTooltip = true, 
  String? deleteButtonTooltipMessage, 
  BorderSide? side, 
  OutlinedBorder? shape, 
  Clip clipBehavior = Clip.none, 
  FocusNode? focusNode, 
  bool autofocus = false, 
  Color? backgroundColor, 
  EdgeInsetsGeometry? padding, 
  VisualDensity? visualDensity, 
  MaterialTapTargetSize? materialTapTargetSize, 
  double? elevation, 
  Color? shadowColor
})

Commonly used properties of chip widget:

  • padding: Give padding space arount the chip widget.
  • backgroundColor: As the name itself says, used to set color to chips.
  • avator: Show a leading Widget inside chip: Display a Small image or Icon before label in chip widget.
  • deleteIcon: Show a delete icon in chip.
  • onDeleted(): Event Function is called when user click on deleteIcon.

Learn more about other properties in Offlical Docs.


Chip Widget Simple Example

The below Code is an example to show many chips in flutter. In below code I used Wrap widget as parent, which has multiple children i.e. Chips, I used Wrap widget because it will automatically adjust and be responsive, The chip will automatically move down line when used Wrap.

Code:

import 'package:flutter/material.dart';

void main() {
  runApp(const MyApp());
}

class MyApp extends StatelessWidget {
  const MyApp({Key? key}) : super(key: key);

  // This widget is the root of your application.
  @override
  Widget build(BuildContext context) {
    return MaterialApp(
      debugShowCheckedModeBanner: false,
      title: 'Flutter Demo',
      theme: ThemeData(
        primarySwatch: Colors.blue,
      ),
      routes: {'/': (context) => MyHomePage()},
    );
  }
}

class MyHomePage extends StatefulWidget {
  const MyHomePage({Key? key}) : super(key: key);

  @override
  State<MyHomePage> createState() => _MyHomePageState();
}

class _MyHomePageState extends State<MyHomePage> {
  @override
  Widget build(BuildContext context) {
    return SafeArea(
      child: Scaffold(
        body: Padding(
            padding: const EdgeInsets.only(top: 10, left: 8),
            child: Wrap(
              spacing: 3,
              children: [
                Chip(
                  label: Text("GYM"),
                  labelStyle: TextStyle(fontSize: 12, color: Colors.white),
                  backgroundColor: Colors.blue,
                  deleteIcon: Icon(
                    Icons.cancel_outlined,
                    color: Colors.white38,
                    size: 18,
                  ),
                  onDeleted: () {
                    print("deleted");
                  },
                ),
                Chip(
                  label: Text("WORKOUT"),
                  labelStyle: TextStyle(fontSize: 12, color: Colors.black),
                  backgroundColor: Colors.yellow,
                  deleteIcon: Icon(
                    Icons.cancel_outlined,
                    color: Colors.white38,
                    size: 18,
                  ),
                  onDeleted: () {
                    print("deleted");
                  },
                ),
                Chip(
                  label: Text("DIET"),
                  labelStyle: TextStyle(fontSize: 12, color: Colors.black),
                  backgroundColor: Colors.green,
                  deleteIcon: Icon(
                    Icons.cancel_outlined,
                    color: Colors.white38,
                    size: 18,
                  ),
                  onDeleted: () {
                    print("deleted");
                  },
                ),
                Chip(
                  label: Text("GAMING"),
                  labelStyle: TextStyle(fontSize: 12, color: Colors.white),
                  backgroundColor: Colors.red[500],
                  deleteIcon: Icon(
                    Icons.cancel_outlined,
                    color: Colors.white38,
                    size: 18,
                  ),
                  onDeleted: () {
                    print("deleted");
                  },
                ),
                Chip(
                  label: Text("FITNESS"),
                  labelStyle: TextStyle(fontSize: 12, color: Colors.white),
                  backgroundColor: Colors.brown,
                  deleteIcon: Icon(
                    Icons.cancel_outlined,
                    color: Colors.white38,
                    size: 18,
                  ),
                  onDeleted: () {
                    print("deleted");
                  },
                ),
                Chip(
                  label: Text("PHOTOSHOOT"),
                  labelStyle: TextStyle(fontSize: 12, color: Colors.white),
                  backgroundColor: Colors.pink,
                  deleteIcon: Icon(
                    Icons.cancel_outlined,
                    color: Colors.white38,
                    size: 18,
                  ),
                  onDeleted: () {
                    print("deleted");
                  },
                ),
                Chip(
                  label: Text("CODING"),
                  labelStyle: TextStyle(fontSize: 12, color: Colors.white),
                  backgroundColor: Colors.black26,
                  deleteIcon: Icon(
                    Icons.cancel_outlined,
                    color: Colors.white38,
                    size: 18,
                  ),
                  onDeleted: () {
                    print("deleted");
                  },
                ),
                Chip(
                  label: Text("DEVELOPMENT"),
                  labelStyle: TextStyle(fontSize: 12, color: Colors.white),
                  backgroundColor: Colors.blue,
                  deleteIcon: Icon(
                    Icons.cancel_outlined,
                    color: Colors.white38,
                    size: 18,
                  ),
                  onDeleted: () {
                    print("deleted");
                  },
                ),
              ],
            )),
      ),
    );
  }
}

Result:


How to Dynamically Add & remove Chips in flutter – Example

Basically, Our app will have a TextField & a Button by which user can create a chip in flutter app, The user need to enter text in textField and press on submit button to add a new chip. if user want to remove any chip that he created then he can simply click on delete icon that is associated with chip.

Complete Source Code

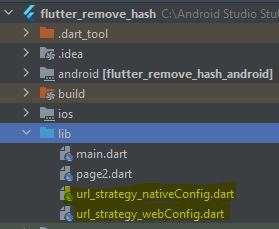
Create a dart file in lib directory, This will be our dataModel class (ChipModel.dart)

ChipModel.dart

//Here id is used so that we can identify which chip to delete when delete event performed.
// and name is the label text that will be shown on chips

class ChipModel{
  final String id;
  final String name;
  ChipModel({required this.id,required this.name});
}

main.dart

import 'dart:math';

import 'package:flutter/material.dart';
import 'package:flutter_remove_hash/Chip_Model.dart';

class ChipExample extends StatefulWidget {
  const ChipExample({Key? key}) : super(key: key);
  @override
  State<ChipExample> createState() => _ChipExampleState();
}

class _ChipExampleState extends State<ChipExample> {
  final List<ChipModel> _chipList = []; // To Store added chips.

  final TextEditingController _chipTextController = TextEditingController();

  //A Function to delete a Chip when user click on deleteIcon on Chip
  void _deleteChip(String id) {
    setState(() {
      _chipList.removeWhere((element) => element.id == id);
    });
  }

  @override
  Widget build(BuildContext context) {
    return SafeArea(
      child: Scaffold(
        body: Column(
          children: [
            Text("Add Chips",style: TextStyle(fontSize: 25),),
            Padding(
              padding: EdgeInsets.all(10),
              child: Wrap(
                spacing: 10,
                children: _chipList.map((chip) => Chip(
                          label: Text(chip.name),
                          backgroundColor: Colors.primaries[Random().nextInt(Colors.primaries.length)],
                          onDeleted: ()=> _deleteChip(chip.id), // call delete function by passing click chip id
                        ))
                    .toList(),
              ),
            ),
            Expanded(
              child: Align(
                alignment: FractionalOffset.bottomCenter,
                child: Padding(
                    padding: EdgeInsets.only(bottom: 10.0),
                    child: Row(
                      children: [
                        Expanded(
                          child: TextField(
                            controller: _chipTextController,
                            decoration:
                                InputDecoration(border: OutlineInputBorder()),
                          ),
                        ),
                        SizedBox(
                          width: 5,
                        ),
                        ElevatedButton(
                            onPressed: () {
                              // add data text enter in textField into ChipModel
                              setState(() {
                                _chipList.add(ChipModel(
                                    id: DateTime.now().toString(),
                                    name: _chipTextController.text));
                                _chipTextController.text = '';
                              });
                            },
                            child: Text("Add Chip"))
                      ],
                    )),
              ),
            )
          ],
        ),
      ),
    );
  }
}

Here is how above code works:

flutter chip widget example
Flutter Chip Widget Example – Dynamically add and remove chips

The Right Way to Remove Hash (#) symbol from URL – Flutter Web

0
flutter web remove hash from url
The right way to remove # symbol from flutter web url

Flutter web: Removing hash symbol (#) from all URLs

Hi Guys, Welcome to Proto Coders Point, In this Flutter tutorial article will learn how to remove # (hash symbol) from Flutter web app URL’s.

Video Tutorial – To Remove # from URL


How to remove hash symbol from flutter web URL’s

So, you are building cross-platform application using flutter framework, By Default, When you run flutter as web app, it uses the hash URL fragment strategy. The url looks like this:

http://localhost:55379/#/

You can see, The URL has # in it. This kind of hashed URL is not much used in real life. So it’s good that we remove the hash (#) symbol from flutter URL.

To Remove hash from URL, we need to set URL strategy with PathUrlStrategy(), Immediately as soon as runApp(…) is called.

Add flutter_web_plugins with sdk: flutter under dependencies section.

Firstly you need to active flutter_web_plugins sdk, To do so open pubspec.yaml file & add it under dependencies as soon below, and hit pub get.

dependencies:
  flutter:
    sdk: flutter
  flutter_web_plugins:  // add this.
    sdk: flutter        // even this link.

Eg: To use flutter web plugins seturlStrategy and set PathUrlStretegy() to remove # symbol from url.

// main.dart
import 'package:flutter/material.dart';
import 'package:flutter_web_plugins/flutter_web_plugins.dart';

void main() {
  runApp(const MyApp());
  setUrlStrategy(PathUrlStrategy());
}

Note/Warning:

When you import flutter_web_plugins.dart to make use of PathUrlStrategy method then your flutter app now will only run on Web platform, and will cause error while running on native android & iOS mobile devices. Solution is below.


The Right way to remove hashtag (#) from URL – Flutter Web

After setting PathUrlStrategy to remove hash # from url flutter app not working on mobile devices, Here is the Solution.

Steps

1. Create 2 Config file for native & Web

In lib directory of your flutter project, create two files named as url_strategy_webConfig.dart and url_strategy_wativeConfig.dart.

2. Code for url_strategy_webConfig.dart

import 'package:flutter_web_plugins/flutter_web_plugins.dart';

void urlConfig() {
  setUrlStrategy(PathUrlStrategy());
}

3. Code for url_strategy_wativeConfig.dart

void urlConfig() {
  // Do nothing on native platforms, As we don't need to set anything in native application
}

4. Import the files in main.dart

Now import the above dart file depending on which platforms our flutter appilication.

if our flutter app in running as web application on browser then will import url_strategy_web.dart file and then apply setUrlStretegy(PathUrlStretegy()).

Code:

// main.dart
import 'package:flutter/material.dart';

import './url_strategy_nativeCongif.dart'
    if (dart.library.html) './url_strategy_webConfig.dart';

void main() {
  runApp(const MyApp());

  urlConfig();
}

Therefore we have successfully, learnt The right way to remove hash(#) symbol from url of flutter web application, and then solved the issuei.e. “flutter app don’t work on mobile devices after importing flutter_web_plugins.dart”.


My Complete Source Code to Remove Hash from url

main.dart

import 'package:flutter/material.dart';
import 'page2.dart';
import 'url_strategy_nativeConfig.dart'
if(dart.library.html) 'url_strategy_webConfig.dart';

void main() {
  runApp(const MyApp());
  isWebConfig();
}

class MyApp extends StatelessWidget {
  const MyApp({Key? key}) : super(key: key);

  // This widget is the root of your application.
  @override
  Widget build(BuildContext context) {
    return MaterialApp(
      title: 'Flutter Demo',
      theme: ThemeData(
        primarySwatch: Colors.blue,
      ),
      routes: {
        '/':(context)=>MyHomePage(),
        '/page2': (context)=>Page2()
      },
    );
  }
}

class MyHomePage extends StatefulWidget {
  const MyHomePage({Key? key}) : super(key: key);

  @override
  State<MyHomePage> createState() => _MyHomePageState();
}

class _MyHomePageState extends State<MyHomePage> {

  @override
  Widget build(BuildContext context) {
    return Scaffold(
      body: Center(
        child: Column(
          mainAxisAlignment: MainAxisAlignment.center,
          children: [
            Text("Page 1",style: TextStyle(fontSize: 18),),
            ElevatedButton(onPressed: (){
              Navigator.of(context).pushNamed('/page2');
            }, child: Text("Goto Page 2")),
          ],
        ),
      ),
    );
  }
}

Flutter Confetti Animation – Celebrate user achievement in app

0
flutter confetti animation - show confetti blast popper on user achievement in app

Hi Guys, Welcome to Proto Coders Point. In this flutter article will create a confetti animation in flutter app.


What is the meaning of confetti?

Confetti are colored small pieces of paper or shining glitter papers, blast popper used to thrown for celebration purpose on any event such as birthday party, bride and bridegroom in their wedding.

Flutter confetti animation

Confetti is an flutter library by using which you can blash different shaped colorful confetti popper animation. You can use this flutter confetti library to show achievements to your flutter app user to celebrate their rewards.


Library installation

1. Create new or Open Existing Flutter Project

I use android studio as my IDE to develop flutter app.

Create new Flutter Project in android studio IDE: File -> New -> New Flutter Project (gave name and create).

Open Existing Flutter Project: File -> Open -> (navigate to project) select the flutter project and open it.

2. Add Dependencies (confetti)

Now, In your project structure you will find a file by name pubspec.yaml open it, and under dependencies section add the library.

dependencies:
  confetti: ^0.7.0

After, adding the above library to download it hit pub get text button you see in android studio IDE or run below command in IDE terminal.

flutter pub get

make sure you are connected to internet.


3. Import it

Now, To add flutter confetti animation widget in your flutter application you have to import it wherever required.

import 'package:confetti/confetti.dart';

How to use Confetti Flutter library

Create CoffettiController object and set duration as 10 seconds.

late ConfettiController _confettiController  = ConfettiController(duration: const Duration(seconds: 10));

ConfettiWidget & different properties to customize it.

ConfettiWidget(
            confettiController: _confettiController, //attach object created
            shouldLoop: true,
            blastDirection: -3.14 / 2,
            colors: [Colors.orange, Colors.blue, Colors.green],
            gravity: 0.3,
            numberOfParticles: 10,
            createParticlePath: drawStar,
),

Properties

PropertiesDescription
confettiControllerController by which you can control to play, stop or destroy confetti widget popper animation.
numberOfParticles paper praticles should pop while playing.
minBlastForceThe Speed of confetti blast, at what minimum force the paper particles should get blasted.
maxBlastForceThe Speed of confetti blast, at what maximum force the paper particles should get blasted.
gravityAfter particles pops, at what gravity force it should fall down.
shouldLoopTrue or False, should the confetti animation by in continous
minimumSize & maximumSizeDefine the size of the paper patricles/
colors[]In how many colors the paper confetti animation should pop up.
createParticlePathCreate you own confetti design using Path, and pass the design her. Eg: star pattern path design

Start and Stop the confetti animation

To play or to stop flutter confetti animation, use it’s controller object.

Eg:

_confettiController.play();

_confettiController.stop();

_confettiController.dispose();

Flutter Confetti Animation Package Library – Complete Source Code

main.dart

import 'dart:math';
import 'package:flutter/material.dart';
import 'package:confetti/confetti.dart';

void main() {
  runApp(const MyApp());
}

class MyApp extends StatelessWidget {
  const MyApp({Key? key}) : super(key: key);
  @override
  Widget build(BuildContext context) {
    return MaterialApp(
      title: 'Flutter Demo',
      theme: ThemeData(
        primarySwatch: Colors.blue,
      ),
      home: const MyHomePage(),
    );
  }
}

class MyHomePage extends StatefulWidget {
  const MyHomePage({Key? key}) : super(key: key);

  @override
  State<MyHomePage> createState() => _MyHomePageState();
}

class _MyHomePageState extends State<MyHomePage> {
  late ConfettiController _confettiController;

  @override
  void initState() {
    // TODO: implement initState
    super.initState();
    _confettiController =
        ConfettiController(duration: const Duration(seconds: 10));
  }

  @override
  void dispose() {
    // TODO: implement dispose
    super.dispose();
    _confettiController.dispose();
  }

  /// A custom Path to paint stars.
  Path drawStar(Size size) {
    // Method to convert degree to radians
    double degToRad(double deg) => deg * (pi / 180.0);
    const numberOfPoints = 5;
    final halfWidth = size.width / 2;
    final externalRadius = halfWidth;
    final internalRadius = halfWidth / 2.5;
    final degreesPerStep = degToRad(360 / numberOfPoints);
    final halfDegreesPerStep = degreesPerStep / 2;
    final path = Path();
    final fullAngle = degToRad(360);
    path.moveTo(size.width, halfWidth);
    for (double step = 0; step < fullAngle; step += degreesPerStep) {
      path.lineTo(halfWidth + externalRadius * cos(step),
          halfWidth + externalRadius * sin(step));
      path.lineTo(halfWidth + internalRadius * cos(step + halfDegreesPerStep),
          halfWidth + internalRadius * sin(step + halfDegreesPerStep));
    }
    path.close();
    return path;
  }

  @override
  Widget build(BuildContext context) {
    return Scaffold(
        body: Center(
      child: Column(
        mainAxisAlignment: MainAxisAlignment.center,
        children: [
          ConfettiWidget(
            confettiController: _confettiController,
            shouldLoop: false,
            blastDirection: -3.14 / 2,
            colors: [Colors.orange, Colors.blue, Colors.green],
            gravity: 0.3,
            numberOfParticles: 10,
            createParticlePath: drawStar,
          ),
          RotatedBox(
              quarterTurns: 2,
              child: Image.network(
                  "https://pngimg.com/uploads/birthday_hat/birthday_hat_PNG36.png")),
          ElevatedButton(
              onPressed: () {
                _confettiController.play();
              },
              child: Text("Play")),
        ],
      ),
    ));
  }
}

what is framework in programming – types of framework for development

0
what is framework in prograaamming - types of framework used in development

Hi Guys, Welcome to Proto Coders Point. In this Article let’s know what is a framework in programming and different types of framework that are used for development.

Framework in programming

Software Framework, Is as foundation by which we development applications, With Framework in development, A Developers load become half, it helps developer to add new functionality into a application.

One Software Developer, don’t have to struggle from scratch to build application, when they already have framework tools built by some other developer and made the framework open source to use it.

In one sentence, A Framework software that helps developer to ease in building application.

Story Example to understand Framework easily

What is Framework in programming:-

Support you have to make tea daily with several ingredients to be added like tea powder, sugar, flavor spices, water, milk etc. Doing this on daily basic it very long process to make just a cup of tea, it difficult to put all the ingredient with current ratio all the time, you may forget some ingredient sometimes, you have to open all the ingredient one by one and keep track of how much ratio is been added.

Then, One morning you strike upon an idea of mising all the ingredient in one jar in one equal ratio, such that every spoon will serve the right ratio while making a cup of tea.

Here the jar is our framework, when you usually do lots of works on redular basis it just consumes lots of time if building whole application from scratch and thus a framework will not only save your development time it also provide right components to make application development fast and easy. Hope this helped you.


Types of frameworks

There are many types of frameworks the are currently used for building website application, Mobile Application, Machine Learning, data science and more. Here are few most popular frameworks that developers uses.

Frameworks for Web Application

Angular a front-end javascript framework, It’s famous and widely used as web development framework.

Django framework for web development, developed b Django Software Foundation, Been written in Python language, It’s secure fast and scalable.

Ruby on Rails, a framework written using Ruby language, Rails framework main motive is to make code less & less number of same event repetition. By using Rails famous website like Twitch, Hulu, Airbnb are developed & are currently live in market.

Express a back-end framework which Node.js, Express helps you in configuring the server and start server on port number eg: 3000.


django logo

Mobile App Development framework

Flutter is a framework developed by google which uses dart programming language. Flutter is a cross platform application development framework by which we can deploy application from Mobile (Android & IOS), Website & Desktop. The main motive of Flutter is to speed up app development & creativity & user-friendly apps. Application build using flutter (ppt).

Xamarin framework, a Framework based on .NET by microsoft. It is a Single Shared codebase.

React Native, The popular are widely used open source framework developed by Facebook to build cross-platform applications. The application build using React native Discord, Shopify, Instagram and much more.

Ionic an another cross-platform framewor, It uses HTML, CSS & Javascript for building application.

flutter logo
React native logo

How to Format date in Dart language – Flutter

0
Date Format In Flutter Dart
how to format date time in flutter dart

Hi Guys, Welcome to Proto Coders Point, In this flutter dart article let’s learn how to format a dateTime in dart language.

For Example: Support I have a Instance of DateTime, & want to format the dateTime as per my need, let’s say I want to convert date into string using DateFormat like “yyyy-MM-dd” – > 2022-06-02.

To Acheive DateFormat in dart we can make use of intl package of dart/flutter.

About intl package in dart/flutter

This flutter intl package library is very much useful when you are working on adding features into you flutter app such as internationalization, localization(including message translation), Number & Date formating.

In this article, will look into DateTime Formating.

1. How to install intl library in dart/flutter

In your project Terminal run below command to install intl package as external library.

In Dart Project:

dart pub add intl

In Flutter Project:

flutter pub add intl

So the below command will add intl as dependencies under pubspec.yaml file as external library usage.

2. Now Import intl.dart

After successfully adding intl, To use it you now need to just import it where required.

import 'package:intl/intl.dart';

How to Format Date Time in flutter dart – Examples Below

Example 1:

import 'package:intl/intl.dart';

void main(){
   final DateTime  now = DateTime.now();

  final DateFormat df = DateFormat('yyyy-MM-dd');

  final String formattedDateTime = df.format(now);

  print(formattedDateTime);    // return current date in yyyy-MM-dd Date format 2022-06-03

}

Example 2: Date Format with time

import 'package:intl/intl.dart';

void main(){
   final DateTime  now = DateTime.now();

  final DateFormat df = DateFormat('yyyy-MM-dd hh:mm');
  // If you want hours and minutes in 24 hours format use this HH:MM

  final String formattedDateTime = df.format(now);

  print(formattedDateTime);    // return current date in yyyy-MM-dd hh:mm Eg: 2022-06-03 12:24

}

There are may method been provided in intl package to format your dateTime: Below is from DateFormat offical Document.

DateFormat method to format date Time month year etc.

ICU Name                   Skeleton
--------                   --------
DAY                          d
ABBR_WEEKDAY                 E
WEEKDAY                      EEEE
ABBR_STANDALONE_MONTH        LLL
STANDALONE_MONTH             LLLL
NUM_MONTH                    M
NUM_MONTH_DAY                Md
NUM_MONTH_WEEKDAY_DAY        MEd
ABBR_MONTH                   MMM
ABBR_MONTH_DAY               MMMd
ABBR_MONTH_WEEKDAY_DAY       MMMEd
MONTH                        MMMM
MONTH_DAY                    MMMMd
MONTH_WEEKDAY_DAY            MMMMEEEEd
ABBR_QUARTER                 QQQ
QUARTER                      QQQQ
YEAR                         y
YEAR_NUM_MONTH               yM
YEAR_NUM_MONTH_DAY           yMd
YEAR_NUM_MONTH_WEEKDAY_DAY   yMEd
YEAR_ABBR_MONTH              yMMM
YEAR_ABBR_MONTH_DAY          yMMMd
YEAR_ABBR_MONTH_WEEKDAY_DAY  yMMMEd
YEAR_MONTH                   yMMMM
YEAR_MONTH_DAY               yMMMMd
YEAR_MONTH_WEEKDAY_DAY       yMMMMEEEEd
YEAR_ABBR_QUARTER            yQQQ
YEAR_QUARTER                 yQQQQ
HOUR24                       H
HOUR24_MINUTE                Hm
HOUR24_MINUTE_SECOND         Hms
HOUR                         j
HOUR_MINUTE                  jm
HOUR_MINUTE_SECOND           jms
HOUR_MINUTE_GENERIC_TZ       jmv
HOUR_MINUTE_TZ               jmz
HOUR_GENERIC_TZ              jv
HOUR_TZ                      jz
MINUTE                       m
MINUTE_SECOND                ms
SECOND                       s

Reference Code:

import 'package:intl/intl.dart';

void main(){
   final DateTime  now = DateTime.now();

  final DateFormat df = DateFormat.yMd();   // replace this method as per your need to format date

  final String formattedDateTime = df.format(now);    //use the formater pattern and pass date in it.

  print(formattedDateTime);    //result

}

DateFormat usage : Example

MethodResult
DateFormat.yMd();6/3/2022
DateFormat.yMMM();Jun 2022
DateFormat.yMEd();Fri, 6/3/2022
DateFormat.yMMMMEEEEd();Friday, June 3, 2022
DateFormat.EEEE();Friday
DateFormat.E();Fri
DateFormat.Hm();01:39
DateFormat.Hms();01:39:26
DateFormat.d();3 // today date
DateFormat.M();6 // current running month
DateFormat.j();1 AM
DateFormat.jm();01:42 AM
DateFormat.jms();01:43:11 AM
Dart dateformat method

and much more method as listed above.


How to get difference between two dates in dart for flutter app

0
get difference between two data in flutter

Hi Guys, Welcome to Proto Coders Point. In this Flutter/Dart article, will learn how to get time difference between dates, This is very useful when you are building any flutter application & want to substract two dates and get difference between two datetimes in flutter.

To Achieve this we will make use of DateTime.difference method of dart

Example:

void main(){
    final DateTime date1 = DateTime(2022,5,30,11,30,40);

    final DateTime date2= DateTime(2022,5,30,14,30,40);

    final Duration durdef = date2.difference(date1);

    print("${durdef.inHours} Hours");    
    //output (Time difference in Hours): 3 Hours

    print("${durdef.inDays} Days");
    //output (Time difference in days): 0

    print("${durdef.inMinutes} Minutes");
    //output (Time difference in minutes): 180

    print("${durdef.inSeconds} Seconds");
    //output (Time difference in Seconds): 10800

}

Get Time Difference between times

First you need intl package of flutter dart

import 'package:intl/intl.dart';

void main(){
  var format = DateFormat("HH:mm");
var one = format.parse("09:30");
var two = format.parse("13:20");
print("${two.difference(one)} Hours "); // prints 3:50 
}

Flutter datetime difference – App Example:

import 'package:flutter/material.dart';

void main() {
  runApp( MaterialApp(
       home: Home()
  ));
}

class Home extends  StatefulWidget {
  @override
  State<Home> createState() => _HomeState();
}

class _HomeState extends State<Home> {

  @override
  Widget build(BuildContext context) {

    DateTime date1 = DateTime.parse("2022-05-30 11:47:00");
    DateTime date2 = DateTime.parse("2022-05-31 10:57:00");

    Duration diff = date1.difference(date2);

    return Scaffold(
         appBar: AppBar(
            title: Text("Calculate Difference between DateTime In Flutter App"),
            backgroundColor: Colors.redAccent,
         ),
          body: Container(
             alignment: Alignment.center,
             padding: EdgeInsets.all(20),
             child: Column(
               children:[
         
                      Text("First Date :" + date1.toString()),
                      Text("Second Date :" + date2.toString()),

                      Text("Difference in Days: " + diff.inDays.toString()),
                      Text("Difference in Hours: " + diff.inHours.toString()),
                      Text("Difference in Minutes: " + diff.inMinutes.toString()),
                      Text("Difference in Seconds: " + diff.inSeconds.toString()),

                ]
             ),
          )
      );
  }
}