
How to Connect to AWS IoT Core using NodeJS and Publish Messages (Dummy IoT Device)
IoT (Internet of Things) devices like smart meters, trackers, and temperature sensors constantly send data to the cloud.
But the interesting part is — you don’t actually need a real electronic device to learn IoT.
You can use NodeJS to simulate a device and send data to AWS IoT Core exactly like a real sensor.
This article explains how AWS IoT Core works and what your NodeJS program is doing when it publishes messages.
What is AWS IoT Core?
AWS IoT Core is a cloud service that allows devices to securely communicate with AWS using the MQTT protocol.
Unlike normal applications that use REST APIs, IoT devices communicate through topics.
A device sends data to a topic, and AWS receives it instantly.
Example:
Topic: room1
Message: temperature = 26.8°C
AWS then can store, analyze, or trigger other services based on this data.
How Devices Connect to AWS IoT
AWS does not allow devices to log in using username and password.
Instead, it uses certificate-based authentication (mTLS) for security.
Each device must have three files:
- Device Certificate → identity of device
- Private Key → proof the device owns the certificate
- Amazon Root CA → verifies AWS server
When your NodeJS program connects using these files, AWS trusts it as a real registered device.
So your JavaScript program becomes a virtual IoT hardware device.
Using NodeJS as a Dummy IoT Device
With the AWS IoT Device SDK, NodeJS can behave like:
- a temperature sensor
- a smart meter
- a monitoring machine
Your code connects to the AWS IoT MQTT broker and starts sending readings automatically.
You installed the required library:
npm install aws-iot-device-sdk-v2
This library handles secure MQTT communication with AWS.
What Your Code Actually Does
The provided program simulates a temperature monitoring device installed in a room.
Here is the simple flow:
1) Connects to AWS IoT Core
The program uses certificates and the AWS IoT endpoint to securely connect to the cloud.
Once connected, AWS recognizes your system as a device named:
rajat_iot_device
You will see in the console:
Connected to AWS IoT Core
2) Generates Sensor Data
Every few seconds the program creates fake sensor readings:
- Device ID
- Random temperature (20°C–30°C)
- Timestamp
This mimics a real temperature sensor measuring room conditions.
3) Waits Before Sending
The program waits 5 seconds before publishing the data.
Why?
Real IoT devices don’t instantly transmit readings.
They collect, process, and then send — so the code imitates real device behavior.
4) Publishes Message to MQTT Topic
After the delay, the message is sent to an MQTT topic:
room1
AWS IoT Core immediately receives the message.
If you open AWS IoT → MQTT Test Client → Subscribe to topic room1,
you will see live incoming data from your NodeJS device.
5) Runs Continuously
The program repeats this cycle every 5 seconds:
- Generate temperature
- Wait
- Publish to AWS
So your computer is now acting like a continuously running IoT sensor.
Simple Working Flow
Your system now works like this:
NodeJS Device → MQTT Topic → AWS IoT Core → Cloud Services
No physical hardware needed.
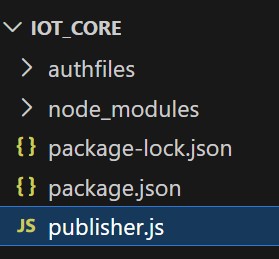
Project Structure
Source Code
const awsIot = require('aws-iot-device-sdk-v2');
const mqtt = awsIot.mqtt;
const iot = awsIot.iot;
const io = awsIot.io;

// ------------------ CONFIG ------------------
const endpoint = "axarqcghtheabshdjb-ats.iot.eu-north-1.amazonaws.com";
const cert = "./authfiles/certificate.pem.crt";
const key = "./authfiles/private.pem.key";
const ca = "./authfiles/AmazonRootCA1.pem";
const clientId = "rajat_iot_device";
// --------------------------------------------

const configBuilder =
    iot.AwsIotMqttConnectionConfigBuilder.new_mtls_builder_from_path(cert, key);

configBuilder.with_certificate_authority_from_path(undefined, ca);
configBuilder.with_clean_session(false);
configBuilder.with_client_id(clientId);
configBuilder.with_endpoint(endpoint);

const config = configBuilder.build();

const clientBootstrap = new io.ClientBootstrap();
const mqttClient = new mqtt.MqttClient(clientBootstrap);
const connection = mqttClient.new_connection(config);

// helper delay function
function sleep(ms) {
    return new Promise(resolve => setTimeout(resolve, ms));
}

async function start() {
    try {
        await connection.connect();
        console.log("✅ Connected to AWS IoT Core");

        // generate data every 10 seconds
        setInterval(async () => {

            // 1️⃣ DATA GENERATED
            const deviceTime = Date.now();

            const message = {
                deviceId: "rajat-device",
                temperature: (20 + Math.random() * 10).toFixed(2),
                deviceTime: deviceTime
            };

            console.log("🧠 Data Generated:", message);

            // 2️⃣ WAIT 5 seconds before sending
            await sleep(5000);

            // 3️⃣ SEND TO AWS
            await connection.publish(
                "room1",
                JSON.stringify(message),
                mqtt.QoS.AtLeastOnce
            );

            console.log("📤 Sent after 5 sec:", message);

        }, 10000); // generate every 10 seconds

    } catch (err) {
        console.log("❌ Connection Error");
        console.error(err);
    }
}

start();
Conclusion
Using NodeJS and AWS IoT Core, you can easily simulate a real IoT device.
The code connects securely to AWS, generates temperature readings, and continuously publishes them to an MQTT topic.
In simple terms, your program is pretending to be a real sensor and sending live data to the cloud.
This is the same architecture used by real-world IoT products — only the device is software instead of hardware.
This is the easiest way to learn and test IoT systems without buying any electronic device.


