Hi Guys, Welcome to Proto Coders Point, In this Flutter Tutorial we will demonstrate on how to implement flutter local_auth library to add fingerprint scanner to your android or iOS apps.
Video Tutorial
Introduction of Local_Auth Flutter library
This local auth flutter plugin, will help you to perform local, i.e on-device authentication of the user.
By using this library you can add Biometric aithentication to login in your Android or iOS Application.
NOTE: This will work only on android 6.0.
Let’s Start
Flutter Authentication | Flutter Fingerprint Scanner | Local Auth Package
Step 1: Create new Flutter project
I am using android studio as my IDE to build/develop Flutter Apps, you may you any of you favourite IDE like : VSCode
In android Studio : File > New > New Flutter Project > Finish
Step 2: Adding Local_auth dependencies
Once your new flutter project is ready or you might have opened existing flutter project.
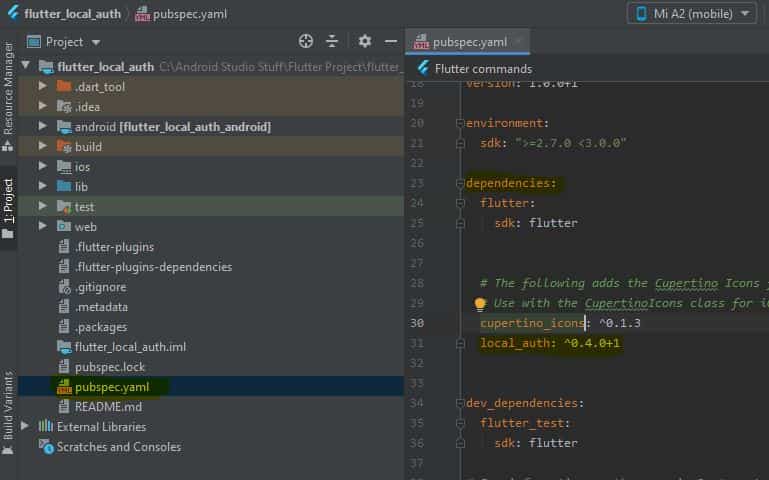
Now, on your left side of your IDE you may see your project structure, under that find pubspec.yaml file where you need to add the local auth dependencie
pubspec.yaml
dependencies:
  local_auth: ^0.4.0+1
As you can see in below screenshot.
Step 3: Adding USE_FINGERPRINT permission
USE_FINGERPRINT PERMISSION IN ANDROID
In your Flutter Project
android > app > src > main > AndroidManifest.xml
add the below permission
<manifest xmlns:android="http://schemas.android.com/apk/res/android"
          package="com.example.app">

  <uses-permission android:name="android.permission.USE_FINGERPRINT"/>  <!-- add this line -->

<manifest>
as show in below screenshot

USE_FINGERPRINT PERMISSION IN IOS
In your Flutter Project
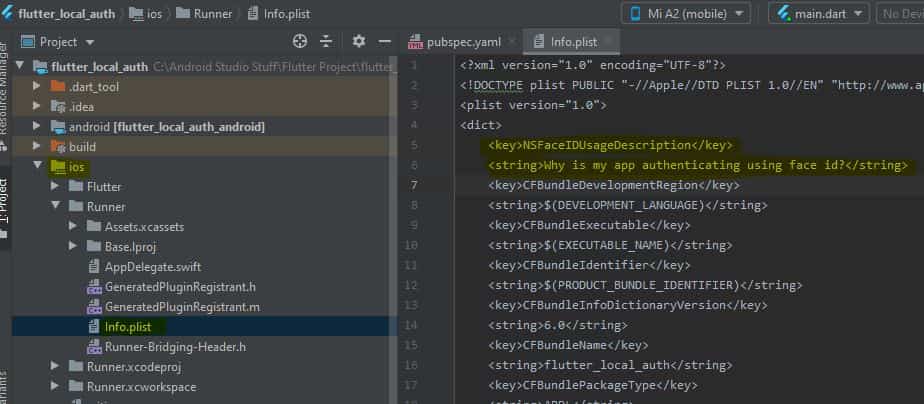
ios > Runner > Info.plist
<key>NSFaceIDUsageDescription</key>
<string>Why is my app authenticating using face id?</string>
as shown in below screenshot
Step 4: Flutter Code
main.dart
import 'package:flutter/material.dart';
import 'package:flutter_local_auth/HomePageAuthCheck.dart';
import 'package:local_auth/local_auth.dart';

void main() {
  runApp(MyApp());
}

class MyApp extends StatelessWidget {
  // This widget is the root of your application.
  @override
  Widget build(BuildContext context) {
    return MaterialApp(
      title: 'Flutter Demo',
      theme: ThemeData(

        primarySwatch: Colors.blue,

        visualDensity: VisualDensity.adaptivePlatformDensity,
      ),
      home: HomePageAuthCheck(),
    );
  }
}
HomePageAuthCheck.dart
import 'package:flutter/cupertino.dart';
import 'package:flutter/material.dart';
import 'package:flutter/services.dart';
import 'package:local_auth/local_auth.dart';

class HomePageAuthCheck extends StatefulWidget {
  @override
  _HomePageAuthCheckState createState() => _HomePageAuthCheckState();
}

class _HomePageAuthCheckState extends State<HomePageAuthCheck> {
  //variable to check is biometric is there or not
  bool _hasBiometricSenson;

  // list of finger print added in local device settings
  List<BiometricType> _availableBiomatrics;


  String  _isAuthorized = "NOT AUTHORIZED";


  LocalAuthentication authentication = LocalAuthentication();

  //future function to check if biometric senson is available on device
  Future<void> _checkForBiometric() async{
    bool hasBiometric;

    try{
      hasBiometric = await authentication.canCheckBiometrics;
    } on PlatformException catch(e)
    {
      print(e);
    }

    if(!mounted) return;

    setState(() {
      _hasBiometricSenson = hasBiometric;
    });
  }

//future function to get the list of Biometric or faceID added into device
  Future<void> _getListofBiometric() async{
    List<BiometricType> ListofBiometric;

    try{
      ListofBiometric = await authentication.getAvailableBiometrics();
    } on PlatformException catch(e)
    {
      print(e);
    }

    if(!mounted) return;

    setState(() {
      _availableBiomatrics  = ListofBiometric;
    });
  }

  ////future function to check is the use is authorized or no
  Future<void> _getAuthentication() async{
    bool isAutherized = false;

    try{
      isAutherized = await authentication.authenticateWithBiometrics(
          localizedReason: "SCAN YOUR FINGER PRINT TO GET AUTHORIZED",
          useErrorDialogs: true,
          stickyAuth: false
      );
    } on PlatformException catch(e)
    {
      print(e);
    }

    if(!mounted) return;

    setState(() {
     _isAuthorized = isAutherized ? "AUTHORIZED" : "NOT AUTHORIZED";
    });
  }

  @override
  Widget build(BuildContext context) {
    return Scaffold(
      appBar: AppBar(
        title: Text("Flutter local Auth Package"),
      ),
      body: Center(
        child: Column(
          mainAxisAlignment: MainAxisAlignment.center,
          children: [

            Text(" Is BioMetric Available ? : $_hasBiometricSenson"),
            RaisedButton(onPressed: (){
             _checkForBiometric();
            },color:Colors.blue,child: Text("Check",style: TextStyle(color: Colors.white),),),


            Text(" List of Available Biomatric LIST : $_availableBiomatrics"),
            RaisedButton(onPressed: (){
              _getListofBiometric();
            },color:Colors.blue,child: Text("Check List",style: TextStyle(color: Colors.white),),),


            Text(" Is AUTHORIED ? : $_isAuthorized"),
            RaisedButton(onPressed: (){
              _getAuthentication();
            },color:Colors.blue,child: Text("AUTH",style: TextStyle(color: Colors.white),),),
          ],
        ),
      ),
    );
  }
}
then, thus you flutter application is ready with Fingerprint and FaceID authentication.
Explaination of above code and the properties been used.
First of all
I have Created an instance of a class i.e LocalAuthentication, This class is provided in local_auth package, this will help us in getting access to Local Authentication of the device.
LocalAuthentication authentication = LocalAuthentication();
By using this Class instance object we can make use of different properties such as:
- canCheckBiometrics: This will return true is Biometric sensor is available.
- getAvailableBiometrics: This will give list of Biometric finger print.
- authenticationWithBiometrics: This will invoke a pop up, where it will ask you to “Scan for fingerprint/faceID”, then, if the authentication get matched then you are been authorized or you are unauthorized.
autherticationWithBiometrics has some more properties such as
- localizedReason: Show a Text on the pop dialog box.
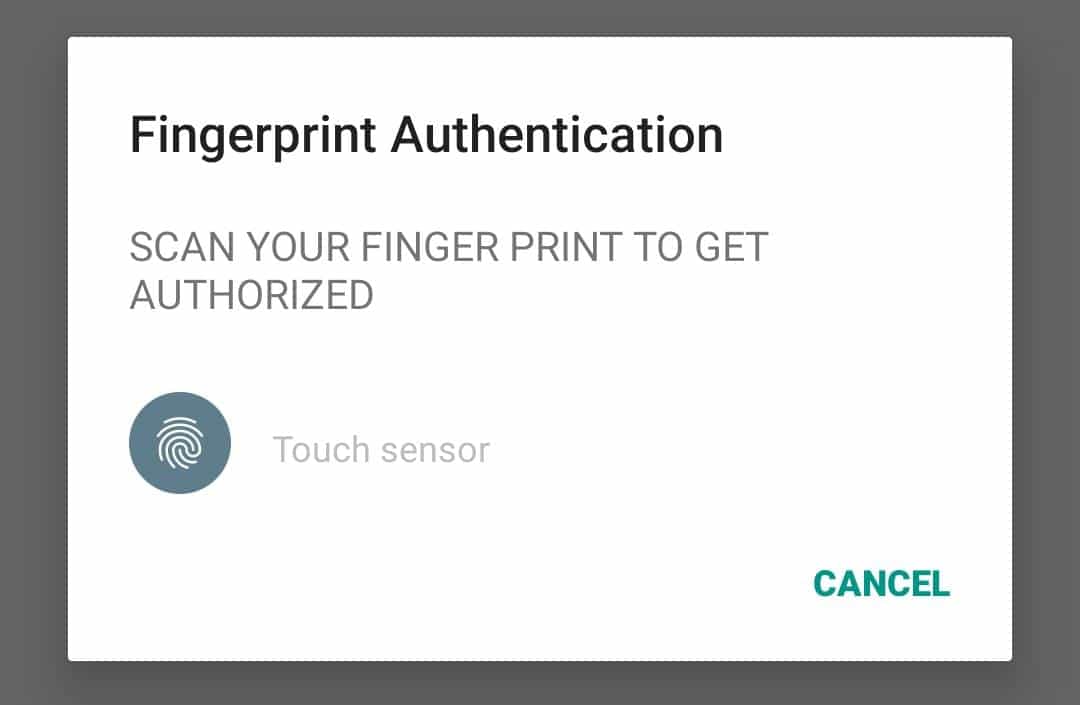
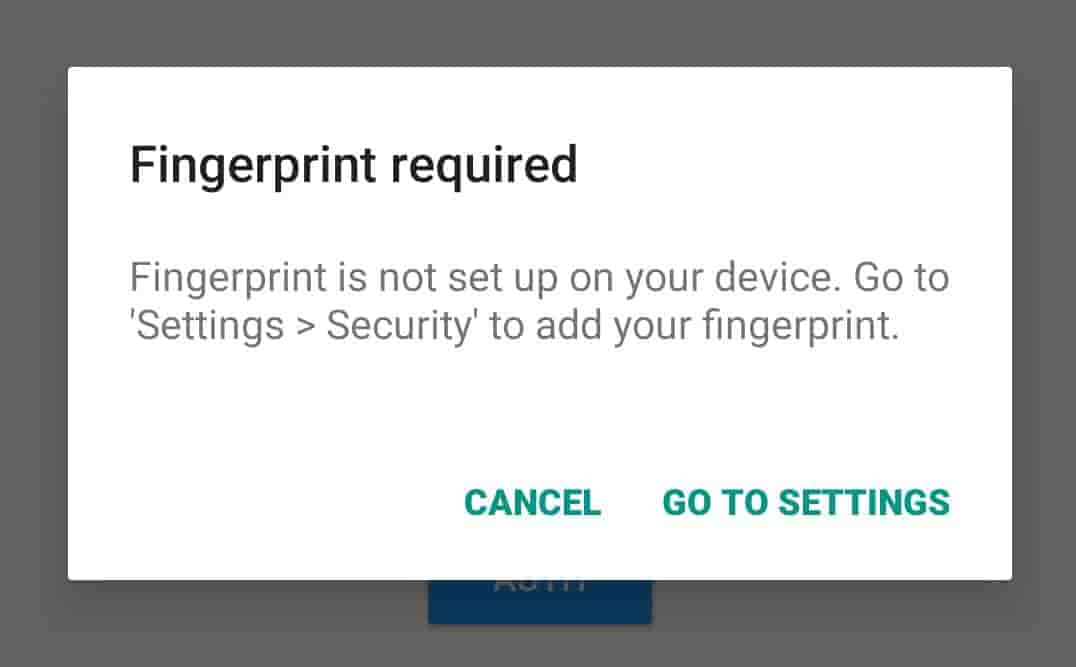
- useErrorDialog: When set to true, will show a proper message on the dailog screen, weather your device have Available Biometric if not then in alert diaolog it will show a message to go to setting to set a new Fingerprint.
- stickyAuth: When set to true, whenever you app goes into background and then you return back to app again, the Authentication process will continue again.
Function Created in above to code to check the same
1. To check if device have biometric sensor or not
//future function to check if biometric sensor is available on device
  Future<void> _checkForBiometric() async{
    bool hasBiometric;

    try{
      hasBiometric = await authentication.canCheckBiometrics;
    } on PlatformException catch(e)
    {
      print(e);
    }

    if(!mounted) return;

    setState(() {
      _hasBiometricSenson = hasBiometric;
    });
  }
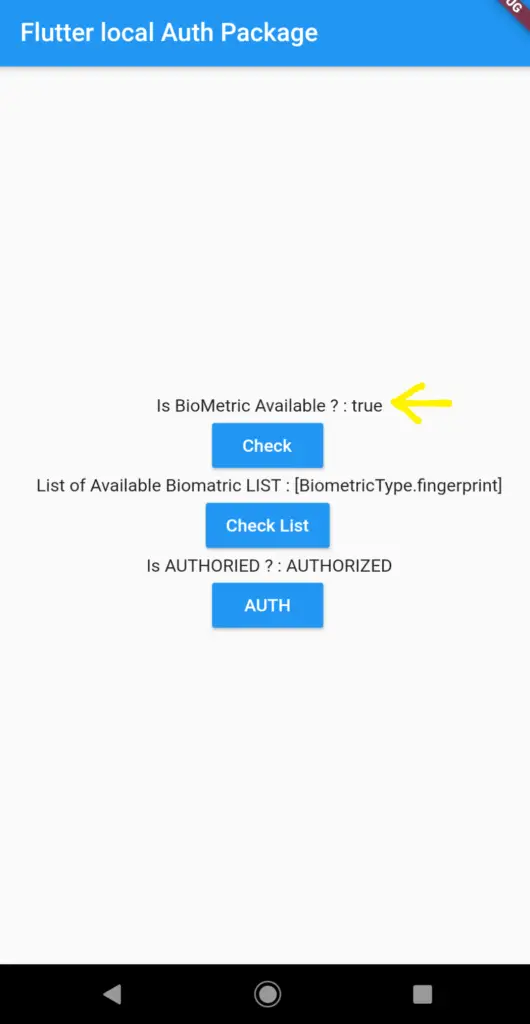
This function will return true if device has biometric sensor else false.
2. To get the list of fingerprint added in your local device
//future function to get the list of Biometric or faceID added into device
  Future<void> _getListofBiometric() async{
    List<BiometricType> ListofBiometric;

    try{
      ListofBiometric = await authentication.getAvailableBiometrics();
    } on PlatformException catch(e)
    {
      print(e);
    }

    if(!mounted) return;

    setState(() {
      _availableBiomatrics  = ListofBiometric;
    });
  }
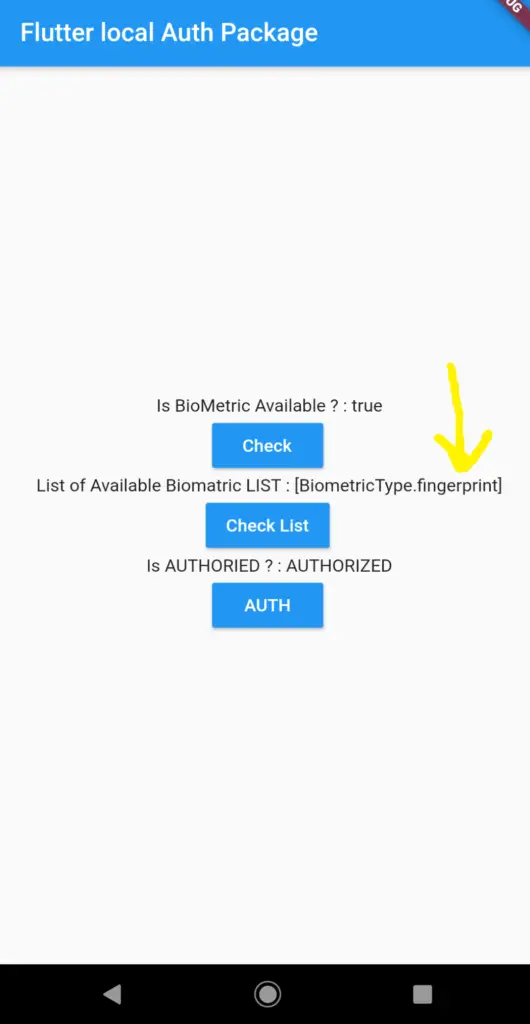
This will return array list of fingerprint
3. To check fingerprint authentication
////future function to check is the use is authorized or no
 Future<void> _getAuthentication() async{
   bool isAutherized = false;

   try{
     isAutherized = await authentication.authenticateWithBiometrics(
         localizedReason: "SCAN YOUR FINGER PRINT TO GET AUTHORIZED",
         useErrorDialogs: true,
         stickyAuth: false
     );
   } on PlatformException catch(e)
   {
     print(e);
   }

   if(!mounted) return;

   setState(() {
    _isAuthorized = isAutherized ? "AUTHORIZED" : "NOT AUTHORIZED";
   });
 }
This function will invoke a dialog box when user will be asked to touch the fingerprint scanner to get access to further app process.
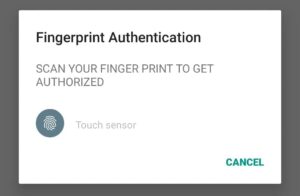
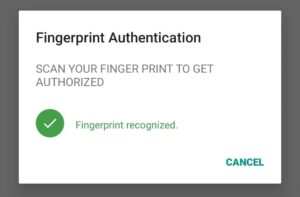
Flutter app local login using fingerprint scanner, access to app with local finger print authentication

