Hi Guys, Welcome to Proto Coders Point.
Giving cashback, rewards & different kinds of online shopping voucher is a clean move to market your app and keep your app users engaged using your application on daily basics, rewarding scratch card rewards is like a lottery to your app user.
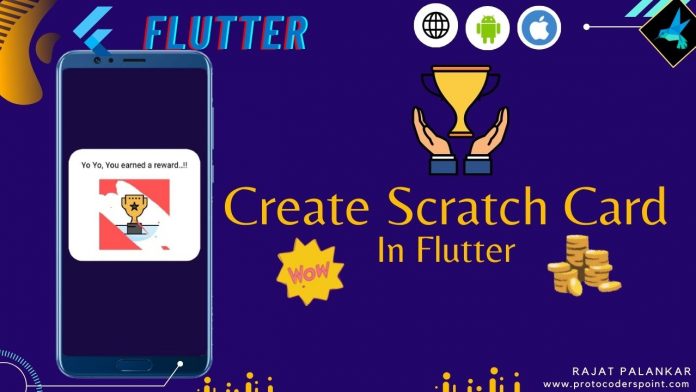
In this Flutter tutorial Article, We will learn how to add a scratch card in flutter app, so will dive into how to implement scratch card in flutter using scratcher package.
What is a Scratch Card reward method
A Scratch Card is mostly used to excite or make user feel enthusiastic to know the offer prizes or cashback reward given to the user.
Now a days a scratch card rewarding is most treading way to attract a user & most of the famous shopping application & UPI payment app make user of scratchCard to reward its’s customers.
Flutter Scratcher Example Demo

The above gif demo image, shows how to create a scratch card in flutter using scratcher plugin in your flutter application.
Complete Source code is below at the end please check it out after learning the basics.
So on button press we will simply show a dialog, which will have flutter scratcher – scratch card. then a user can simply rub his finger on the card to reveal or grab the cashback or reward offers.
Scratcher Flutter
Let’s get Started
Let’s install scratcher widget in your futter application as external package
Step 1: Add scratcher dependencies
open pubspec.yaml file & under dependencies add scratcher package
dependencies:
  scratcher: ^ #latest version
now hit pub get button in pubspec.yaml file or run a command in IDE Terminal.
"flutter pub get"
Step 2: Import scratcher.dart
Then, Once you have successfully added the dependencies plugin, so to use it you need to import scratcher.dart where required
import 'package:scratcher/scratcher.dart';
then, you are good to create scratch card in flutter.
Scratcher Snippet Code Explained below
Scratcher(
  color: Colors.red,
  brushSize: 35,
  threshold: 40,
  onChange: (value) => print("$value%  Scratched"),
  onThreshold: () => print("Reached Threshold..!!"),
  child: Container(
    height: 300,
    width: 300,
    color: Colors.green,
  ),
)
Properties of Scratcher Widget
| Properties | Description |
| color: | Give color to scratching card |
| image: | Instead of simple color on cardm you can declare a image on card. |
| brushSize: | Define a size to brush, give size to scratch the card |
| threshold: | Design/ set a percentage level of wiping. Eg: threshold : 50 |
| onThreshold:() => | When user wipe 50% of card onThreshold will be called |
| onChange:(value)=> | This callback will be called every time when new part of card is been scratched. |
| child: | A Widget that is behind the scratcher widget, This is actual reward been shown to user. |
| key: | To contoller the scratcher. |
This are some properties that we will use in our app below, To learn about more properties visit official library page.
Programmatically reset or reveal the reward begin card
By asigning a GolbalKey to scratcher widget we can easily control it.
Let’s check with a snippet example
Create a Golbal key using type as scratcherState
final scratchKey = GlobalKey<ScratcherState>();
Then assign it to Scratcher Widget as below
 Scratcher(
              key: scratchKey ,
..................
)
and thus you can easily control it as shown below
Here, How to reset scratcher Widget
   ElevatedButton(onPressed: (){
              scratchKey.currentState?.reset(duration: Duration(milliseconds: 2000));

 }, child: Text('Reset')),
Here’s how to reveal the scratcher reward
ElevatedButton(onPressed: (){
              scratchKey.currentState?.reveal(duration: Duration(milliseconds: 2000));
}, child: Text('Reveal'))
Complete Project Source Code
Flutter Scratcher widget Example
import 'package:flutter/material.dart';
import 'package:scratcher/scratcher.dart';

void main() {
  runApp(const MyApp());
}

class MyApp extends StatelessWidget {
  const MyApp({Key? key}) : super(key: key);

  // This widget is the root of your application.
  @override
  Widget build(BuildContext context) {
    return MaterialApp(
      title: 'Flutter Demo',
      theme: ThemeData(
        primarySwatch: Colors.blue,
      ),
      home: const MyHomePage(),
    );
  }
}

class MyHomePage extends StatefulWidget {
  const MyHomePage({Key? key}) : super(key: key);

  @override
  _MyHomePageState createState() => _MyHomePageState();
}

class _MyHomePageState extends State<MyHomePage> {
  final scratchKey = GlobalKey<ScratcherState>();

  double _opacity = 0.0;

  @override
  Widget build(BuildContext context) {
    return Scaffold(
      body: Center(
        child: Column(
          mainAxisAlignment: MainAxisAlignment.center,
          children: [
            ElevatedButton(
                onPressed: () {
                  scratchDialog(context);
                },
                child: Text('Show Dialog for Reward')),
            ElevatedButton(
                onPressed: () {
                  scratchKey.currentState
                      ?.reset(duration: Duration(milliseconds: 2000));
                },
                child: Text('Reset')),
            ElevatedButton(
                onPressed: () {
                  scratchKey.currentState
                      ?.reveal(duration: Duration(milliseconds: 2000));
                },
                child: Text('Reveal'))
          ],
        ),
      ),
    );
  }

  Future<void> scratchDialog(BuildContext context) async {
    return showDialog(
        context: context,
        builder: (BuildContext context) {
          return AlertDialog(
              shape: RoundedRectangleBorder(
                  borderRadius: BorderRadius.circular(30)),
              title: const Align(
                alignment: Alignment.center,
                child: Text('Yo Yo, You earned a reward..!!'),
              ),
              content: StatefulBuilder(
                builder: (context, StateSetter setState) {
                  return Scratcher(
                    accuracy: ScratchAccuracy.medium,
                    threshold: 50,
                    onThreshold: () {
                      setState(() {
                        _opacity = 1;
                      });
                    },
                    color: Colors.redAccent,
                    onChange: (value) => print('Progress $value%'),
                    brushSize: 20,
                    child: AnimatedOpacity(
                      duration: Duration(milliseconds: 1000),
                      opacity: _opacity,
                      child: Container(
                          width: 150,
                          height: 150,
                          child: const Image(
                              image: AssetImage('assets/reward.png'))),
                    ),
                  );
                },
              ));
        });
  }
}


