Hi Guys, Welcome to Proto Coders Point. In this flutter tutorial will look into how to make text auto size, where our app can auto adjust text size depending of screensize.
An Responsive UI is a must required feature because now a days user uses wide range of devices with different screen size like Tablet, Mobile, PC.
A Developer named “Simon Leier“, has built a flutter package named “auto size text” that can auto adjust text size depending on text length & screen size.
Let’s learn about auto_size_text
A Flutter Widget that we can use to automatically resize texts to get fit into available space and get fit within it boundary defined.
Usage
1. Install:
Add the package in pubspec.yaml file in your flutter project
dependencies:
  auto_size_text: ^3.0.0
2. Import it to use
You need to import it, on page where you want to use it eg: main.dart
import 'package:auto_size_text/auto_size_text.dart';
Syntax – Adding simple AutoSizeText Widget example
SizedBox(
          width: 200,
          height: 140,
          child: AutoSizeText(
            'This string will be automatically resized to fit in two lines.',

            style: TextStyle(fontSize: 30),
            maxLines: 2,
          ),
        ),
Here I have made use of SizedBox with width 200, height 140, The Auto Text widget in it will auto adjected with maxLines 2 as defined.
AutoSizeText Widget works & respond exactly like text, The different over here is text will auto resize depending on parent widget or screen size.
Properties of Auto Size Text Widget
maxLines: will work exactly like how it work with Text widget.
minFontSize: The possible smallest font size to fit. Text will not go smallest fontsize then defined, By default minFontSize is 12.
maxFontSize: The maximum posible fontsize.
wrapWords: when set to false, The font will not line break it will only decrease fontsize in same line.
overflowReplacement: Support if the text overflows and not fit in boundary, then replacement text or message can be shown to the user. Very useful if text got too small to read.
stepGranularity: define by show many unit the fontsize should re-size when screen size is sink or enlarged.
Eg: stepGranularity : 8, then font size will decreased by 8 or increased by 8.
AutoSizeText(
  'Welcome to Proto Coders Point, This tutorial is on how to make app responsive',
  style: TextStyle(fontSize: 40),
  minFontSize: 8,
  stepGranularity: 8,
  maxLines: 4,
  overflow: TextOverflow.ellipsis,
)
presetFontSize: Use when you have fixe fontsize, I mean you only allow certain specified fontsize Eg: presetFontSize : [30, 20, 10, 5], so here fontSize will be 30 then as screen get sink the fontsize get decreatsed to 20, then 10, 5.
AutoSizeText(
  'This text will get sink as per defined preset font size ',
  presetFontSizes: [30, 20, 10, 5],
  maxLines: 4,
)
Note: If presetFontSizes is been set, then minFontSize, maxFontSize and stepGranularity will be simply get ignored.
group: To apply same rules to multiple AutoSizeText Widget you can use group instance.
Create a group instance using AutoSizeGroup(),
Eg: final group = AutoSizeGroup().
Here I have created Instance of Auto Size Group that I can use further in multiple AutoSizeText.
final myGroup = AutoSizeGroup();

AutoSizeText(
  'Text 1',
  group: myGroup,
);

AutoSizeText(
  'Text 2',
  group: myGroup,
);
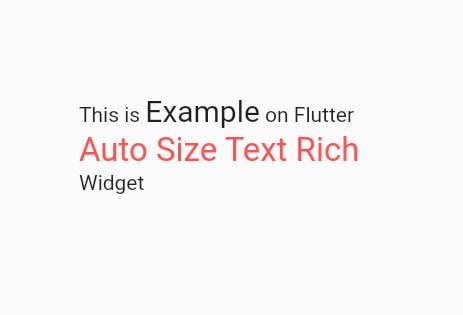
The Text with custom text style & font from highlighting. To make RichText with Auto Resize ability will be a great feature. Therefore to add richtext with autoSize, we must use addition constructor AutoSizeText.rich() widget.

SizedBox(
          width: 200,
          height: 300,
          child: AutoSizeText.rich(
            TextSpan(
              text: "This is ",
              children: <TextSpan>[
                TextSpan(
                  text: "Example",
                  style: TextStyle(fontSize: 20)
                ),
                TextSpan(
                    text: " on Flutter",

                ),
                TextSpan(
                  text: "Auto Size Text Rich ",
                    style: TextStyle(fontSize: 22,color: Colors.redAccent)
                ),
                TextSpan(
                  text: "Widget",

                ),
              ]
            )
          )
        )
In above RichText, it take a TextSpan & will have multiple textSpan children with different fontSize & style.


