
How to use the Flutter Bottom Navigation Bar in Flutter using android studio tuturial.
In this Post we’re going to be adding Flutter’s Bottom Navigation Bar to an app. Here i am making use of android-studio to write flutter codes.
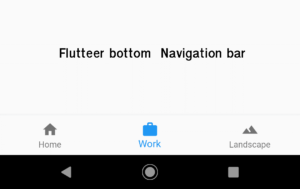
if you don’t know what acutally / how Bottom Navigation bar looks like in Flutter I’m referring to just look at the picture pasted below.
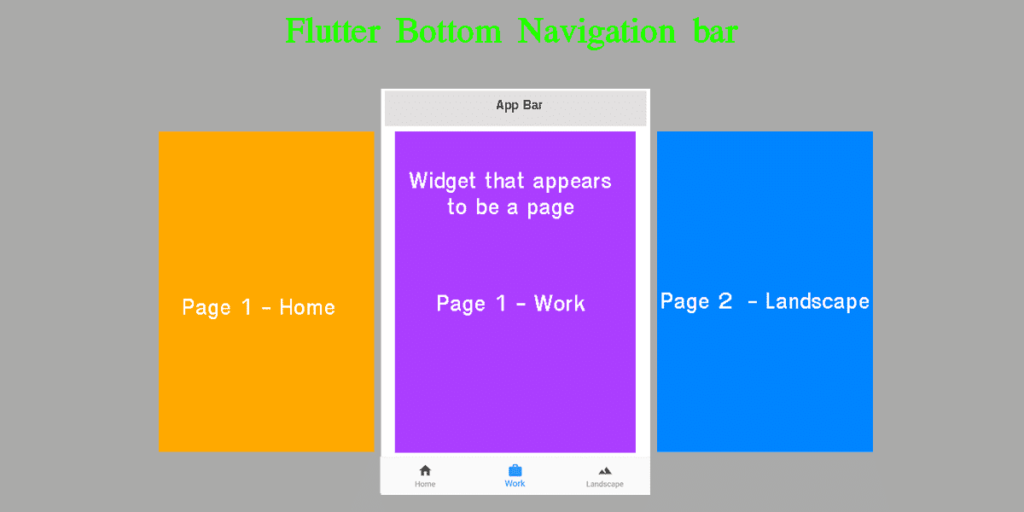
Instead, you’re switching out a over all group of content within a single page to give the appearance that the page is changing.Here is a illustration to visually describe what we’re doing. Not that the overall “scaffolding”, as Flutter calls it, stays the same and the contents within the page change.
Create a Flutter Project.
So Let’s begin with Creating a new Flutter project for Bottom Navigation bar Implementation .
I am making Use of android studio to write my flutter code.
File >New > New Flutter Project
First We need to start by changing the MyApp widget in main.dart to be a Stateful widget. We need to do this because we will be storing which tab the user is currently on within our state.
class MyApp extends StatefulWidget {
  @override
  State<StatefulWidget> createState() {
    return MyAppState();
  }
}
and a class that extends State<MyApp> some thing like this.
class MyAppState extends State<MyApp> {
    @override
    Widget build(BuildContext context) {
        return yourAppData
    }
}
After you’ve done that you need to, create the
bottomNavigationBar: BottomNavigationBar(
    items: [
        BottomNavigationBarItem(
            icon: Icon(Icons.home),
            title: Text('Home'),
        ),
        BottomNavigationBarItem(
            icon: Icon(Icons.category),
            title: Text('Categories'),
        ),
        BottomNavigationBarItem(
            icon: Icon(Icons.search),
            title: Text('Search'),
        ),
    ],
),
Next, You need to add the onTap property to the BottomNavigationBar widget before items in above code.
currentIndex: selectedPage,
          onTap: (int index) {
            setState(() {
              selectedPage = index;
            });
          },
Then, set the currentIndex property of the BottomNavigationBar widget to a variable.
currentIndex: selectedPage,
Now create an integer variable with the same name you set in currentIndex . Set this at the top of the state.
int selectedPage = 0;
Last, create anlist of array variable that holds all the widgets that will be loaded depending on which bottom navigation bar button the user taps on (note the order here matters and should be the same as the buttons).
final _pageOptions = [
    Home(),
    Work(),
    Landpage()
  ];
All codes together looks something like this.
The Complete Flutter bottom Navigation Bar Tutorial.
main.dart
import 'package:flutter/material.dart';
import './Home.dart';
import './Work.dart';
import './Landpage.dart';

void main() => runApp(MyApp());

class MyApp extends StatefulWidget {
  @override
  State<StatefulWidget> createState() {
    return MyAppState();
  }
}

class MyAppState extends State<MyApp> {
  int selectedPage = 0;
  final _pageOptions = [Home(), Work(), Landpage()];
  @override
  Widget build(BuildContext context) {
    return MaterialApp(
      title: 'Flutter Demo',
      theme: ThemeData(
        primarySwatch: Colors.blue,
      ),
      home: Scaffold(
        appBar: AppBar(
          title: Text("Bottom Navigation Bar"),
        ),
        body: _pageOptions[selectedPage],
        bottomNavigationBar: BottomNavigationBar(
          currentIndex: selectedPage,
          onTap: (int index) {
            setState(() {
              selectedPage = index;
            });
          },
          items: [
            BottomNavigationBarItem(
                icon: Icon(Icons.home), title: Text('Home')),
            BottomNavigationBarItem(
                icon: Icon(Icons.work), title: Text('Work')),
            BottomNavigationBarItem(
                icon: Icon(Icons.landscape), title: Text('Landscape'))
          ],
        ),
      ),
    );
  }
}
Create a new page and name it as Work.dart in lib directory of you project
Work.dart
import 'package:flutter/material.dart';

class Work extends StatelessWidget {
  @override
  Widget build(BuildContext context) {
    return Container(
      padding: EdgeInsets.all(25.0),
      child: Text(
        'Work Page ',
        style: TextStyle(fontSize: 36.0),
      ),
    );
  }
}
likewise code 2 more pages in same lib directory
Home.dart
import 'package:flutter/material.dart';

class Home extends StatelessWidget {
  @override
  Widget build(BuildContext context) {
    return Container(
      padding: EdgeInsets.all(25.0),
      child: Text(
        'Home Page',
        style: TextStyle(fontSize: 36.0),
      ),
    );
  }
}
Landscape.dart
import 'package:flutter/material.dart';

class Landpage extends StatelessWidget {
  @override
  Widget build(BuildContext context) {
    return Container(
      padding: EdgeInsets.all(25.0),
      child: Text(
        'Land Page',
        style: TextStyle(fontSize: 36.0),
      ),
    );
  }
}
VIDEO TUTORIAL
")


[…] check out how to add bottomNavigationbar […]
[…] have Already Made tutorial on Flutter Default Bottom Navigation Bar Check […]
[…] bottom navigation bar flutter […]