")
Hi Guys, Welcome to Proto Coders Point.
In this flutter tutorial, We will learn how to integrate recaptcha verification in flutter app i.e. i am not a robot validation process in flutter.
What is reCAPTCHA
The recaptcha is very useful service when you want to protect your website from spam users and as flutter can we hosted as web app, we need to protect it, so it better to integrate recaptcha in flutter app.
recaptcha validation uses advanced risk analysis technique to detect human user or bot & support if captcha found any spam then it prompt a challenge to verify that you are a human( a real user ).
SignUp – How to get Google recaptcha API key
To use recaptcha in flutter app, you need to sign up for captcha API key for your site ip/domain
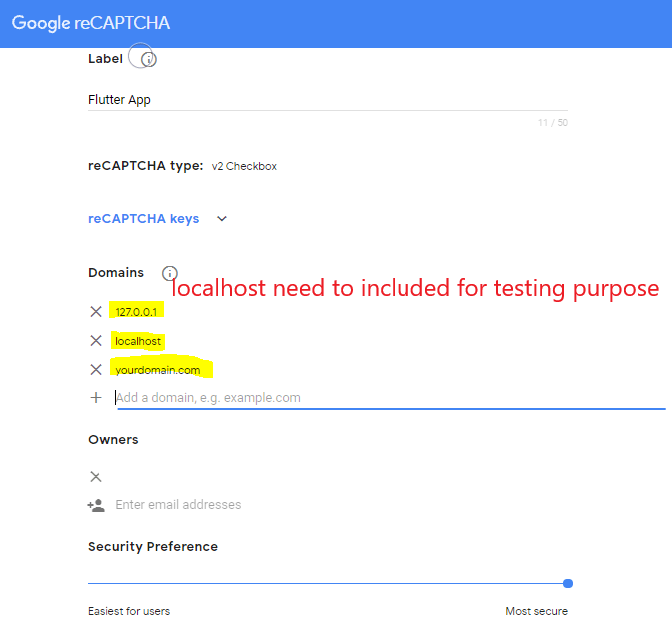
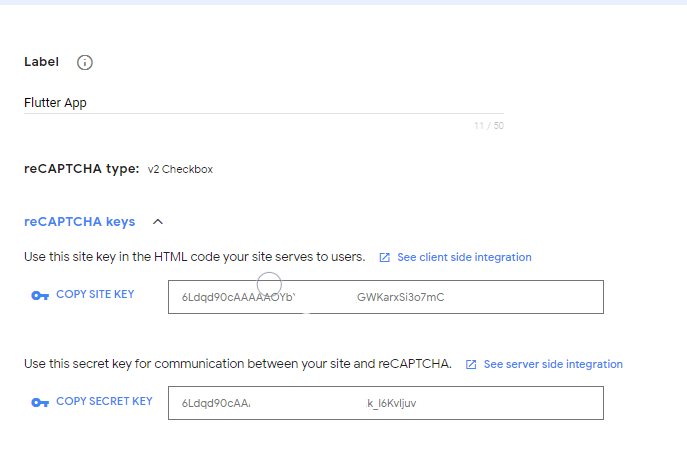
The captcha consist of 2 keys
- Site Key: used to show captcha verification widget on your site.
- Secret Key: is used for authentiation a communication between application & recaptcha server to verify user’s response.
Let’s get Started
In this project we are going to load a HTML page from Assets directory & display the webpage into our flutter app.
So in HTML page (index.html) will implement recaptcha verify & then show index.html web page into our flutter app.
To Load Web Page into flutter app we need a library i.e. webview_flutter_plus.
Video Tutorial
Implement recaptcha in flutter by loading WebPage in flutter App
Step 1: Add Webview Plus dependencies in flutter project
Open pubspec.yaml file & under dependencies section add webview_flutter_plus package.
dependencies:
  webview_flutter_plus:
Now run ‘flutter pub get’ command in IDE terminal else hit pub get button.
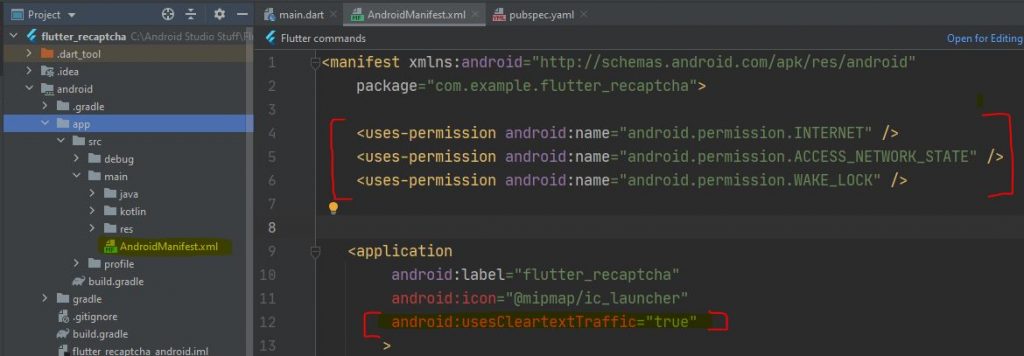
Step 2: Add Internet uses permission & cleartraffic
As we are making internet calls to verify captcha, we need internet access permission.
To add Intermet permission goto AndroidManifest.xml file
android > app > src > main > AndroidManifest.xml
Add the 3 permission in manifest tag
<uses-permission android:name="android.permission.INTERNET" />
<uses-permission android:name="android.permission.ACCESS_NETWORK_STATE" />
<uses-permission android:name="android.permission.WAKE_LOCK" />
then in <application> tag add usesClearTextTraffic = true
refer screenshot below
Step 3: Create a Webpage under directory in flutter project
Right click on project > New > Directory (create assets folder)
and in assets folder create one more directory (webpages), as shown in below screenshot
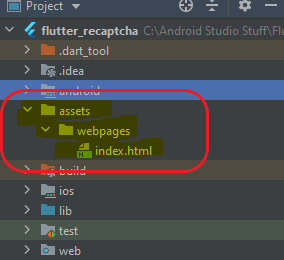
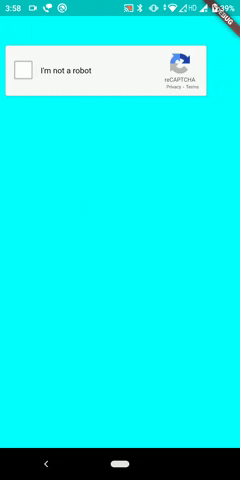
Now in assets/webpages/ folder create a file & name it as index.html and copy paste below html code
recaptcha code
index.html
replace data-site-key with your own recaptcha API key as we have created in google recaptcha signup.
<!DOCTYPE html>
<html>
<head>
    <title>reCAPTCHA</title>
    <script src="https://www.google.com/recaptcha/api.js" async defer></script>
</head>
<body style='background-color: aqua;'>
<div style='height: 60px;'></div>
<form action="?" method="POST">
    <div class="g-recaptcha"
         data-sitekey="6Ldqd90cAAA- your api key here-xSi3o7mC"
         data-callback="captchaCallback"></div>

</form>
<script>
      function captchaCallback(response){
        //console.log(response);
        if(typeof Captcha!=="undefined"){
          Captcha.postMessage(response);
        }
      }
    </script>
</body>
</html>

<html>
<body>
Step 5: loading index.html page in flutter webview
main.dart
Explanation of below source code
As we have added Webview_flutter_plus package in our flutter project, thus we can make use of WebViewPlus widget to load website in flutter app.
In WebViewPlus widget, we have a method onWebViewCreated() that help us to load webpages from assets folder i.e. assets/webpages/index.html
Then by using javascriptChannels, we will get response or captcha server response and then navigate the user to next page i.e. Welcome Page after successful verification of captcha in flutter.
import 'package:flutter/material.dart';
import 'package:flutter_recaptcha/WelcomePage.dart';
import 'package:webview_flutter_plus/webview_flutter_plus.dart';

void main() {
  runApp(const MyApp());
}

class MyApp extends StatelessWidget {
  const MyApp({Key? key}) : super(key: key);
  @override
  Widget build(BuildContext context) {
    return MaterialApp(
      title: 'Flutter Demo',
      theme: ThemeData(

        primarySwatch: Colors.blue,
      ),
      home: const MyHomePage(),
    );
  }
}

class MyHomePage extends StatefulWidget {

  const MyHomePage({Key? key}) : super(key: key);

  @override
  _MyHomePageState createState() => _MyHomePageState();
}

class _MyHomePageState extends State<MyHomePage> {
  @override
  Widget build(BuildContext context) {
    return Scaffold(
      body: WebViewPlus(
        javascriptMode: JavascriptMode.unrestricted,
        onWebViewCreated: (controller){
          controller.loadUrl("assets/webpages/index.html");
        },
        javascriptChannels: Set.from([
          JavascriptChannel(name: 'Captcha', onMessageReceived: (JavascriptMessage message){
            Navigator.pushReplacement(context, MaterialPageRoute(builder: (context) => WelcomePage()));
          })
        ]),
      )
    );
  }
}
Step 6: Create a WelcomePage.dart
WelcomePage.dart
import 'package:flutter/material.dart';

class Welcomeage extends StatelessWidget {
  const WelcomePage({Key? key}) : super(key: key);

  @override
  Widget build(BuildContext context) {
    return Scaffold(
      body: Center(
        child: Text("Welcome",style: TextStyle(fontSize: 20),),
      ),
    );
  }
}
")


