Base Adapter android is simple a base class that is used in implementation of any Adopter that can be used in variour activity in android like ListView or GridView.
So In this Article we need Customize the GridView by creating our own Custom Adopter that extends BaseAdopter
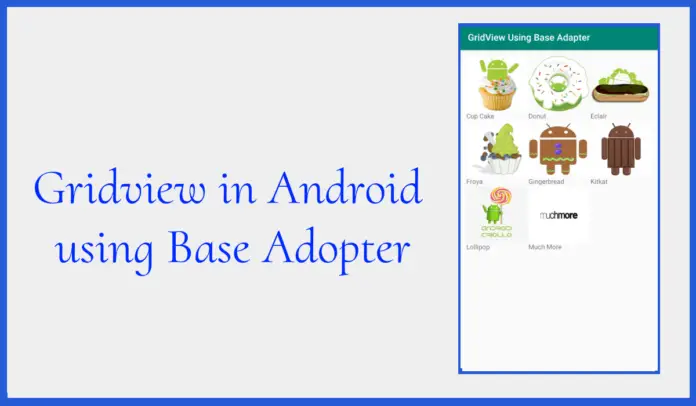
Below is the example of GridView in Android, In which we show the Android Version logo’s in the form of Grids.
Gridview in Android using Base Adopter
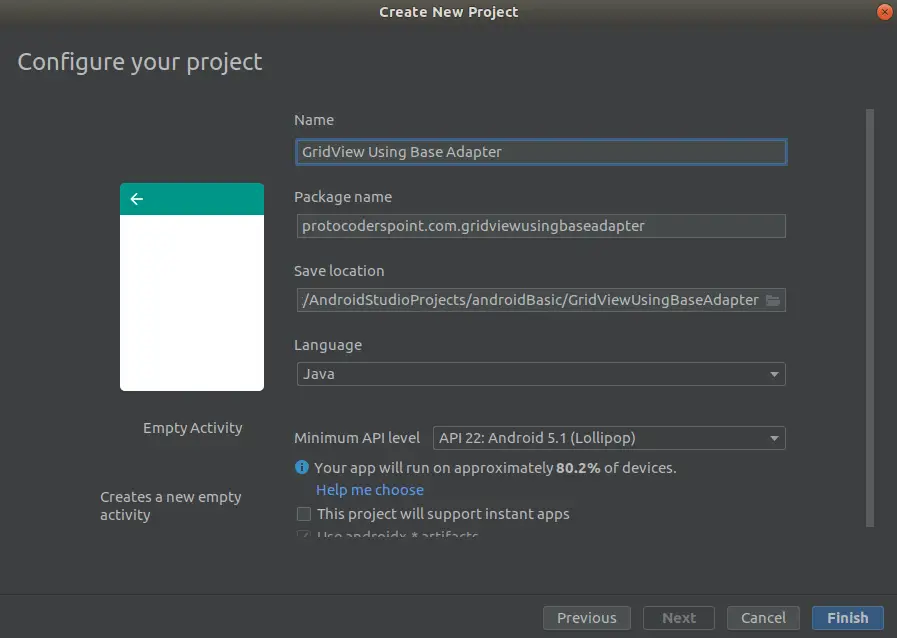
Step1: Create a new Android project in Android Studio as usually and you need to fill all the required details.
In our case we have named GridView Using Base Adopter and package protocoderspoint.com.griviewbaseadopter

Step 3 : Now, Just Open activity_main.xml design and paste the below xml code in that file.
Here i have created a GridView with have set with number of columns as 3.
<?xml version="1.0" encoding="utf-8"?>
<LinearLayout xmlns:android="http://schemas.android.com/apk/res/android"
    android:layout_width="match_parent"
    android:layout_height="match_parent"
    android:orientation="vertical">

    <GridView
        android:id="@+id/simpleGridView"
        android:layout_width="fill_parent"
        android:layout_height="wrap_content"
        android:footerDividersEnabled="false"
        android:padding="1dp"
        android:layout_margin="10dp"
        android:numColumns="3" /> <!-- GridView with 3 value for numColumns attribute -->
</LinearLayout>
Step 3: : Ok then Create a new XML file I have named the new file as gridview_image.xml. because we are just displaying a Image using ImageView and a Text with TextView.
Then the CustomAdopter to set the andorid version logo images.
You can just Copy paste below xml code
<?xml version="1.0" encoding="utf-8"?>
<LinearLayout xmlns:android="http://schemas.android.com/apk/res/android"
    android:layout_width="match_parent"
    android:layout_height="wrap_content"
    android:padding="1dp"
    android:orientation="vertical"
    android:layout_margin="10dp">
    <ImageView
        android:id="@+id/icon"
        android:layout_width="match_parent"
        android:layout_height="120dp"
        android:scaleType="fitXY"
        android:layout_gravity="center_horizontal"
        android:src="@drawable/logo1"
        />

    <TextView
        android:id="@+id/text1"
        android:layout_width="match_parent"
        android:layout_height="match_parent"
        android:text="logo1"/>
</LinearLayout>
Adding Images in to Drawable Folder
Then Here you need to download come images and paste it into drawable folder of your android project.
Keep in mind that image size should not be more then 2 mb else the app might force stop.
Now, Name all the images as logo1,logo2 and so on.
Step 5: Create a new class CustomAdapter.java and paste the below code.
CustomAdopter.java
Then, Now We have to create a CustomAdopter.java class That is Extends BaseAdapter in it.
In CustomAdopter we will set image logo’s and set it’s text under the imageview logo.
package protocoderspoint.com.gridviewusingbaseadapter;

import android.content.Context;
import android.view.LayoutInflater;
import android.view.View;
import android.view.ViewGroup;
import android.widget.BaseAdapter;
import android.widget.ImageView;
import android.widget.TextView;

public class CustomAdapter extends BaseAdapter {
    Context context;
    int logos[];
    LayoutInflater inflter;
    String title[];
    public CustomAdapter(Context applicationContext, int[] logos,String[] text) {
        this.context = applicationContext;
        this.logos = logos;
        inflter = (LayoutInflater.from(applicationContext));
        this.title=text;
    }
    @Override
    public int getCount() {
        return logos.length;
    }
    @Override
    public Object getItem(int i) {
        return null;
    }
    @Override
    public long getItemId(int i) {
        return 0;
    }
    @Override
    public View getView(int i, View view, ViewGroup viewGroup) {
        view = inflter.inflate(R.layout.gridview_image, null); // inflate the layout
        ImageView icon = (ImageView) view.findViewById(R.id.icon); // get the reference of ImageView
        icon.setImageResource(logos[i]); // set logo images

        TextView textView = (TextView)view.findViewById(R.id.text1);
        textView.setText(title[i]);
        return view;
    }
}
Step 6 : Copy below code in Main_Activity.java
package protocoderspoint.com.gridviewusingbaseadapter;

import android.content.Intent;
import android.os.Bundle;
import android.view.View;
import android.widget.AdapterView;
import android.widget.GridView;

import androidx.appcompat.app.AppCompatActivity;

public class MainActivity extends AppCompatActivity {
    GridView simpleGrid;

    int logos[] = {R.drawable.logo1, R.drawable.logo2, R.drawable.logo3,R.drawable.logo4,R.drawable.logo5,R.drawable.logo6,R.drawable.logo7,R.drawable.logo8};

    String title[]={"Cup Cake","Donut","Eclair","Froya","Gingerbread","Kitkat","Lollipop","And Much More"};
    @Override
    protected void onCreate(Bundle savedInstanceState) {
        super.onCreate(savedInstanceState);
        setContentView(R.layout.activity_main);

        simpleGrid = (GridView) findViewById(R.id.simpleGridView); // init GridView

        // Create an object of CustomAdapter and set Adapter to GirdView
        CustomAdapter customAdapter = new CustomAdapter(getApplicationContext(), logos,title);

        simpleGrid.setAdapter(customAdapter);

        // implement setOnItemClickListener event on GridView
        simpleGrid.setOnItemClickListener(new AdapterView.OnItemClickListener() {
            @Override
            public void onItemClick(AdapterView<?> parent, View view, int position, long id) {
                // set an Intent to Another Activity
                Intent intent = new Intent(MainActivity.this, activity_second.class);
                intent.putExtra("image", logos[position]); // put image data in Intent
                startActivity(intent); // start Intent
            }
        });
    }
}
All is set and app is ready that display girdview with images in 3 columns but when its is clicked i need to open second activity to open which simply shows the image with the gridview image is been clicked
Step 7: Now Create a new Activity with name activity_second.class.
To create new Activity just follow this steps :
Right click of Project > New >Activity > Empty Activity
And name it as activity_second, this will create both java file as well as xml file
Step 8: Open Second Actvity xml file and copy paste below code, Our Second Activity to display the android version logo image in full size, by which gridView imageis been clicked.
activity_second.xml
<?xml version="1.0" encoding="utf-8"?>
<RelativeLayout xmlns:android="http://schemas.android.com/apk/res/android"
    xmlns:tools="http://schemas.android.com/tools"
    android:layout_width="match_parent"
    android:layout_height="match_parent"

    android:background="#fff"
    tools:context=".activity_second">
    <ImageView
        android:id="@+id/selectedImage"
        android:layout_width="match_parent"
        android:layout_height="wrap_content"
        android:layout_centerInParent="true"
        android:scaleType="fitXY" />
</RelativeLayout>
Step 9: Now Open a new Activity that we have created just with name activity_second.java and add below code in it.
package protocoderspoint.com.gridviewusingbaseadapter;

import android.content.Intent;
import android.os.Bundle;

import android.widget.ImageView;

import androidx.appcompat.app.AppCompatActivity;

public class activity_second extends AppCompatActivity {
    ImageView selectedImage;
    @Override
    protected void onCreate(Bundle savedInstanceState) {
        super.onCreate(savedInstanceState);
        setContentView(R.layout.activity_second);
        selectedImage = (ImageView) findViewById(R.id.selectedImage); // init a ImageView
        Intent intent = getIntent(); // get Intent which we set from Previous Activity
        selectedImage.setImageResource(intent.getIntExtra("image", 0)); // get image from Intent and set it in ImageView
    }
}


