
Hi Guys,
Welcome to Proto Coders Point, In this article we will learn how to generate signed apk of your flutter code in android studio. There are various ways to create a APK file, But in this article we will check out the simplest & easiest way to do it.
NOTE: THIS ARTICLE WILL BE JUST ON GENERATING SIGNED APK FOR ANDROID PUBLICATION.
How to Build Signed APK?
You have completed your flutter project & is ready to be published to the world through play store.
Then, now you are here to know how to generate signed apk of your flutter project.
Let’s Begin, Here is my Flutter Project built in android Studio(IDE),
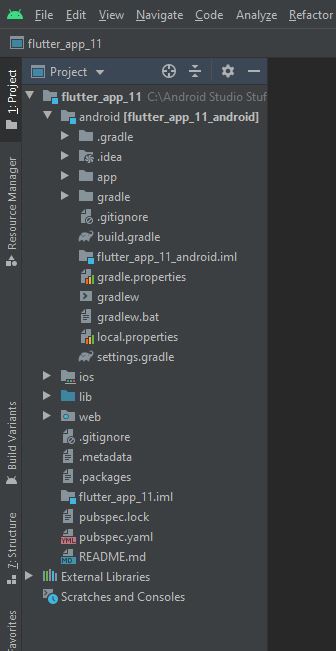
So let’s see the process of building a signed APK in flutter project.
VIDEO TUTORIAL
Time needed: 5 minutes
How to generate signed apk in flutter android studio
- Open Android module in android studio
In Android Studio tab bar, Navigate towords Tools > Flutter > then Open Android module in android Studio.
Check out the screenshot for path reference.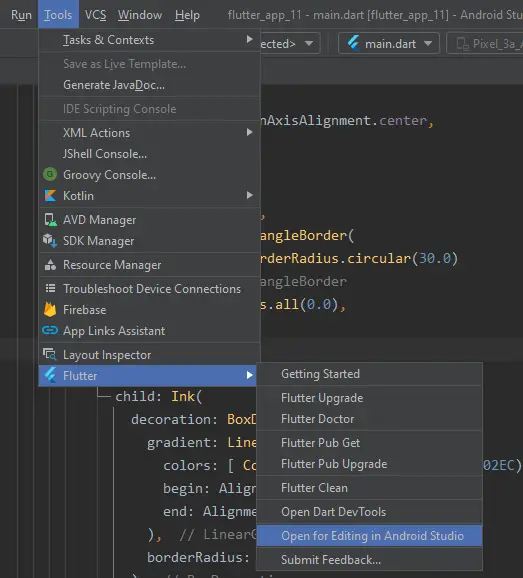
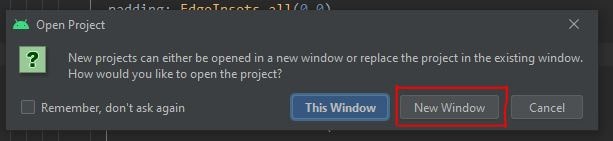
- Open Project in new window
This will open android module version of your flutter project
- Generate Signed Bundle/APK file
Now, you will have a new window of your android studio, where your flutter project android verison is been opened.
Click on Build > Generate Signed Bundle/APK
After Clicking on it you will see a new pop dialog box, there select apk/bundle. - Creating new key store path
Click on create new…
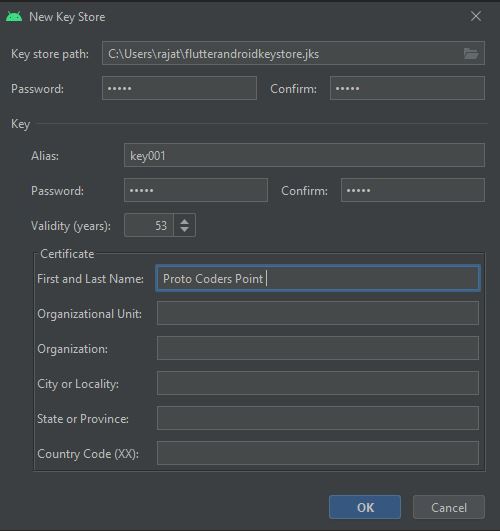
Here set a key store path there you want to create key store for your flutter project. - Configure signing in gradle
Open /android/app/build.gradle file
Just before android block: add below keystoreProperties
def keystoreProperties = new Properties()
def keystorePropertiesFile = rootProject.file(‘key.properties’)
if (keystorePropertiesFile.exists()) {
keystoreProperties.load(new FileInputStream(keystorePropertiesFile))
}
android {
…
}
then add below code before buildType block:signingConfigs {release {
keyAlias keystoreProperties['keyAlias']
keyPassword keystoreProperties['keyPassword']
storeFile keystoreProperties['storeFile'] ? file(keystoreProperties['storeFile']) : null
storePassword keystoreProperties['storePassword'] }
}buildTypes {
release {
signingConfig signingConfigs.release}} - flutter clear
Please note that after making any changes in build.gradle file, you need to run as comment in your IDE “flutter clear” so the the changes will affect in signing process.
- Select Build Varient as release
After creating keystore & seting Alias & password hit next button.
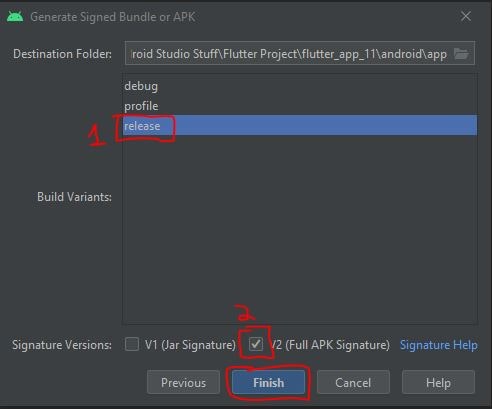
If you are creating apk for final app release on play store then select release else if you are giving for testing you can select as bebug. - Full APK Signature
You can see in above 5th step i have selected V2 (Full APK signature) to create full release version of my android flutter project
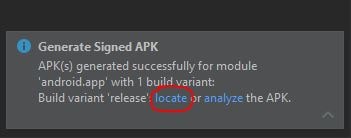
- Locate to the path
Now we have created signed apk successfully, To locate to the path where release version of apk is created check out below screenshot.
This article is been Refered from StackoverFlow : How to build signed apk from Android Studio for Flutter.
Easy way to set Flutter app icon
")


