Hi Guys, Welcome to Proto Coders Point, In this Tutorial, we will Install gcloud windows 10 (Google Cloud SDK windows) and set up Google Compute Engine VM Instance, and connect FileZilla to google cloud to transfer files to your Google Cloud System.
How to download Google Cloud SDK Installer?
There are many ways by which you can install gcloud SDK on your OS, The best and easy way to install it is by using gcloud SDK installer
Download it from here, The Official gcloud website. google cloud sdk download
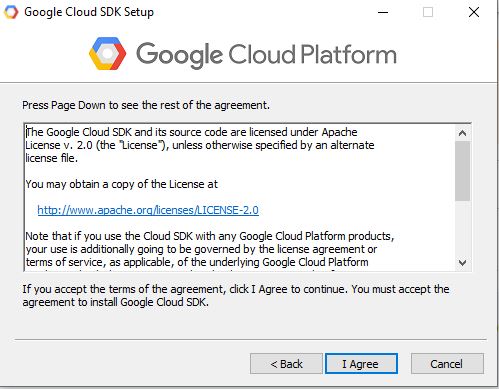
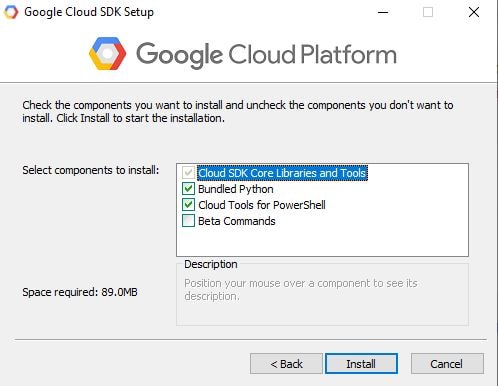
The Setup process is very simple, you just need to click next, next, next and Install.
Note: System must be connected with Internet as Installer need to download gcloud packages which may be about 450mb
Download and Install FileZilla
In this Tutorial, we are going to learn about How to use FileZilla to upload files to google cloud compute engine VM instance.
To do so, First we need to download FileZilla, So to download FileZilla please Visit https://filezilla-project.org
Yes, After downloading Filezilla, just install it in your system by launching the setup and just hit next next, install.
Now FileZilla and Gcloud is Successfully installed in your system
Connect FileZilla to Google cloud
Step 1: Launch gcloud SDK shell
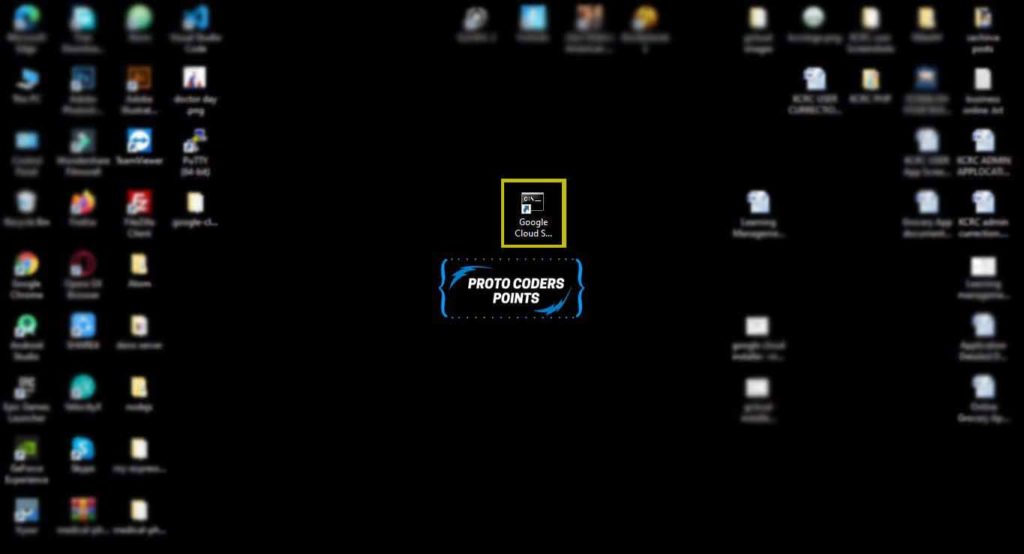
Launch gcloud sdk shell run as Adminstration

now run ‘gloud auth login’ as shown in above screenshot, this command will open your default browser or ask you permission to select a browser.
Note: Keep your Google account signed in so that process will be must faster.
Then it will ask you some permission to allow access to google cloud SDK.

Just hit that Allow button

Now you have Successfully connect command shell with google cloud.
Step 2 : Generate filezilla ppk file
Then, you need to generate .ppk file so that you can add it to SFTP in your filezilla settings to connect to gcloud system.
To generate .ppk file you need to run gcloud command of your Compute Engine VM Instance
to get that command go to your Google Cloud Console > open Compute Engine → VM instance → Select VM Instance and Copy gcloud command line under SSH.
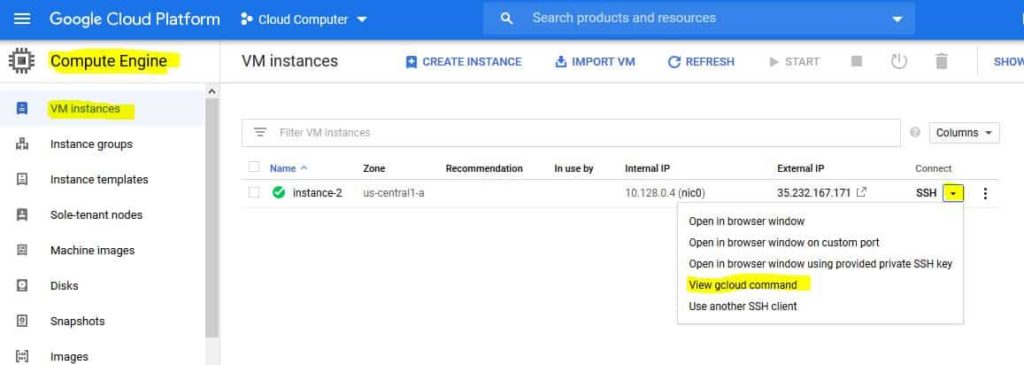
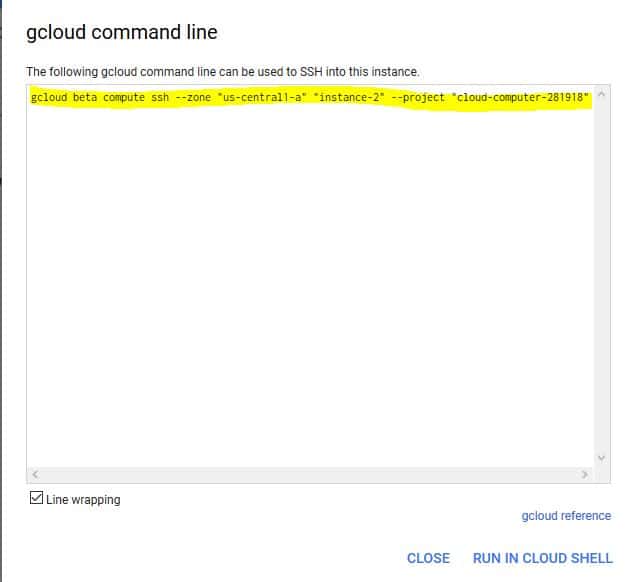
NOTE: Below command is my gcloud computer engine number, so don’t run the below command as it is, to get your system command follow above steps properly.
Then Copy your system gcloud command and paste in your gcloud SDK shell.


This Command will generate .ppk file that need to add in filezilla SFTP settings.
Now we are done with generating google_compute_engine.ppk file now you need to add this file in your Filezilla SFTP settings.
Step 3 : FileZilla SFTP setting add new key .ppk file
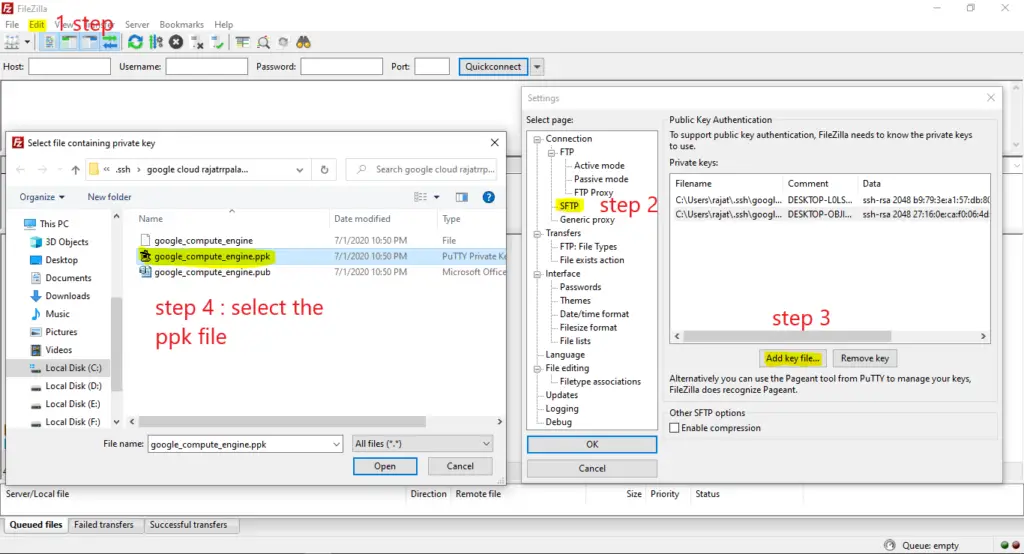
Now launch FilaZilla software and add the new key
go to Edit > setting and add the ppk file you have generated using gcloud command, as shown in below screenshot
Step 4 : Add your Google Site to FileZilla
Go to File > Site Manager and add new site
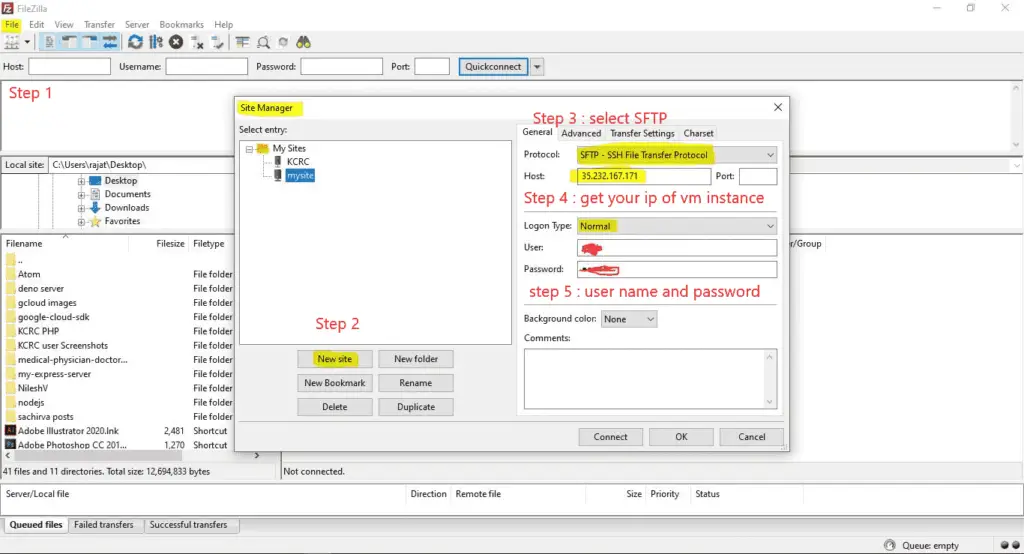
protocal : select SFTP
host : get the host ip address of you google cloud system in Compute Engine VM Instance. as shown below

username and password will be same as your google account first name For example : my name is Rajat Palankar so my username and passwork will be rajat.
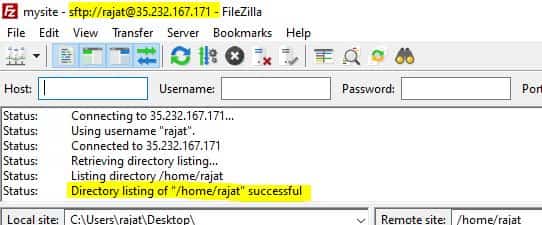
and then just hit the connect button, now filezilla will get connected to your google cloud system.
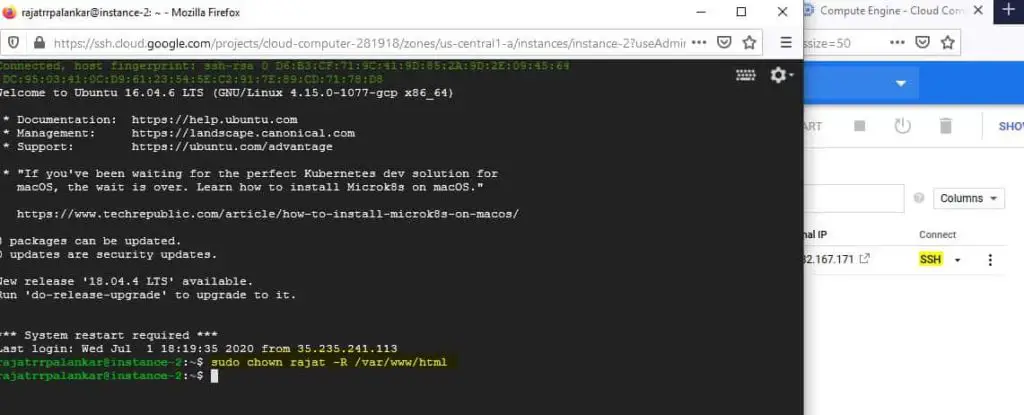
Step 5 : Change Owner of /var/www/html ( Optional )
By Default, the permission of file path /var/www/html will be _rw_r__r__ and by this you can’t save or make changed or create a new file, to do so you need to change the Owner of that path. then now you can use Filezilla to transfer files
sudo chown username -R /var/www/html
Conclusion
In this Tutorial article we learned how to install gcloud in windows, how to generate .ppk file using gcloud command and then use that .ppk file to connect to google cloud compute engine VM Instance using FileZilla

