
Hi Guys, Welcome to Proto Coders Point, In this flutter tutorial article, will learn how to implement persistent footer button in flutter with example.
Flutter persistent footer button
In Flutter, We can easily set button or any widget at bottom of app to do that we use persistent footer buttons properties of scaffold widget.
A persistentfooterbuttons are a set of widget that is been displayed at bottom of scaffold body.
As the name “persistent” means continuing exist in the view, so any widget defined inside persistent footer button is persistently visible to user, even if user scrolls to the views.
The persistentFooterButtons properties widget are always rendered above flutter bottomNavigationBar(if used) & it’s below scaffold widget body.
Syntax
Scaffold(
       body:.........,
       persistentFooterButtons: const [
       // any widget here

      ],
)
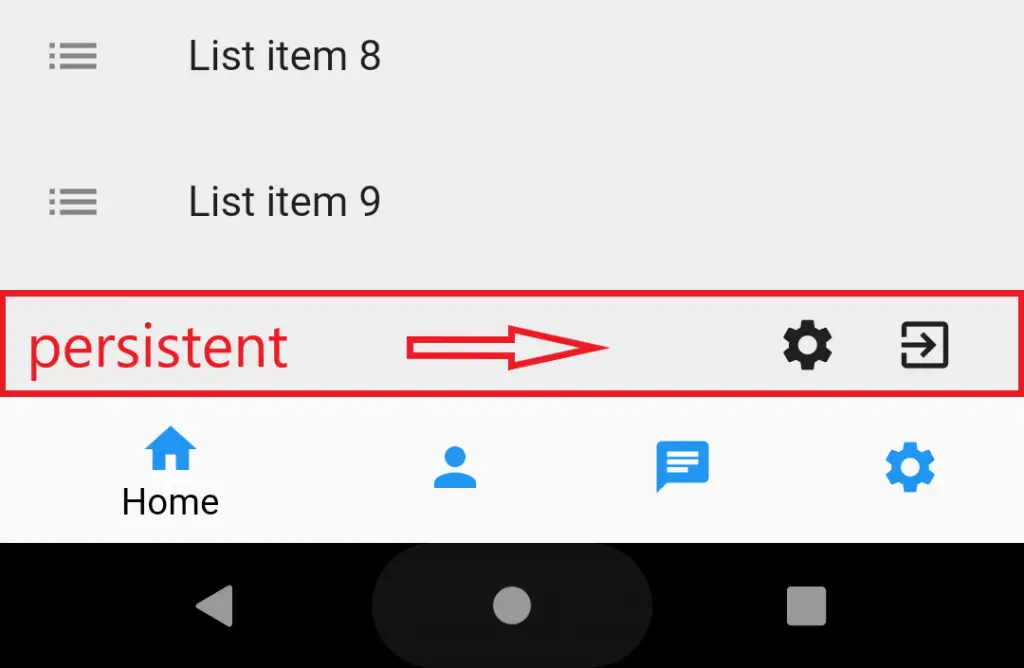
How to give space between widget in persistent footer buttons
As any you know, Inside persistent footer you can use any widget like IconButton, Icons, TextWidget, Admob ads at bottom in flutter, and you can use SizedBox() widget to give space between widget in flutter.
Snippet Code
persistentFooterButtons: const [

        Icon(Icons.settings),
        SizedBox(width: 5),
        Icon(Icons.exit_to_app),
        SizedBox(width: 10,),

      ],
As you can see in above snippet code, persistent footer button accepts an arrayList of Widget & don’t have any properties to customize it, It make use of backgroundColor from Scafford Widget body.
Here is how the view got generated.
Complete Source Code with persistent footer button properties used in scafford widget
main.dart
import 'package:flutter/material.dart';

void main() {
  runApp(const MyApp());
}

class MyApp extends StatelessWidget {
  const MyApp({Key? key}) : super(key: key);
  @override
  Widget build(BuildContext context) {
    return MaterialApp(
      title: 'Flutter Demo',
      theme: ThemeData(
        primarySwatch: Colors.blue,
      ),
      home: MyHomePage(),
      debugShowCheckedModeBanner: false ,
    );
  }
}

class MyHomePage extends StatefulWidget {
  const MyHomePage({Key? key}) : super(key: key);
  @override
  _MyHomePageState createState() => _MyHomePageState();
}

class _MyHomePageState extends State<MyHomePage> {

  @override
  Widget build(BuildContext context) {
    return Scaffold(
      backgroundColor: Colors.grey[200],
        appBar: AppBar(
          title: Text("Persistent Footer"),
          centerTitle: true,
        ),
        body: ListView.builder(
            itemCount: 15,
            itemBuilder: (BuildContext context,int index){
              return ListTile(
                  leading: const Icon(Icons.list),
                  title:Text("List item $index")
              );
            }
        ),
        persistentFooterButtons: const [
          Icon(Icons.settings),
          SizedBox(width: 5),
          Icon(Icons.exit_to_app),
          SizedBox(width: 10,),
        ],
        bottomNavigationBar: BottomNavigationBar(
          items: const [
            BottomNavigationBarItem(icon: Icon(Icons.home,color: Colors.blue,),title: Text("Home",style: TextStyle(color: Colors.black),)),
            BottomNavigationBarItem(icon: Icon(Icons.person,color: Colors.blue,),title: Text("Profile",style: TextStyle(color: Colors.black),)),
            BottomNavigationBarItem(icon: Icon(Icons.chat,color: Colors.blue,),title: Text("Chat",style: TextStyle(color: Colors.black),)),
            BottomNavigationBarItem(icon: Icon(Icons.settings,color: Colors.blue,),title: Text("Settings",style: TextStyle(color: Colors.black),))
          ],
        )
    );
  }
}
Output
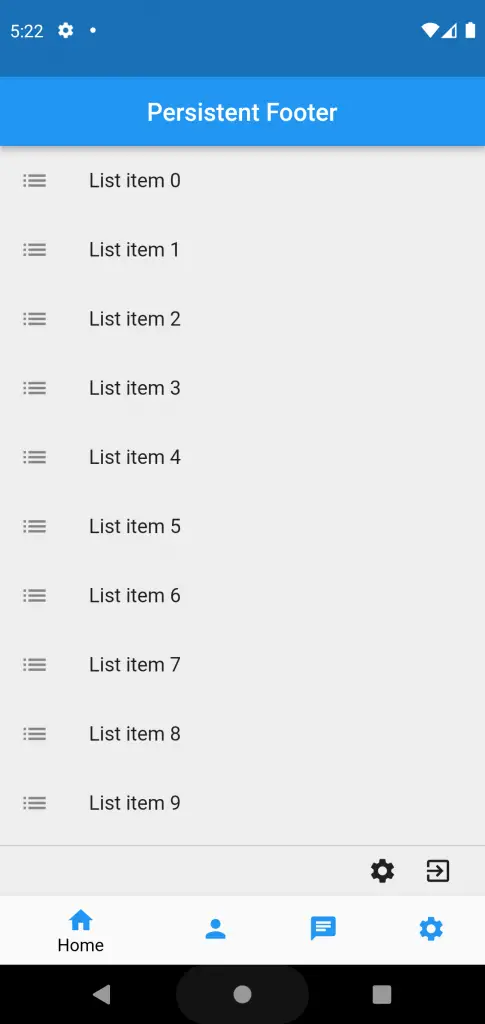
That’s all in this flutter article, will explore more on flutter & together build our skills.
Thanks for reading…!
")


