Hi Guys, Welcome to Proto Coders Point, In this Flutter Tutorial we gonna design a Login and Registration UI Design by using “VELOCITY X” Flutter Library developed by Pawan Kumar using Flutter SDK.
What is Flutter Velocity X?
The Velocity X library in flutter development is a minimalist flutter framework that helps you in building custom Application design Rapidly.
Velocity X comes with various properties that we can apply to our flutter widget such as Color, Padding, Text , Box, Card, SizedBox and many more.
Basic of how to use Velocity X
How to use velocityX in Text Widget.
How to use velocity x Card on any Flutter Widgets
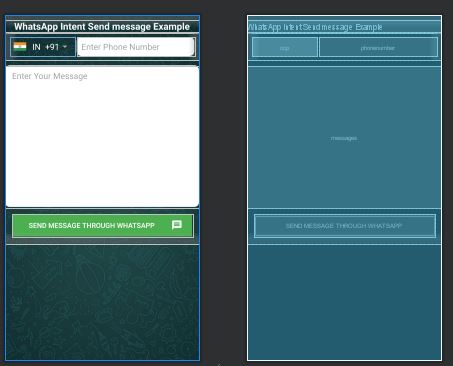
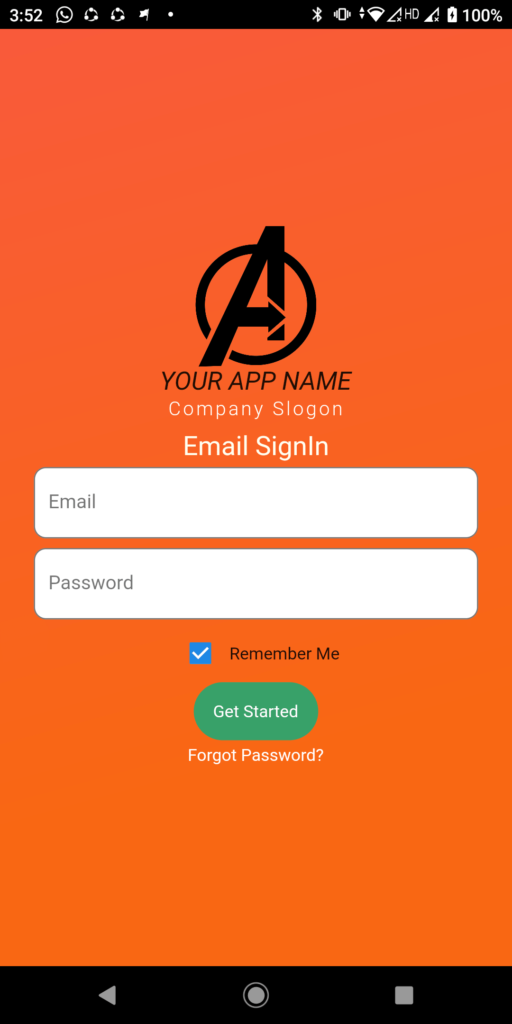
Login UI Screen using Velocity X Library.
Ok So let’s begin with Flutter to build Login and Registration UI Design.
Flutter Login and Registration UI design using Flutter Velocity X Library
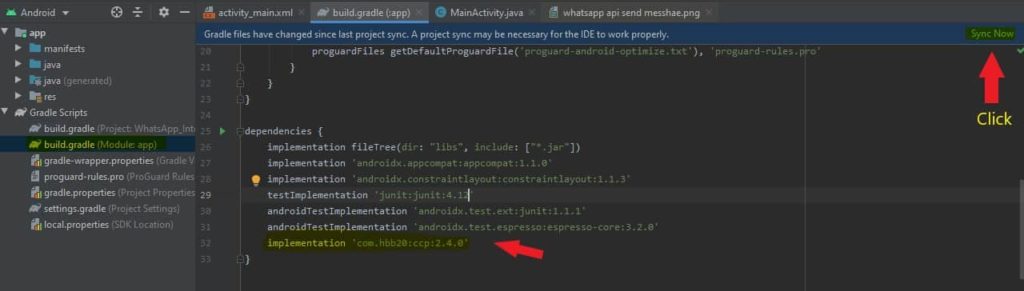
Add Dependencies
dependencies:
  velocity_x:
  font_awesome_flutter:
Open pubspec.yaml file and all the above 2 dependencies line
velocityx: To make app designing faster
font_awesome_flutter: To use Icons such a FacebookF and Google Icons.
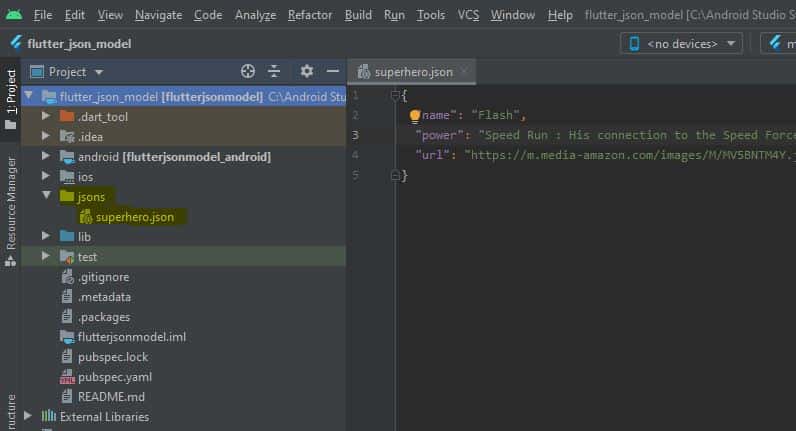
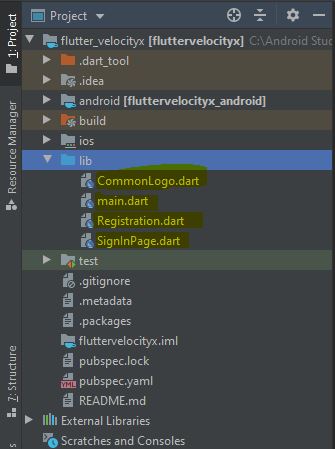
Project File Sturcture
In your Flutter Project under lib directory create 4 dart files.
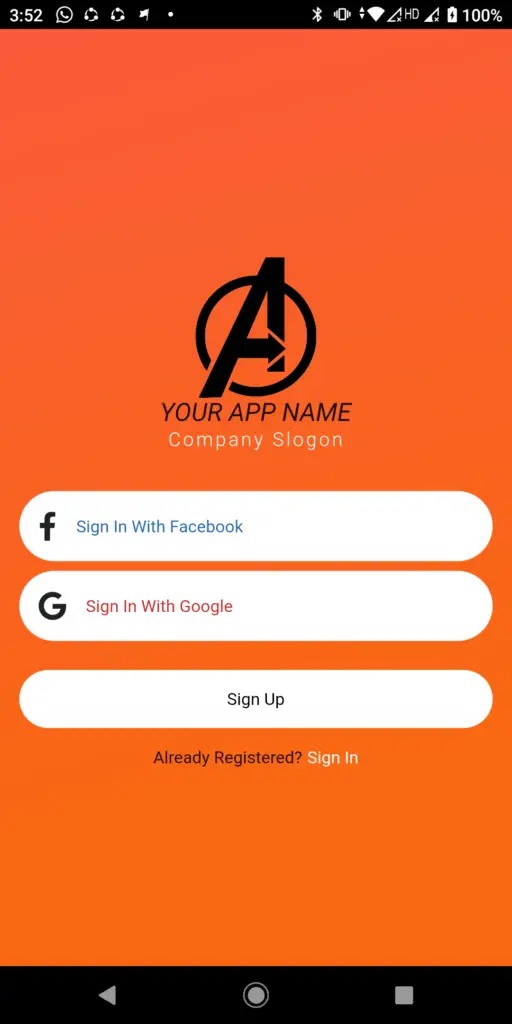
main.dart : Here where user can SignIn through Social Media Directly.
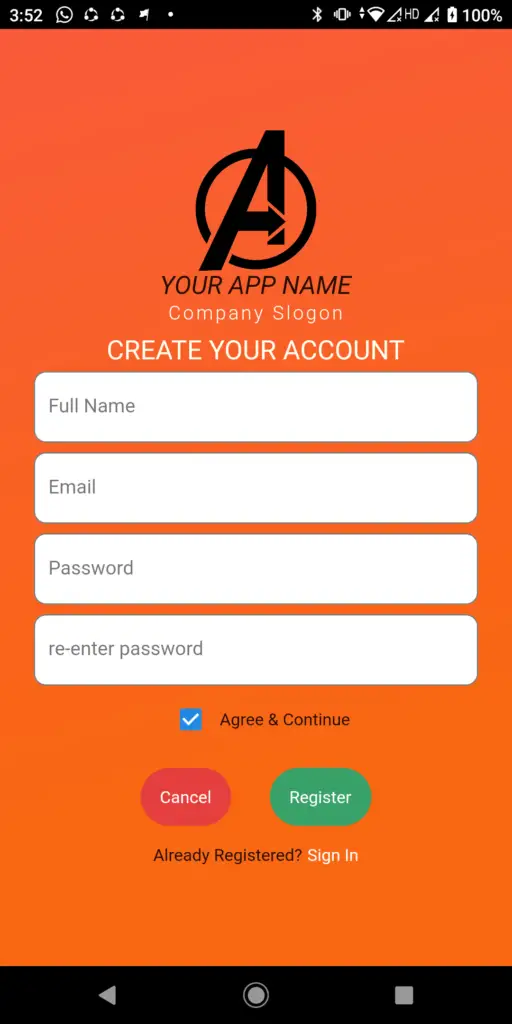
Registration.dart : Here where user can Register himself though Email address.
SignInPage.dart : Sign In page where user can signIn using Email and Password
CommonLogo.dart : This class will return a Common Company Logo with Company name by using which we can just use it wherever required.
I have used CommonLogo Widget on all the above 3 pages.
Just Create all the 4 dart file in your flutter project and add respective flutter dart code in it.
CommonLogo.dart
![]()
import 'package:flutter/material.dart';
import 'package:velocity_x/velocity_x.dart';

class CommonLogo extends StatelessWidget {

  @override
  Widget build(BuildContext context) {
    return Column(
      mainAxisAlignment: MainAxisAlignment.center,
      children: <Widget>[
        Image.network("https://pluspng.com/img-png/avengers-logo-png-avengers-logo-png-1376.png",width: 100,),
        "YOUR APP NAME".text.xl2.italic.make(),
        "Company Slogon".text.light.white.wider.lg.make(),
      ],
    );
  }
}
main.dart
import 'package:flutter/material.dart';
import 'package:velocity_x/velocity_x.dart';
import 'package:font_awesome_flutter/font_awesome_flutter.dart';
import 'SignInPage.dart';
import 'CommonLogo.dart';
import 'Registration.dart';

void main() {
  runApp(MyApp());
}

class MyApp extends StatelessWidget {
  // This widget is the root of your application.
  @override
  Widget build(BuildContext context) {
    return MaterialApp(
      title: 'Flutter Demo',
      debugShowCheckedModeBanner: false,
      theme: ThemeData(

        primaryColor: Colors.black,
        visualDensity: VisualDensity.adaptivePlatformDensity,
      ),
      home: SignIn(),
    );
  }
}

class SignIn extends StatefulWidget {
  @override
  _SignInState createState() => _SignInState();
}

class _SignInState extends State<SignIn> {
  @override
  Widget build(BuildContext context) {
    return SafeArea(
      child: Scaffold(
        body: Container(
          width: MediaQuery.of(context).size.width,
          height: MediaQuery.of(context).size.height,
          decoration: BoxDecoration(
            gradient: LinearGradient(
                colors: [const Color(0XFFF95A3B),const Color(0XFFF96713)],
                begin: FractionalOffset.topLeft,
                end: FractionalOffset.bottomCenter,
                stops: [0.0,0.8],
                tileMode: TileMode.mirror
            ),
          ),
          child: Column(
            mainAxisAlignment: MainAxisAlignment.center,
            children: <Widget>[
              CommonLogo().py24(),
              HeightBox(10),
              VxBlock(
                children: <Widget>[
                  GestureDetector(
                    onTap: (){
                      print("Sign In with FaceBook");
                    },
                    child: VxBox(child:Row(children: <Widget>[
                      FaIcon(FontAwesomeIcons.facebookF).p16(),
                      "Sign In With Facebook".text.blue700.make()
                    ],)).white.roundedLg.make().px16(),
                  ),
                  VxBox(child:Row(children: <Widget>[
                    FaIcon(FontAwesomeIcons.google).p16(),
                    "Sign In With Google".text.red700.make()
                  ],)).white.roundedLg.make().px16().py8(),
                  GestureDetector(
                      onTap:(){
                        print("SignUp");
                        Navigator.push(context, MaterialPageRoute(builder: (context)=>Registration()));
                      },child: VxBox(child: "Sign Up".text.black.makeCentered().p16()).white.roundedLg.make().px16().py16()),
                 GestureDetector(
                   onTap: (){
                     print("Sign In");
                     Navigator.push(context, MaterialPageRoute(builder: (context)=>SignInPage()));
                   },
                   child: HStack([
                     "Already Registered?".text.make(),
                     " Sign In".text.white.make()
                   ]).centered(),
                 )
                ],
              )
            ],
          ),
        ),
      ),
    );
  }
}
Registration.dart
import 'package:flutter/material.dart';
import 'package:velocity_x/velocity_x.dart';
import 'package:font_awesome_flutter/font_awesome_flutter.dart';
import 'CommonLogo.dart';
import 'SignInPage.dart';

class Registration extends StatefulWidget {
  @override
  _RegistrationState createState() => _RegistrationState();
}

class _RegistrationState extends State<Registration> {
  bool checked = true;
  @override
  Widget build(BuildContext context) {
    return SafeArea(
      child: Scaffold(
        body: Container(
          width: MediaQuery.of(context).size.width,
          height: MediaQuery.of(context).size.height,
          decoration: BoxDecoration(
            gradient: LinearGradient(
                colors: [const Color(0XFFF95A3B),const Color(0XFFF96713)],
                begin: FractionalOffset.topLeft,
                end: FractionalOffset.bottomCenter,
                stops: [0.0,0.8],
                tileMode: TileMode.mirror
            ),
          ),
          child: Center(
            child: SingleChildScrollView(
              child: Column(
                mainAxisAlignment: MainAxisAlignment.center,
                children: <Widget>[
                  CommonLogo(),
                  HeightBox(10),
                  "CREATE YOUR ACCOUNT".text.size(22).yellow100.make(),
                  TextField(
                    keyboardType: TextInputType.text,
                    decoration: InputDecoration(
                        filled: true,
                        fillColor: Colors.white,
                        hintText: "Full Name",
                        border: OutlineInputBorder(
                            borderRadius: BorderRadius.all(Radius.circular(10.0)))),
                  ).p4().px24(),
                  TextField(
                    keyboardType: TextInputType.text,
                    decoration: InputDecoration(
                        filled: true,
                        fillColor: Colors.white,
                        hintText: "Email",
                        border: OutlineInputBorder(
                            borderRadius: BorderRadius.all(Radius.circular(10.0)))),
                  ).p4().px24(),
                  TextField(
                    keyboardType: TextInputType.text,
                    decoration: InputDecoration(
                        filled: true,
                        fillColor: Colors.white,
                        hintText: "Password",
                        border: OutlineInputBorder(
                            borderRadius: BorderRadius.all(Radius.circular(10.0)))),
                  ).p4().px24(),
                  TextField(
                    keyboardType: TextInputType.text,
                    decoration: InputDecoration(
                        filled: true,
                        fillColor: Colors.white,
                        hintText: "re-enter password",
                        border: OutlineInputBorder(
                            borderRadius: BorderRadius.all(Radius.circular(10.0)))),
                  ).p4().px24(),
                  HStack([
                    Checkbox(
                      value: checked, onChanged: (bool value) { checked=value ;},

                    ),
                    "Agree & Continue".text.make().py16()

                  ]),
                  HStack([
                    VxBox(child: "Cancel".text.white.makeCentered().p16()).red600.roundedLg.make().px16().py16(),
                    VxBox(child: "Register".text.white.makeCentered().p16()).green600.roundedLg.make().px16().py16(),
                  ]),
                  GestureDetector(
                    onTap: (){
                      print("Sign In");
                      Navigator.push(context, MaterialPageRoute(builder: (context)=>SignInPage()));
                    },
                    child: HStack([
                      "Already Registered?".text.make(),
                      " Sign In".text.white.make()
                    ]).centered(),
                  )
                ],
              ),
            ),
          ),
        ),
      ),
    );
  }
}
SignInPage.dart
import 'package:flutter/material.dart';
import 'package:fluttervelocityx/Registration.dart';
import 'package:velocity_x/velocity_x.dart';
import 'package:font_awesome_flutter/font_awesome_flutter.dart';
import 'CommonLogo.dart';

class SignInPage extends StatefulWidget {
  @override
  _SignInPageState createState() => _SignInPageState();
}

class _SignInPageState extends State<SignInPage> {
  bool checked = true;
  @override
  Widget build(BuildContext context) {
    return SafeArea(
      child: Scaffold(
        body: Container(
          width: MediaQuery.of(context).size.width,
          height: MediaQuery.of(context).size.height,
          decoration: BoxDecoration(
            gradient: LinearGradient(
                colors: [const Color(0XFFF95A3B),const Color(0XFFF96713)],
                begin: FractionalOffset.topLeft,
                end: FractionalOffset.bottomCenter,
                stops: [0.0,0.8],
                tileMode: TileMode.mirror
            ),
          ),
          child: Center(
            child: SingleChildScrollView(
              child: Column(
                mainAxisAlignment: MainAxisAlignment.center,
                children: <Widget>[
                  CommonLogo(),
                  HeightBox(10),
                  "Email Sign-IN".text.size(22).yellow100.make(),

                  TextField(
                    keyboardType: TextInputType.text,
                    decoration: InputDecoration(
                        filled: true,
                        fillColor: Colors.white,
                        hintText: "Email",
                        border: OutlineInputBorder(
                            borderRadius: BorderRadius.all(Radius.circular(10.0)))),
                  ).p4().px24(),
                  TextField(
                    keyboardType: TextInputType.text,
                    decoration: InputDecoration(
                        filled: true,
                        fillColor: Colors.white,
                        hintText: "Password",
                        border: OutlineInputBorder(
                            borderRadius: BorderRadius.all(Radius.circular(10.0)))),
                  ).p4().px24(),

                  HStack([
                    Checkbox(
                      value: checked, onChanged: (bool value) { checked=value ;},

                    ),
                    "Remember Me".text.make().py16()

                  ]),
                  HStack([
                    VxBox(child: "Get Started".text.white.makeCentered().p16()).green600.roundedLg.make(),
                  ]),
                  GestureDetector(
                    onTap: (){
                      print("Sign In");
                    },
                    child: HStack([
                      "Forgot Password?".text.white.makeCentered(),
                    ]).centered().p4(),
                  ),
                  HStack([
                    VxBox(child:  FaIcon(FontAwesomeIcons.facebookF,color: Colors.white,size: 30,).p20()).blue700.roundedFull.make(),
                    VxBox(child:  FaIcon(FontAwesomeIcons.google,color: Colors.white,size: 25,).p20()).red700.roundedFull.make().p4(),
                  ])
                ],
              ),
            ),
          ),
        ),
        bottomNavigationBar: GestureDetector(
          onTap: (){
            Navigator.push(context, MaterialPageRoute(builder: (context)=>Registration()));
          },
          child: Container(
            height: 25,
              color: Colors.lightBlue,
              child: Center(child: "Create a new Account..! Sign Up".text.white.makeCentered())),
        ),
      ),
    );
  }
}
All set your Flutter application is ready with beautiful Login and Registration UI design using Velocity X library.