
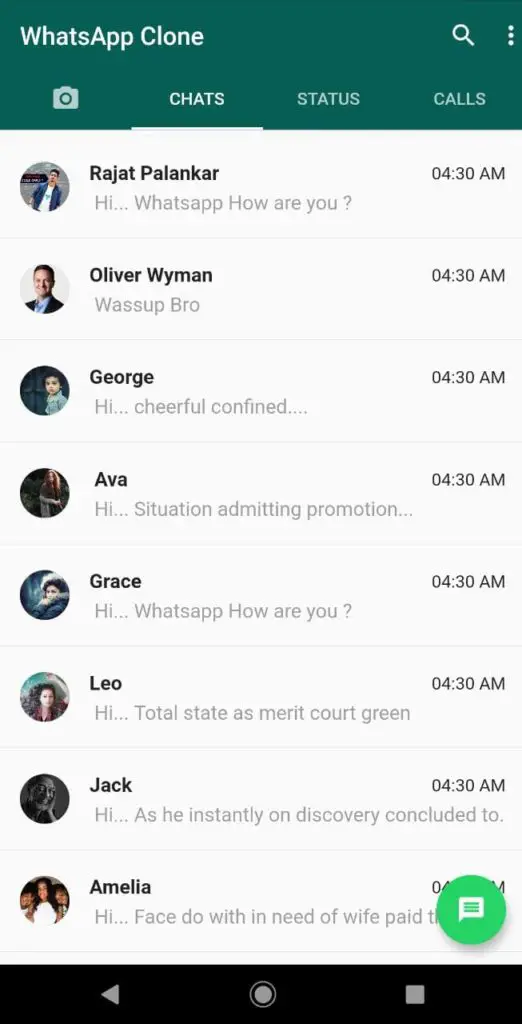
Hi Guys, Welcome to Proto Coders Point, In this Flutter Tutorial we will learn to build WhatsApp Clone App using Flutter – UI Design.
Final Result of this Project
Follow the below step to build/create a whatsapp clone using flutter.
or Watch the Video Tutorial on flutter whatsapp clone tutorial
Note this Article is devided in 3 parts for each tabs in whatsapp app Status bar clone, whatsapp Call Tab
Step 1: Create a new Flutter Project
OffCourse you need to create a new Flutter Project or Open any Existing Project,
In my Case, I am making use of Android Studio as my IDE to Build WhatsApp Clone UI.
How to create new Flutter Project in android Studio?
File > New > New Flutter Project > Give a name to your project ” Whatsapp Clone UI Design”
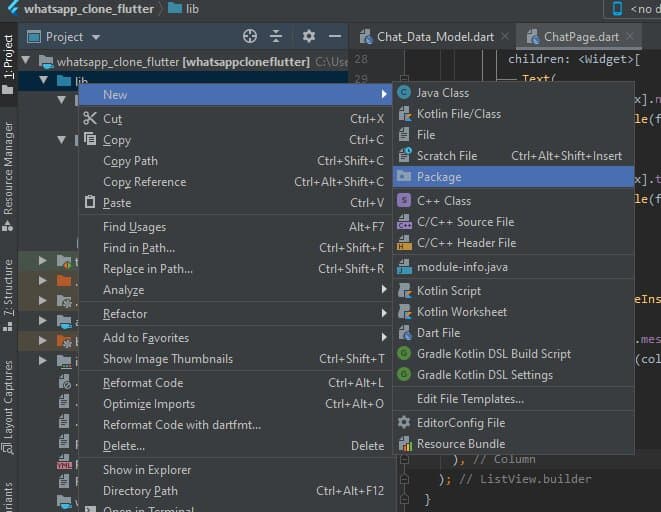
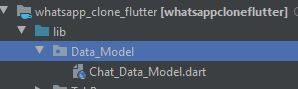
Step 2: Create new package “Data_Model” and create a “Chat_Data_Model”
Right Click on lib > New > Package name the package as “Data_Model” or anything as per your choice.
Then you need a class Data Model that holds list of Dummy Chat list so
Under “Data_Model” directory create a new dart file named “Chat_Data_Model.dart”
Then, Paste the below code
Chat_Data_Model.dart
This contains dummy data list of whatsapp chat details like
- name,
- message,
- time,
- and profile picture
class Chat_Data_Model {
  final String name;
  final String message;
  final String time;
  final String profilepic;

  Chat_Data_Model({this.name, this.message, this.time, this.profilepic});
}

// dummy data for chats page  listview

List<Chat_Data_Model> dummyData = [
  new Chat_Data_Model(
      name: "Rajat Palankar",
      message: " Hi... Whatsapp How are you ?",
      time: "04:30 AM",
      profilepic:
          "https://pbs.twimg.com/profile_images/1243950916362895361/Z__-CJxz_400x400.jpg"),
  new Chat_Data_Model(
      name: "Oliver Wyman",
      message: " Wassup Bro",
      time: "04:30 AM",
      profilepic:
          "https://www.oliverwyman.com/content/dam/oliver-wyman/v2/careers/profiles/scottbk-profile-460x460.jpg"),
  new Chat_Data_Model(
      name: "George",
      message: " Hi... cheerful confined.... ",
      time: "04:30 AM",
      profilepic:
          "https://cdn.pixabay.com/photo/2015/06/22/08/40/child-817373__340.jpg"),
  new Chat_Data_Model(
      name: "	Ava",
      message: " Hi... Situation admitting promotion...",
      time: "04:30 AM",
      profilepic:
          "https://cdn.pixabay.com/photo/2016/11/29/03/36/beautiful-1867093__340.jpg"),
  new Chat_Data_Model(
      name: "Grace",
      message: " Hi... Whatsapp How are you ?",
      time: "04:30 AM",
      profilepic:
          "https://cdn.pixabay.com/photo/2015/11/26/00/14/fashion-1063100__340.jpg"),
  new Chat_Data_Model(
      name: "Leo",
      message: " Hi... Total state as merit court green",
      time: "04:30 AM",
      profilepic:
          "https://cdn.pixabay.com/photo/2016/11/29/02/28/attractive-1866858__340.jpg"),
  new Chat_Data_Model(
      name: "Jack",
      message: " Hi... As he instantly on discovery concluded to.",
      time: "04:30 AM",
      profilepic:
          "https://cdn.pixabay.com/photo/2017/06/26/02/47/people-2442565__340.jpg"),
  new Chat_Data_Model(
      name: "Amelia",
      message: " Hi... Face do with in need of wife paid that be. ",
      time: "04:30 AM",
      profilepic:
          "https://cdn.pixabay.com/photo/2018/01/24/19/49/people-3104635__340.jpg"),
  new Chat_Data_Model(
      name: "Sophia",
      message: " Hi...  Given mrs she first china",
      time: "04:30 AM",
      profilepic:
          "https://cdn.pixabay.com/photo/2017/11/23/07/47/babe-2972221__340.jpg"),
  new Chat_Data_Model(
      name: "Harry",
      message: " Hi... Is post each that just leaf no....",
      time: "04:30 AM",
      profilepic:
          "https://cdn.pixabay.com/photo/2018/02/21/15/06/woman-3170568__340.jpg"),
  new Chat_Data_Model(
      name: "Isla",
      message: " Hi...Surprise not wandered speedily ...",
      time: "04:30 AM",
      profilepic:
          "https://cdn.pixabay.com/photo/2016/01/19/18/04/man-1150058__340.jpg"),
  new Chat_Data_Model(
      name: "Emily",
      message: " Hi...Extended kindness trifling remember ...",
      time: "04:30 AM",
      profilepic:
          "https://cdn.pixabay.com/photo/2015/07/31/15/01/man-869215__340.jpg"),
  new Chat_Data_Model(
      name: "Mia",
      message: " Hi...She exposed painted fifteen are noisier....",
      time: "04:30 AM",
      profilepic:
          "https://cdn.pixabay.com/photo/2016/03/24/09/10/men-1276384_960_720.jpg"),
  new Chat_Data_Model(
      name: "Poppy",
      message: " Hi... Admiration we surrounded possession ...",
      time: "04:30 AM",
      profilepic:
          "https://cdn.pixabay.com/photo/2015/07/14/06/06/homeless-844208__340.jpg"),
  new Chat_Data_Model(
      name: "Alfie",
      message: " Hi... Entire any had depend and figure winter.",
      time: "04:30 AM",
      profilepic:
          "https://cdn.pixabay.com/photo/2017/08/12/18/31/male-2634974__340.jpg"),
];
Step 3 : Create a new Package/ Directory for TabPages
Right click on lib > New >Package name the package as “TabPages” or anything it’s left to you.
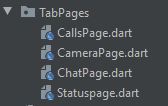
Create 4 dart files under TabPages folder
How to Create dart file in android Studio?
Right Click Tabpages > New > dart
like that create 4 dart file.
- Callspage.dart
- CameraPage.dart
- Chatpage.dart
- Statuspage.dart
Then Just Copy below dart page code in those dart file you have created just now
1. CallsPage.dart
import 'package:flutter/material.dart';

class CallsPage extends StatefulWidget {
  @override
  _CallsPageState createState() => _CallsPageState();
}

class _CallsPageState extends State<CallsPage> {
  @override
  Widget build(BuildContext context) {
    return Center(
      child: Text("Call Page"),
    );
  }
}
2. CameraPage.dart
import 'package:flutter/material.dart';

class CameraPage extends StatefulWidget {
  @override
  _CameraPageState createState() => _CameraPageState();
}

class _CameraPageState extends State<CameraPage> {
  @override
  Widget build(BuildContext context) {
    return Center(
      child: Text("Camera Page"),
    );
  }
}
3. Statuspage.dart
import 'package:flutter/material.dart';

class Statuspage extends StatefulWidget {
  @override
  _StatuspageState createState() => _StatuspageState();
}

class _StatuspageState extends State<Statuspage> {
  @override
  Widget build(BuildContext context) {
    return Center(
      child: Text("Status Page"),
    );
  }
}
4. ChatsPage.dart
import 'package:flutter/material.dart';
import 'package:whatsappcloneflutter/Data_Model/Chat_Data_Model.dart';

class ChatPage extends StatefulWidget {
  @override
  _ChatPageState createState() => _ChatPageState();
}

class _ChatPageState extends State<ChatPage> {
  @override
  Widget build(BuildContext context) {
    return ListView.builder(
      itemCount: dummyData.length,
      itemBuilder: (context, index) => Column(
        children: <Widget>[
          Divider(
            height: 10.0,
          ),
          ListTile(
            leading: CircleAvatar(
              radius: 20,
              foregroundColor: Theme.of(context).primaryColor,
              backgroundColor: Colors.grey,
              backgroundImage: NetworkImage(dummyData[index].profilepic),
            ),
            title: new Row(
              mainAxisAlignment: MainAxisAlignment.spaceBetween,
              children: <Widget>[
                Text(
                  dummyData[index].name,
                  style: TextStyle(fontWeight: FontWeight.bold),
                ),
                Text(
                  dummyData[index].time,
                  style: TextStyle(fontSize: 14.0),
                ),
              ],
            ),
            subtitle: Container(
              padding: const EdgeInsets.only(top: 5.0),
              child: Text(
                dummyData[index].message,
                style: TextStyle(color: Colors.grey, fontSize: 16.0),
              ),
            ),
          ),
        ],
      ),
    );
  }
}
Step 4 : At Last open main.dart file and paste the below code
main.dart
import 'package:flutter/material.dart';
//importing all the whatsapp clone tab pages
import 'package:whatsappcloneflutter/TabPages/CallsPage.dart';
import 'package:whatsappcloneflutter/TabPages/CameraPage.dart';
import 'package:whatsappcloneflutter/TabPages/ChatPage.dart';
import 'package:whatsappcloneflutter/TabPages/Statuspage.dart';

void main() => runApp(MyApp());

class MyApp extends StatelessWidget {
  // This widget is the root of your application.
  @override
  Widget build(BuildContext context) {
    return MaterialApp(
      debugShowCheckedModeBanner: false,
      title: 'WhatApp Clone Example',
      theme: ThemeData(
          primaryColor: Color(0XFF075E54),
          accentColor: Color(0XFF25D366) // green color for whatapp clone theme
          ),
      home: MyHomePage(),
    );
  }
}

class MyHomePage extends StatefulWidget {
  @override
  _MyHomePageState createState() => _MyHomePageState();
}

class _MyHomePageState extends State<MyHomePage>
    with SingleTickerProviderStateMixin {
  TabController _tabController;

  @override
  void initState() {
    // TODO: implement initState
    super.initState();
    // total tab we are creating is 4 so : length is 4 : initialIndex is set to position 1
    _tabController = new TabController(length: 4, vsync: this, initialIndex: 1);
  }

  @override
  Widget build(BuildContext context) {
    return Scaffold(
      appBar: AppBar(
        title: Text("WhatsApp Clone app UI"),
        elevation: 0.5,
        bottom: TabBar(
          controller: _tabController,
          indicatorColor: Colors.white,
          tabs: <Widget>[
            // here we are creating 4 Tabs
            Tab(icon: Icon(Icons.camera_alt)),
            Tab(
              text: "CHATS",
            ),
            Tab(
              text: "STATUS",
            ),
            Tab(text: "CALLS")
          ],
        ),
        //we need 2 menu icons on app bar : search and more setting
        actions: <Widget>[
          Icon(Icons.search),
          Padding(
            padding: const EdgeInsets.symmetric(horizontal: 7),
          ),
          Icon(Icons.more_vert)
        ],
      ),
      body: TabBarView(
        //this will work similar to fragment in android app
        controller: _tabController,
        //loading 4 pages in tabs
        children: <Widget>[CameraPage(), ChatPage(), Statuspage(), CallsPage()],
      ),
      floatingActionButton: FloatingActionButton(
        onPressed: () {
          print("Floating Button Clicked");
        },
        backgroundColor: Theme.of(context).accentColor,
        child: Icon(
          Icons.message,
          color: Colors.white,
        ),
      ),
    );
  }
}
There you go your Flutter app is now ready to show WhatsApp UI Design Clone.
NOTE : Here we have just Created a Dummy Data for Chat Page, In upcoming updates we will create update data for status page and calls pages too.
If you face any kind of problem feel free to comment below. I will Replay in less then 12 hours Sure.
Thank you
Recommended Post
")


[…] you have not gone through the first part of WhatsApp UI Clone using Flutter, Then make sure to go through it. […]
[…] you have not gone through the previous part of WhatsApp UI Clone using Flutter, Then make sure to go through […]
[…] WhatsApp like Story/status view in android […]