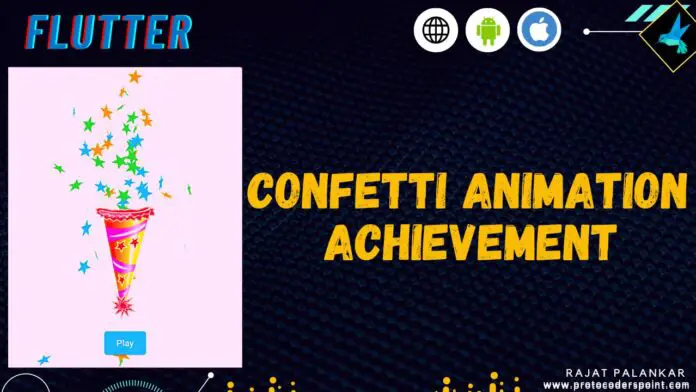
Hi Guys, Welcome to Proto Coders Point. In this flutter article will create a confetti animation in flutter app.
What is the meaning of confetti?
Confetti are colored small pieces of paper or shining glitter papers, blast popper used to thrown for celebration purpose on any event such as birthday party, bride and bridegroom in their wedding.
Flutter confetti animation
Confetti is an flutter library by using which you can blash different shaped colorful confetti popper animation. You can use this flutter confetti library to show achievements to your flutter app user to celebrate their rewards.

Library installation
1. Create new or Open Existing Flutter Project
I use android studio as my IDE to develop flutter app.
Create new Flutter Project in android studio IDE: File -> New -> New Flutter Project (gave name and create).
Open Existing Flutter Project: File -> Open -> (navigate to project) select the flutter project and open it.
2. Add Dependencies (confetti)
Now, In your project structure you will find a file by name pubspec.yaml open it, and under dependencies section add the library.
dependencies:
  confetti: ^0.7.0
After, adding the above library to download it hit pub get text button you see in android studio IDE or run below command in IDE terminal.
flutter pub get
make sure you are connected to internet.
3. Import it
Now, To add flutter confetti animation widget in your flutter application you have to import it wherever required.
import 'package:confetti/confetti.dart';
How to use Confetti Flutter library
Create CoffettiController object and set duration as 10 seconds.
late ConfettiController _confettiController = ConfettiController(duration: const Duration(seconds: 10));
ConfettiWidget & different properties to customize it.
ConfettiWidget(
            confettiController: _confettiController, //attach object created
            shouldLoop: true,
            blastDirection: -3.14 / 2,
            colors: [Colors.orange, Colors.blue, Colors.green],
            gravity: 0.3,
            numberOfParticles: 10,
            createParticlePath: drawStar,
),
Properties
| Properties | Description |
| confettiController | Controller by which you can control to play, stop or destroy confetti widget popper animation. |
| numberOfParticles | paper praticles should pop while playing. |
| minBlastForce | The Speed of confetti blast, at what minimum force the paper particles should get blasted. |
| maxBlastForce | The Speed of confetti blast, at what maximum force the paper particles should get blasted. |
| gravity | After particles pops, at what gravity force it should fall down. |
| shouldLoop | True or False, should the confetti animation by in continous |
| minimumSize & maximumSize | Define the size of the paper patricles/ |
| colors[] | In how many colors the paper confetti animation should pop up. |
| createParticlePath | Create you own confetti design using Path, and pass the design her. Eg: star pattern path design |
Start and Stop the confetti animation
To play or to stop flutter confetti animation, use it’s controller object.
Eg:
_confettiController.play();

_confettiController.stop();

_confettiController.dispose();
Flutter Confetti Animation Package Library – Complete Source Code
main.dart
import 'dart:math';
import 'package:flutter/material.dart';
import 'package:confetti/confetti.dart';

void main() {
  runApp(const MyApp());
}

class MyApp extends StatelessWidget {
  const MyApp({Key? key}) : super(key: key);
  @override
  Widget build(BuildContext context) {
    return MaterialApp(
      title: 'Flutter Demo',
      theme: ThemeData(
        primarySwatch: Colors.blue,
      ),
      home: const MyHomePage(),
    );
  }
}

class MyHomePage extends StatefulWidget {
  const MyHomePage({Key? key}) : super(key: key);

  @override
  State<MyHomePage> createState() => _MyHomePageState();
}

class _MyHomePageState extends State<MyHomePage> {
  late ConfettiController _confettiController;

  @override
  void initState() {
    // TODO: implement initState
    super.initState();
    _confettiController =
        ConfettiController(duration: const Duration(seconds: 10));
  }

  @override
  void dispose() {
    // TODO: implement dispose
    super.dispose();
    _confettiController.dispose();
  }

  /// A custom Path to paint stars.
  Path drawStar(Size size) {
    // Method to convert degree to radians
    double degToRad(double deg) => deg * (pi / 180.0);
    const numberOfPoints = 5;
    final halfWidth = size.width / 2;
    final externalRadius = halfWidth;
    final internalRadius = halfWidth / 2.5;
    final degreesPerStep = degToRad(360 / numberOfPoints);
    final halfDegreesPerStep = degreesPerStep / 2;
    final path = Path();
    final fullAngle = degToRad(360);
    path.moveTo(size.width, halfWidth);
    for (double step = 0; step < fullAngle; step += degreesPerStep) {
      path.lineTo(halfWidth + externalRadius * cos(step),
          halfWidth + externalRadius * sin(step));
      path.lineTo(halfWidth + internalRadius * cos(step + halfDegreesPerStep),
          halfWidth + internalRadius * sin(step + halfDegreesPerStep));
    }
    path.close();
    return path;
  }

  @override
  Widget build(BuildContext context) {
    return Scaffold(
        body: Center(
      child: Column(
        mainAxisAlignment: MainAxisAlignment.center,
        children: [
          ConfettiWidget(
            confettiController: _confettiController,
            shouldLoop: false,
            blastDirection: -3.14 / 2,
            colors: [Colors.orange, Colors.blue, Colors.green],
            gravity: 0.3,
            numberOfParticles: 10,
            createParticlePath: drawStar,
          ),
          RotatedBox(
              quarterTurns: 2,
              child: Image.network(
                  "https://pngimg.com/uploads/birthday_hat/birthday_hat_PNG36.png")),
          ElevatedButton(
              onPressed: () {
                _confettiController.play();
              },
              child: Text("Play")),
        ],
      ),
    ));
  }
}


