Hi Guys, Welcome to Proto Coders Point, In this flutter tutorial we will learn how to show local notification in flutter by using awesome notification package.
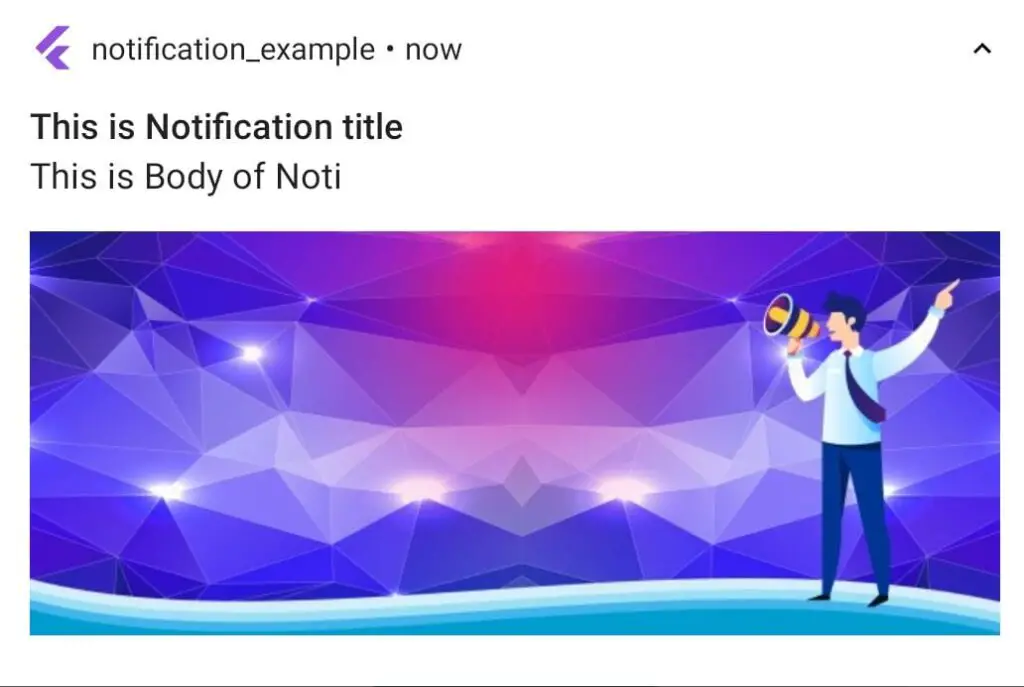
Output of below source code main.dart

About Awesome Notification – flutter package
Flutter awesome notification is a very useful & complete solution, when it comes in implementation of notification in flutter weather it’s a local notification or a push notification in flutter through firebase or any other cloud messaging services.
Let’s have a look into feature of awesome notifications
- Support in creating local notification on Android, iOS and Web.
- With few lines of code integrate firebase push notification.
- Notification can be customized as per needs.
- Add Image, custom sound, Action button & more.
- OnForeground, Background or even when app is force stopped notification can be invoked.
- Scheduled Notifications.
Video Tutorial on Flutter Local Notificaton.
How to show/create local notification in flutter
1. Create a new Flutter Project.
Jus open any existing flutter project or create a new flutter project. In my case I make use of Android Studio IDE to build flutter application.
Android Studio > File > New > New Flutter Project ( give name to project and finish ), your project will be ready.
2. Add Awesome_Notification dependencies.
Now, Navigate to pubspec.yaml file & under dependencies add flutter awesome_notification package.
dependencies: awesome_notifications: ^0.0.6+7
Then hit pub get button on top of right hand side of IDE. It will download the package into your flutter project as external plugin.
3. import the package class.
Then once you have added the dependencies now you have to import it in main.dart file.
import 'package:awesome_notifications/awesome_notifications.dart';
4. initialize the AwesomeNotification class.
Then initialize awesomenotifications().initialize() before running the app runApp(MyApp()); in void main().
void main() async {
  WidgetsFlutterBinding.ensureInitialized();

  AwesomeNotifications().initialize(
      null, // icon for your app notification
      [
        NotificationChannel(
          channelKey: 'key1',
          channelName: 'Proto Coders Point',
          channelDescription: "Notification example",
          defaultColor: Color(0XFF9050DD),
          ledColor: Colors.white,
          playSound: true,
          enableLights:true,
          enableVibration: true
        )
      ]
  );
  runApp(MyApp());
}
NotificationChannel Properties.
| property | type | description |
| channelKey: | String | A Key to identity noti.. |
| channelName: | String | A Name of your channel notification |
| channelDescription: | String | A description about the channel |
| playSound: | bool | turn on notification sound. true/false. |
| soundSource: | String | url or path of sound file |
| enableLights: | bool | enable notification light on/off |
| ledColor: | Color | Set a color for notification led light |
| enableVibration: | bool | phone will vibrate when notification arrive. |
5. Create Notification.
1. [Snippet Code] Notification with only title & body text.
AwesomeNotifications().createNotification(
        content: NotificationContent(
          id: 1,
          channelKey: 'key1',
          title:'Title for your notification',
          body: 'body text/ content'
        )
    );
2. [Snippet Code] Notificaton with title,body & a Image NotificationLayout.
AwesomeNotifications().createNotification(
      content: NotificationContent(
        id: 1,
        channelKey: 'key1',
        title: 'This is Notification title',
        body: 'This is Body of Noti',
        bigPicture: 'https://protocoderspoint.com/wp-content/uploads/2021/05/Monitize-flutter-app-with-google-admob-min-741x486.png',
        notificationLayout: NotificationLayout.BigPicture
      ),
  );
3. [Snippet Code] Scheduled Notification.
 String timezom = await AwesomeNotifications().getLocalTimeZoneIdentifier(); //get time zone you are in

AwesomeNotifications().createNotification(
      content: NotificationContent(
        id: 1,
        channelKey: 'key1',
        title: 'This is Notification title',
        body: 'This is Body of Noti',
        bigPicture: 'https://protocoderspoint.com/wp-content/uploads/2021/05/Monitize-flutter-app-with-google-admob-min-741x486.png',
        notificationLayout: NotificationLayout.BigPicture
      ),
   schedule: NotificationInterval(interval: 2,timeZone: timezom,repeats: true),
  );
CreateNotification class accept 3 parameters content, schedule and List of actionButtons, where content is required to be specified.
In Content: we are passing NotificationContent which then needs some data properties such as id, channelKey, title & body, and there are many other properties which can be used to customize local notification such as showing a image by using bigPicture properties to show image in notification.
Scheduling a local notification in flutter
As you see in above snippet code, we have used schedule property in createNotification(content: …., schedule:…).
You can easily set a scheduled notification by using schedule property inside createNotification class. In schedule you can make use of NotificationInterval to schedule.
schedule – NotificationInterval properties
| property | description |
| interval | initial notification show time in seconds. |
| timeZone | your current location timezone |
| repeat (type bool) | show notification keep repeating after certain seconds, as specified in interval. |
NotificationContent properties
| property | type | Description |
| id | int | A unique number identify notification. |
| channelKey | String | A uniget key to identify the notification. |
| title | String | A header title text. |
| body | String | Text Content |
| displayOnBackground | bool | set weather noti should be displayed when user is not using your app. |
| displayOnForeground | bool | set weather noti should be displayed when user is using your app. |
| icon | String | icon for your app notification. |
| bigPicture | String | url/path of image to show notification thumbnail. |
| autoCancel | bool | noti should go when user top on it. |
| backgroundColor | Color | set a custom color to notify. |
How to open NotificationPage when user click on Notification – flutter
So the below snippet code, will be listening to user click event & when user click on notification app will get opened & user will be navigated to ‘/NotificationPage’.
AwesomeNotifications().actionStream.listen((receivedNotifiction)
{
                  Navigator.of(context).pushNamed(
                    '/navigationPage',
                  );
});
Complete Source Code of Local Notification with Image.
Video Tutorial on Local Notification in flutter.
main.dart
import 'package:flutter/material.dart';
import 'package:awesome_notifications/awesome_notifications.dart';
import 'package:notification_example/NavigationPage.dart';

void main() async {
  WidgetsFlutterBinding.ensureInitialized();
  AwesomeNotifications().initialize(
      null,
      [
        NotificationChannel(
          channelKey: 'key1',
          channelName: 'Proto Coders Point',
          channelDescription: "Notification example",
          defaultColor: Color(0XFF9050DD),
          ledColor: Colors.white,
          playSound: true,
          enableLights:true,
          enableVibration: true
        )
      ]
  );
  runApp(MyApp());
}

class MyApp extends StatelessWidget {
  // This widget is the root of your application.
  @override
  Widget build(BuildContext context) {
    return MaterialApp(
       routes: {
         '/navigationPage' :(context)=>NavigationPage()
       },
      title: 'Flutter Demo',
      theme: ThemeData(
        primarySwatch: Colors.blue,
      ),
      home: MyHomePage(),
    );
  }
}


class MyHomePage extends StatefulWidget {
  @override
  _MyHomePageState createState() => _MyHomePageState();
}

class _MyHomePageState extends State<MyHomePage> {

  @override
  Widget build(BuildContext context) {
    return Scaffold(
      body: Center(
        child: Column(
          mainAxisAlignment: MainAxisAlignment.center,
          children: [
            ElevatedButton(
              onPressed: (){
                Notify();  //localnotification method call below

                   // when user top on notification this listener will work and user will be navigated to notification page
                AwesomeNotifications().actionStream.listen((receivedNotifiction){
                  Navigator.of(context).pushNamed(
                    '/navigationPage',
                  );
                });
              },
              child: Text("Local Notification"),

            ),
          ],
        ),
      ),
    );
  }


}


void Notify()  async{
  String timezom = await AwesomeNotifications().getLocalTimeZoneIdentifier();

 await AwesomeNotifications().createNotification(
      content: NotificationContent(
        id: 1,
        channelKey: 'key1',
        title: 'This is Notification title',
        body: 'This is Body of Noti',
        bigPicture: 'https://protocoderspoint.com/wp-content/uploads/2021/05/Monitize-flutter-app-with-google-admob-min-741x486.png',
        notificationLayout: NotificationLayout.BigPicture
      ),
   schedule: NotificationInterval(interval: 2,timeZone: timezom,repeats: true),
  );


}


