
Hi Guys, Welcome to Proto Coders Point , In this Flutter Tutorial we will learn and Implement Flutter Sensor Library.
Introduction to Flutter Sensors Library
A Flutter plugin to access the accelerometer and gyroscope sensors.
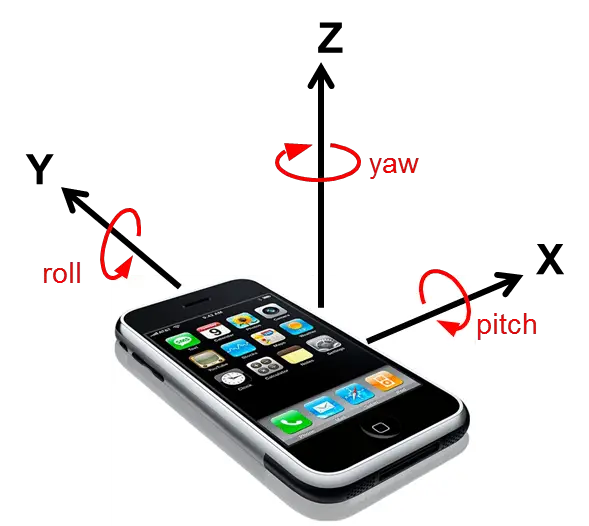
AccelerometerEvent : used to describe the velocity of the device, which also include the effect of gravity in the mobile device, Flutter Accelerometer simply uses accelerometer reading and tell weather the device is currently moving and if moving then in which direction it’s moving. Detail about Accelerometer wiki
UserAccelerometer Event sensor : in function reads the velocity of the device but does not read the gravity.
Gyroscope Event the Reads the Rotations of the device. Gyroscope sensor a device that is used to know the orientation ( portrait or landscape) and also the device angular velocity. Detail about Gyroscope Wiki
Now, As we know basic about those sensor in our mobile device, let’s begin implementation of Flutter Sensor Library.
Flutter Sensors Plugin – Accelerometer and Gyroscope sensors with example
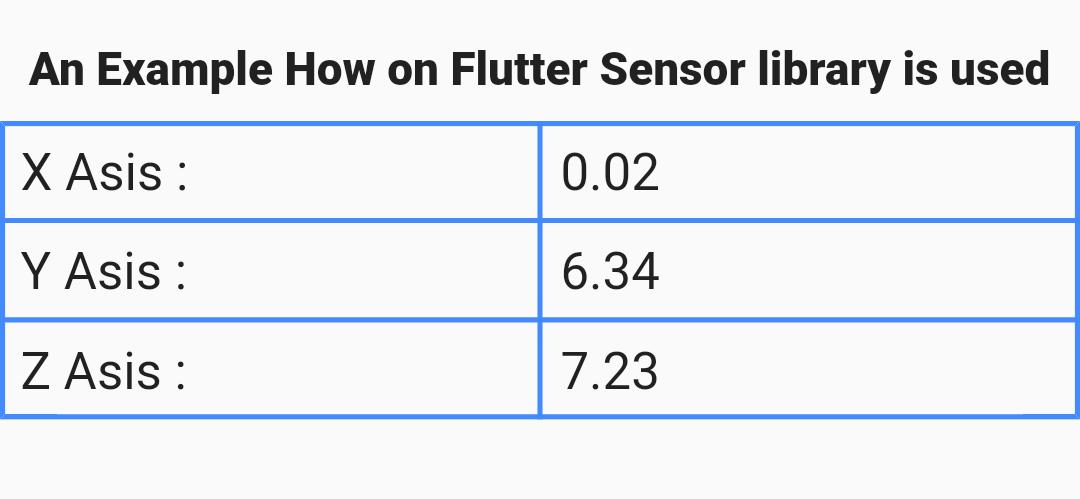
Final Result of the Flutter Sensor Example
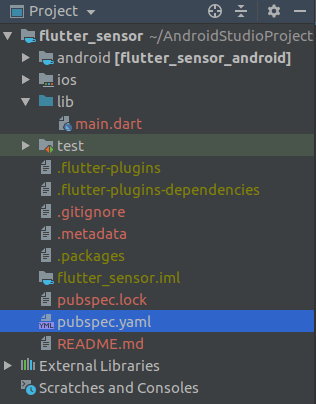
Step 1 : Create a new Flutter Project or open any Existing flutter project
my project Structure
Step 2 : Add the Sensors library in pubspec.yaml file
Get the latest version of Flutter Sensor library from official site here
dependencies:
  sensors: ^0.4.1+7   #//add this flutter sensor plugin
when you add the above sensor dependencies, the sensor packages will get added into your flutter project.
Step 3 : Importing the sensor.dart class
Then, as you have added the sensor dependencies library in your project now you can easily use the feature of sensors class just by importing sensors.dart file wherever required in your project.
import 'package:sensors/sensors.dart';
Step 4 : snippet code example
accelerometerEvents.listen((AccelerometerEvent event) {
  print(event);
});
// [AccelerometerEvent (x: 0.0, y: 9.8, z: 0.0)]

userAccelerometerEvents.listen((UserAccelerometerEvent event) {
  print(event);
});
// [UserAccelerometerEvent (x: 0.0, y: 0.0, z: 0.0)]

gyroscopeEvents.listen((GyroscopeEvent event) {
  print(event);
});
// [GyroscopeEvent (x: 0.0, y: 0.0, z: 0.0)]
Step 5 : Example using Accelerometer Sensor
In this Flutter Tutorial sensor Example i am using Accelerometer sensor to get motion data from the Sensor Device
Here is the Snippet code i have used to get the value of X asis, Y Asis , and Z Asis.
@override
  void initState() {
    // TODO: implement initState
    super.initState();
    accelerometerEvents.listen((AccelerometerEvent event) {
      setState(() {
        x = event.x;
        y = event.y;
        z = event.z;
      });
    });
  }
Here i have override initState() method so that sensor start sending data as soon as Flutter Application starts.
As in the above lines of code accelerometerEvent returns data in a form of double. I have initialized 3 double datatype variable that holds value of X,Y,Z Asis.
Then i am using those variable to display the value in Text widget.
Text(x.toStringAsFixed(2), style: TextStyle(fontSize: 20.0)),
Here, Text widget will print only 2 digits after the decimal point.
For Example : 2.59235471 will get trimmed into 2.59
Complete Code of Flutter Accelerometer and Gyroscope sensor library
Just Copy paste the below lines of Flutter Dart code in main.dart file
main.dart
import 'dart:math';

import 'package:flutter/cupertino.dart';
import 'package:flutter/material.dart';
import 'package:sensors/sensors.dart';

void main() => runApp(MyApp());

class MyApp extends StatelessWidget {
  // This widget is the root of your application.
  @override
  Widget build(BuildContext context) {
    return MaterialApp(
      title: 'Flutter Demo',
      theme: ThemeData(

        primarySwatch: Colors.blue,
      ),
      home: MyHomePage(),
    );
  }
}

class MyHomePage extends StatefulWidget {
  @override
  _MyHomePageState createState() => _MyHomePageState();
}

class _MyHomePageState extends State<MyHomePage> {
  double x, y, z;

  @override
  void initState() {
    // TODO: implement initState
    super.initState();
    accelerometerEvents.listen((AccelerometerEvent event) {
      setState(() {
        x = event.x;
        y = event.y;
        z = event.z;
      });
    }); //get the sensor data and set then to the data types
  }

  @override
  Widget build(BuildContext context) {
    return Scaffold(
        appBar: AppBar(
          title: Text("Flutter Sensor Library"),
        ),
        body: Center(
          child: Column(
            mainAxisAlignment: MainAxisAlignment.center,
            children: <Widget>[
              Padding(
                padding: const EdgeInsets.all(10.0),
                child: Text(
                  "An Example How on Flutter Sensor library is used",
                  style: TextStyle(fontSize: 18.0, fontWeight: FontWeight.w900),
                ),
              ),
              Table(
                border: TableBorder.all(
                    width: 2.0,
                    color: Colors.blueAccent,
                    style: BorderStyle.solid),
                children: [
                  TableRow(
                    children: [
                      Padding(
                        padding: const EdgeInsets.all(8.0),
                        child: Text(
                          "X Asis : ",
                          style: TextStyle(fontSize: 20.0),
                        ),
                      ),
                      Padding(
                        padding: const EdgeInsets.all(8.0),
                        child: Text(x.toStringAsFixed(2), //trim the asis value to 2 digit after decimal point
                            style: TextStyle(fontSize: 20.0)),
                      )
                    ],
                  ),
                  TableRow(
                    children: [
                      Padding(
                        padding: const EdgeInsets.all(8.0),
                        child: Text(
                          "Y Asis : ",
                          style: TextStyle(fontSize: 20.0),
                        ),
                      ),
                      Padding(
                        padding: const EdgeInsets.all(8.0),
                        child: Text(y.toStringAsFixed(2),  //trim the asis value to 2 digit after decimal point
                            style: TextStyle(fontSize: 20.0)),
                      )
                    ],
                  ),
                  TableRow(
                    children: [
                      Padding(
                        padding: const EdgeInsets.all(8.0),
                        child: Text(
                          "Z Asis : ",
                          style: TextStyle(fontSize: 20.0),
                        ),
                      ),
                      Padding(
                        padding: const EdgeInsets.all(8.0),
                        child: Text(z.toStringAsFixed(2),   //trim the asis value to 2 digit after decimal point
                            style: TextStyle(fontSize: 20.0)),
                      )
                    ],
                  ),
                ],
              ),
            ],
          ),
        ));
  }
}
And Here you go your Flutter app is ready to get data from device accelerometer and gyroscope sensor.
")


