Hi Guys, Welcome to Proto Coders Point. In this flutter tutorial will learn how to implement flutter liquid swipe screen which is a similar to any onboarding welcome sceen in flutter.
Liquid Swipe in flutter
Video Tutorial
The flutter liquid swipe is a amazing animation swipe stacked widget, that provide liquid animation while switching/swiping between pages.
By using flutter liquid swipe widget library we can create onboarding screen / welcome intro screen or we can say it as introduction screen in flutter for introviews.
So this flutter widget i.e liquid swipe can be used to create & design a beautiful app welcome screen in flutter, that we can show to a user only once when he launch the applicaton for he very first time to explain user about the app & how to use it. it will be like introguide for user.
Let’s get started
Thus, now we know about this flutter widget let’s begin adding liquid swipe introduction screen in flutter.
Flutter onBoarding screen using liquid swipe widget
Step 1: Create a flutter project
Create a new flutter project or open a existing flutter project where you want to implement liquid swipe library for adding app welcome screen in flutter.
I make use of android studio to develop flutter application
File > New > New Flutter Project
create by filling all the app details.
Step 2: Install liquid swipe dependencies
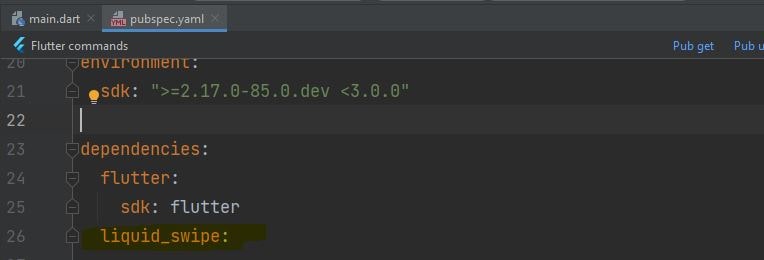
Now, To install dependencies, goto pubspec.yaml file & under dependencies section add…
dependencies:
  liquid_swipe:

After adding, click on 'pub get', it will download the library as external libraries else run flutter pub get in terminal.
Step 3: Import liquid swipe package
Now, you need to import liquid_swipe.dart file where required eg: main.dart.
import 'package:liquid_swipe/liquid_swipe.dart';
add the import statement in main.dart page on the top.
Properties of flutter liquid swipe widget
| Properties | Description |
| pages: | List of pages or screen, that you want to show onboarding |
| initialPage: | Default initial page, from where the first pagee start “0” |
| enableSideReveal: | Reveal slight view about next page, so that user can understand he can swipe, set to true or false. |
| enableLoop: | set to true or false, if you want keep page loop through pages. |
| slideIconWidget: | display a swipe indication, you can add a Arrow icon. |
| liquidController: | To handle some runtime changes by users. |
| onPageChangeCallback: | this finction will get triggered each time when changes occur. |
Read more on official document flutter liquid swipe.
How to use Liquid Swipe Widget
final pages = [
    Container(...),
    Container(...),
    Container(...),
  ];
Above we have just defined a array of pages, that contains list of Container Widget.
Now you just need to use this array pages in LiquidSwipe widget as below.
 @override
  Widget build(BuildContext context) {
    return new MaterialApp(
      home: Builder(
          builder: (context) =>
              LiquidSwipe(
                  pages: pages
              )),
    );
  }
Complete Source Code – How to implement Liquid Swiper in flutter
main.dart
import 'package:flutter/material.dart';
import 'package:liquid_swipe/liquid_swipe.dart';

void main() {
  runApp(const MyApp());
}

class MyApp extends StatelessWidget {
  const MyApp({Key? key}) : super(key: key);

  @override
  Widget build(BuildContext context) {
    return MaterialApp(
      title: 'Flutter Demo',
      theme: ThemeData(
        primarySwatch: Colors.blue,
      ),
      home: const MyHomePage(),
    );
  }
}

class MyHomePage extends StatefulWidget {
  const MyHomePage({Key? key}) : super(key: key);

  @override
  State<MyHomePage> createState() => _MyHomePageState();
}

class _MyHomePageState extends State<MyHomePage> {
  @override
  Widget build(BuildContext context) {
    return Scaffold(
      body: LiquidSwipe(
        enableSideReveal: true,
        slideIconWidget: const Icon(
          Icons.arrow_back,
          color: Colors.white,
        ),
        pages: [
          Container(
            color:Colors.black,
            child: Center(
              child: Column(
                mainAxisAlignment: MainAxisAlignment.center,
                children: [
                  Center(child: Image.asset('assets/logo.png')),
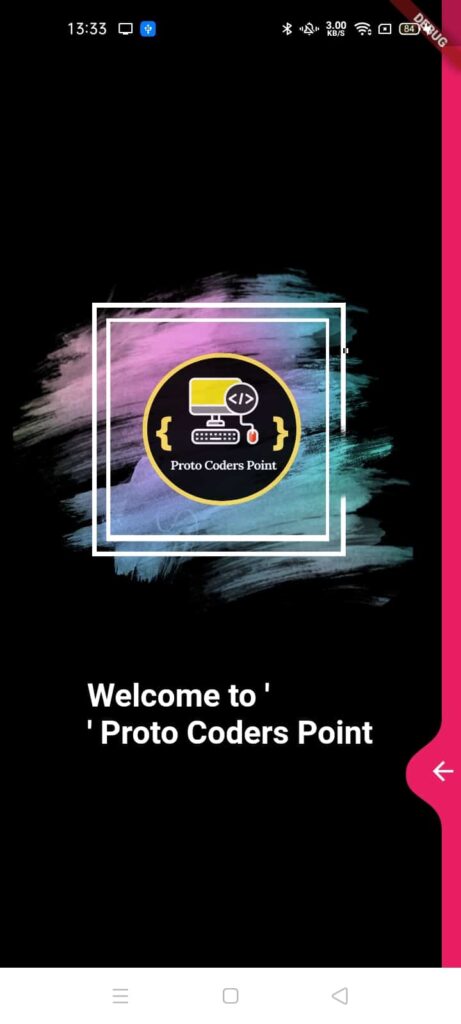
                  Text('Welcome to \'\n\' Proto Coders Point',style: TextStyle(color: Colors.white,fontSize: 25,fontWeight: FontWeight.bold),)
                ],
              ),
            ),
          ),
          Container(
            color:Colors.pink,
            child: Center(
              child: Column(
                mainAxisAlignment: MainAxisAlignment.center,
                children: [
                  Center(child: Image.asset('assets/logo.png')),
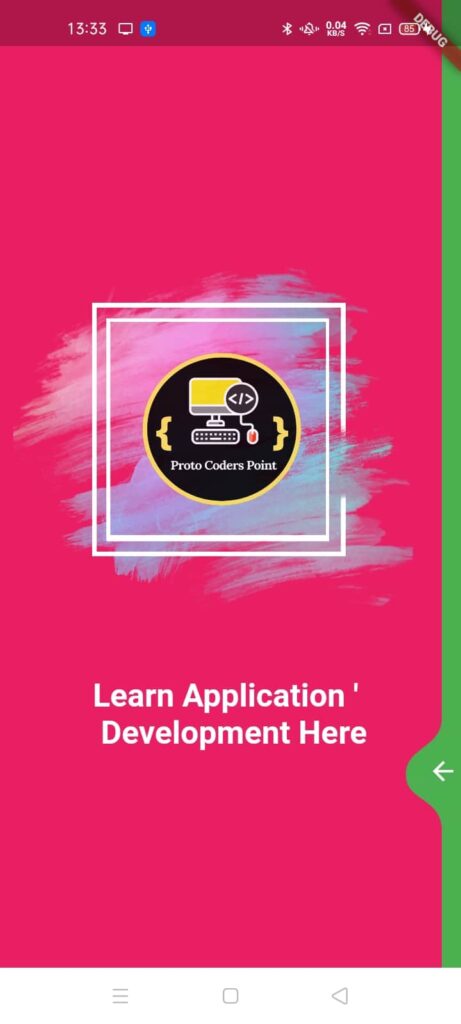
                  Text('Learn Application \'\n\ Development Here',style: TextStyle(color: Colors.white,fontSize: 25,fontWeight: FontWeight.bold),)
                ],
              ),
            ),
          ),
          Container(
            color:Colors.green,
            child: Center(
              child: Column(
                mainAxisAlignment: MainAxisAlignment.center,
                children: [
                  Center(child: Image.asset('assets/youtube.png')),
                  Text('Subscribe us now ',style: TextStyle(color: Colors.white,fontSize: 25,fontWeight: FontWeight.bold),)
                ],
              ),
            ),
          ),
        ],
      )
    );
  }
}
output


