viewflipper android
viewflipper android

Hi Guys, Welcome to Proto Coders Point, In this android tutorial we will learn & implement android viewFlipper with example.

What is viewflipper in android?

ViewFlipper in android is a layout view that accept more then one view (like Imageview,TextView or any other layout vew) but display only one view at a time & thus we can use viewflipper to transition from one view to another with proper animation effect while switching smoothy between view in view flipper.

In Android, view flippers are mostly used as automatic image slider in android androidhive, the easiest way to show image slider to the app users.

android ViewFlipper Example

image slider using viewflipper android

Note: Android viewFlipper & ViewSwitcher both work same but the difference is:
viewSwitcher: can’t home more then 2 view child.
viewFlipper: can hold two or more child view at a same time.

Basic ViewFlipper XML code Example

In below xml snippet code you see i have view Flipper that has 3 view as a child of it, you can add as many view you want to flip.

Plain text
Copy to clipboard
Open code in new window
EnlighterJS 3 Syntax Highlighter
<ViewFlipper
android:id="@+id/ViewFlipper1"
android:layout_width="match_parent"
android:layout_height="wrap_content">
<!-- You can add as many view you want to flip -->
<!-- I have created 3 TextView under viewFipper -->
<TextView
android:layout_width="wrap_content"
android:layout_height="wrap_content"
android:text="This is TextView 1"/>
<TextView
android:layout_width="wrap_content"
android:layout_height="wrap_content"
android:text="This is TextView 2"/>
<TextView
android:layout_width="wrap_content"
android:layout_height="wrap_content"
android:text="This is TextView 3"/>
</ViewFlipper>
<ViewFlipper android:id="@+id/ViewFlipper1" android:layout_width="match_parent" android:layout_height="wrap_content"> <!-- You can add as many view you want to flip --> <!-- I have created 3 TextView under viewFipper --> <TextView android:layout_width="wrap_content" android:layout_height="wrap_content" android:text="This is TextView 1"/> <TextView android:layout_width="wrap_content" android:layout_height="wrap_content" android:text="This is TextView 2"/> <TextView android:layout_width="wrap_content" android:layout_height="wrap_content" android:text="This is TextView 3"/> </ViewFlipper>
<ViewFlipper
       android:id="@+id/ViewFlipper1"
       android:layout_width="match_parent"
       android:layout_height="wrap_content">

       <!-- You can add as many view you want to flip -->
       <!-- I have created 3 TextView under viewFipper -->
       <TextView
           android:layout_width="wrap_content"
           android:layout_height="wrap_content"
           android:text="This is TextView 1"/>

       <TextView
           android:layout_width="wrap_content"
           android:layout_height="wrap_content"
           android:text="This is TextView 2"/>

       <TextView
           android:layout_width="wrap_content"
           android:layout_height="wrap_content"
           android:text="This is TextView 3"/>

   </ViewFlipper>

Steps to Implement ViewFlipper in android

Time needed: 2 minutes

Below i step by step process to adding view flipper android

  1. Create View Flipper reference

    create a reference object of view flipper class by using findViewById().

    ViewFlipper viewFlipper = (ViewFlipper) findViewById(R.id.ViewFlipper1);

  2. Declare Animation object

    Then Declare 2 Animation object using Animation Utilities & LoadAnimation default Animation effect.

    Animation out = AnimationUtils.loadAnimation(this, android.R.anim.slide_out_right);
    Animation in = AnimationUtils.loadAnimation(this, android.R.anim.slide_in_left);

  3. Set in-Animation

    Now set In-animation to flipper using viewflipper.setInAnimation(in);

    viewFlipper.setInAnimation(in);

  4. Set Out-Animation

    Now set out-animation to flipper using viewflipper.setOutAnimation(out);

    viewFlipper.setOutAnimation(out);

  5. set timer to change view

    set the flip Interval timer to change to next view.

    viewFlipper.setFlipInterval(3000); //in millisecond

  6. finally

    Use autoStart or manually startFlipping

    simpleViewFlipper.setAutoStart(true);
    simpleViewFlipper.startFlipping();

Let’s look into some useful Method of ViewFlipper

Here are some view Flipper method that are used to manage the vie

1. startFlipping(): Start the timer to cycle through view flipper child views, you can call this method on events such as button click or some other event.
Eg: Start cycler of view flipper android

Plain text
Copy to clipboard
Open code in new window
EnlighterJS 3 Syntax Highlighter
ViewFlipper viewFlipper = (ViewFlipper)findViewById(R.id.simpleViewFlipper);
viewFlipper.startFlipping(); // start the view cycle
ViewFlipper viewFlipper = (ViewFlipper)findViewById(R.id.simpleViewFlipper); viewFlipper.startFlipping(); // start the view cycle
ViewFlipper viewFlipper = (ViewFlipper)findViewById(R.id.simpleViewFlipper);
viewFlipper.startFlipping();   // start the view cycle


2. stopFlipping(): used to stop flipping of child view, when we no longer need to see the flip view of the child layout. call stop flipping method on button press or any other event.

Eg:

Plain text
Copy to clipboard
Open code in new window
EnlighterJS 3 Syntax Highlighter
ViewFlipper viewFlipper = (ViewFlipper)findViewById(R.id.simpleViewFlipper);
viewFlipper.stopFlipping(); //stop it
ViewFlipper viewFlipper = (ViewFlipper)findViewById(R.id.simpleViewFlipper); viewFlipper.stopFlipping(); //stop it
ViewFlipper viewFlipper = (ViewFlipper)findViewById(R.id.simpleViewFlipper);
viewFlipper.stopFlipping();   //stop it 

3. setFlipInterval(milliseconds): The time before switching to next child view in milliseconds.

Eg: as you see we have set the flip interval to 2 second : 2000 milliseconds before switching to next view.

Plain text
Copy to clipboard
Open code in new window
EnlighterJS 3 Syntax Highlighter
ViewFlipper viewFlipper = (ViewFlipper)findViewById(R.id.simpleViewFlipper);
viewFlipper.setFlipInterval(2000); //interval of 2 secends
ViewFlipper viewFlipper = (ViewFlipper)findViewById(R.id.simpleViewFlipper); viewFlipper.setFlipInterval(2000); //interval of 2 secends
ViewFlipper viewFlipper = (ViewFlipper)findViewById(R.id.simpleViewFlipper);
viewFlipper.setFlipInterval(2000);  //interval of 2 secends

or you can set Interval directly through xml

Plain text
Copy to clipboard
Open code in new window
EnlighterJS 3 Syntax Highlighter
<ViewFlipper
android:id="@+id/simpleViewFlipper"
android:layout_width="match_parent"
android:flipInterval="2000"
android:layout_height="wrap_content">
</ViewFlipper>
<ViewFlipper android:id="@+id/simpleViewFlipper" android:layout_width="match_parent" android:flipInterval="2000" android:layout_height="wrap_content"> </ViewFlipper>
 <ViewFlipper
        android:id="@+id/simpleViewFlipper"
        android:layout_width="match_parent"
        android:flipInterval="2000"
        android:layout_height="wrap_content">
 </ViewFlipper>

4. setAutoStart(boolean): This method will automatically call startFlipping() method. when the app loads.

Eg:

Plain text
Copy to clipboard
Open code in new window
EnlighterJS 3 Syntax Highlighter
ViewFlipper viewFlipper = (ViewFlipper)findViewById(R.id.simpleViewFlipper);
viewFlipper.setAutoStart(true);
ViewFlipper viewFlipper = (ViewFlipper)findViewById(R.id.simpleViewFlipper); viewFlipper.setAutoStart(true);
ViewFlipper viewFlipper = (ViewFlipper)findViewById(R.id.simpleViewFlipper);
viewFlipper.setAutoStart(true);

or else directly start from xml using autoStart

Plain text
Copy to clipboard
Open code in new window
EnlighterJS 3 Syntax Highlighter
<ViewFlipper
android:id="@+id/simpleViewFlipper"
android:layout_width="match_parent"
android:autoStart="true"
android:layout_height="wrap_content">
</ViewFlipper>
<ViewFlipper android:id="@+id/simpleViewFlipper" android:layout_width="match_parent" android:autoStart="true" android:layout_height="wrap_content"> </ViewFlipper>
    <ViewFlipper
        android:id="@+id/simpleViewFlipper"
        android:layout_width="match_parent"
        android:autoStart="true"
        android:layout_height="wrap_content">
    </ViewFlipper>

5. isAutoStart(): used to check if the viewflipper is in autoStart mode. This return boolean type value either true or false.
it is true if the view get automatically start else return false.

Plain text
Copy to clipboard
Open code in new window
EnlighterJS 3 Syntax Highlighter
ViewFlipper viewFlipper = (ViewFlipper)findViewById(R.id.simpleViewFlipper);
if(viewFlipper.isAutoStart()){
// if true
}else{
// if false
}
ViewFlipper viewFlipper = (ViewFlipper)findViewById(R.id.simpleViewFlipper); if(viewFlipper.isAutoStart()){ // if true }else{ // if false }
ViewFlipper viewFlipper = (ViewFlipper)findViewById(R.id.simpleViewFlipper);
       
       if(viewFlipper.isAutoStart()){
            // if true
        }else{
            // if false
        }

6. isFlipping(): used to check if viewFlipping is flipping or no. This method returns either true or false

Eg:

Plain text
Copy to clipboard
Open code in new window
EnlighterJS 3 Syntax Highlighter
ViewFlipper viewFlipper = (ViewFlipper)findViewById(R.id.simpleViewFlipper);
Boolean isFlipOn = viewFlipper.isFlipping();
ViewFlipper viewFlipper = (ViewFlipper)findViewById(R.id.simpleViewFlipper); Boolean isFlipOn = viewFlipper.isFlipping();
ViewFlipper viewFlipper = (ViewFlipper)findViewById(R.id.simpleViewFlipper);
Boolean isFlipOn = viewFlipper.isFlipping();

7. showNext(): used to manually switch to next child view of viewfliper on some event like button pressed.

Eg:

Plain text
Copy to clipboard
Open code in new window
EnlighterJS 3 Syntax Highlighter
ViewFlipper viewFlipper = (ViewFlipper)findViewById(R.id.simpleViewFlipper);
btnNext.setOnClickListener(new View.OnClickListener() {
@Override
public void onClick(View view) {
viewFlipper.showNext(); //go to next child view on button click
}
});
ViewFlipper viewFlipper = (ViewFlipper)findViewById(R.id.simpleViewFlipper); btnNext.setOnClickListener(new View.OnClickListener() { @Override public void onClick(View view) { viewFlipper.showNext(); //go to next child view on button click } });
 ViewFlipper viewFlipper = (ViewFlipper)findViewById(R.id.simpleViewFlipper);
      
 btnNext.setOnClickListener(new View.OnClickListener() {
           @Override
           public void onClick(View view) {
               viewFlipper.showNext(); //go to next child view on button click
           }
       });

8. showPrevious(): used to go back to previous child view

Eg: when button press go back to previous child view

Plain text
Copy to clipboard
Open code in new window
EnlighterJS 3 Syntax Highlighter
ViewFlipper viewFlipper = (ViewFlipper)findViewById(R.id.simpleViewFlipper);
btnPrevious.setOnClickListener(new View.OnClickListener() {
@Override
public void onClick(View view) {
viewFlipper.showPrevious(); // go to previous child
}
});
ViewFlipper viewFlipper = (ViewFlipper)findViewById(R.id.simpleViewFlipper); btnPrevious.setOnClickListener(new View.OnClickListener() { @Override public void onClick(View view) { viewFlipper.showPrevious(); // go to previous child } });
 ViewFlipper viewFlipper = (ViewFlipper)findViewById(R.id.simpleViewFlipper);
       
 btnPrevious.setOnClickListener(new View.OnClickListener() {
           @Override
           public void onClick(View view) {
               viewFlipper.showPrevious();  // go to previous child
           }
       });

9. LoadAnimation(context,anim effect id): Used to define a Animation effect using AnimationUtilities.

Eg:

Plain text
Copy to clipboard
Open code in new window
EnlighterJS 3 Syntax Highlighter
// Declare in and out animations and load them using AnimationUtils class
Animation outAnim = AnimationUtils.loadAnimation(this, android.R.anim.slide_out_right);
Animation inAnim = AnimationUtils.loadAnimation(this, android.R.anim.slide_in_left);
// Declare in and out animations and load them using AnimationUtils class Animation outAnim = AnimationUtils.loadAnimation(this, android.R.anim.slide_out_right); Animation inAnim = AnimationUtils.loadAnimation(this, android.R.anim.slide_in_left);
       // Declare in and out animations and load them using AnimationUtils class
        Animation outAnim = AnimationUtils.loadAnimation(this, android.R.anim.slide_out_right);
        Animation inAnim = AnimationUtils.loadAnimation(this, android.R.anim.slide_in_left);


10. setInAnimation(inAnim) & setOutAnimation(outAnim): used to set Animation effect to viewflipper which switching between child.

Plain text
Copy to clipboard
Open code in new window
EnlighterJS 3 Syntax Highlighter
// set the animation type to ViewFlipper
viewFlipper.setInAnimation(inAnim);
viewFlipper.setOutAnimation(outAnim);
// set the animation type to ViewFlipper viewFlipper.setInAnimation(inAnim); viewFlipper.setOutAnimation(outAnim);
       // set the animation type to ViewFlipper
        viewFlipper.setInAnimation(inAnim);
        viewFlipper.setOutAnimation(outAnim);

11. addView(View child): Using addView you can easily add new child view to viewFlipper at RunTime of your android app dynamically.

Eg:

Plain text
Copy to clipboard
Open code in new window
EnlighterJS 3 Syntax Highlighter
ViewFlipper viewFlipper = (ViewFlipper)findViewById(R.id.simpleViewFlipper);
TextView t1 = new TextView(this);
t1.setText("This is Set text addview view flipper example");
ImageView imv2 = new ImageView(this);
imv2.setImageResource(R.drawable.image1);
//adding new view at runtime to viewflipper
viewFlipper.addView(t1);
viewFlipper.addView(imv2);
ViewFlipper viewFlipper = (ViewFlipper)findViewById(R.id.simpleViewFlipper); TextView t1 = new TextView(this); t1.setText("This is Set text addview view flipper example"); ImageView imv2 = new ImageView(this); imv2.setImageResource(R.drawable.image1); //adding new view at runtime to viewflipper viewFlipper.addView(t1); viewFlipper.addView(imv2);
       ViewFlipper viewFlipper = (ViewFlipper)findViewById(R.id.simpleViewFlipper);

        TextView t1 = new TextView(this);
        t1.setText("This is Set text addview view flipper example");
        
        ImageView imv2 = new ImageView(this);
        imv2.setImageResource(R.drawable.image1);

        //adding new view at runtime to viewflipper
        viewFlipper.addView(t1);
        viewFlipper.addView(imv2);

Complete Source Code on ViewFlipper in android

activity_main.xml

Plain text
Copy to clipboard
Open code in new window
EnlighterJS 3 Syntax Highlighter
<LinearLayout xmlns:android="http://schemas.android.com/apk/res/android"
android:layout_width="match_parent"
android:layout_height="match_parent"
android:orientation="vertical">
<ViewFlipper
android:id="@+id/viewFlipperId"
android:layout_width="match_parent"
android:layout_height="wrap_content">
</ViewFlipper>
<Button
android:id="@+id/buttonNext"
android:layout_width="wrap_content"
android:layout_height="wrap_content"
android:layout_gravity="center"
android:layout_marginTop="150dp"
android:background="#005"
android:text="NEXT"
android:textColor="#fff"
android:textStyle="bold" />
</LinearLayout>
<LinearLayout xmlns:android="http://schemas.android.com/apk/res/android" android:layout_width="match_parent" android:layout_height="match_parent" android:orientation="vertical"> <ViewFlipper android:id="@+id/viewFlipperId" android:layout_width="match_parent" android:layout_height="wrap_content"> </ViewFlipper> <Button android:id="@+id/buttonNext" android:layout_width="wrap_content" android:layout_height="wrap_content" android:layout_gravity="center" android:layout_marginTop="150dp" android:background="#005" android:text="NEXT" android:textColor="#fff" android:textStyle="bold" /> </LinearLayout>
<LinearLayout xmlns:android="http://schemas.android.com/apk/res/android"
    android:layout_width="match_parent"
    android:layout_height="match_parent"
    android:orientation="vertical">

    
    <ViewFlipper
        android:id="@+id/viewFlipperId"
        android:layout_width="match_parent"
        android:layout_height="wrap_content">
    </ViewFlipper>


    <Button
        android:id="@+id/buttonNext"
        android:layout_width="wrap_content"
        android:layout_height="wrap_content"
        android:layout_gravity="center"
        android:layout_marginTop="150dp"
        android:background="#005"
        android:text="NEXT"
        android:textColor="#fff"
        android:textStyle="bold" />

</LinearLayout>

MainActivity.java

Plain text
Copy to clipboard
Open code in new window
EnlighterJS 3 Syntax Highlighter
package com.example.viewflipper;
import androidx.appcompat.app.AppCompatActivity;
import android.os.Bundle;
import android.view.View;
import android.view.animation.Animation;
import android.view.animation.AnimationUtils;
import android.widget.Button;
import android.widget.ImageView;
import android.widget.TextView;
import android.widget.ViewFlipper;
public class MainActivity extends AppCompatActivity {
private ViewFlipper simpleViewFlipper;
Button btnNext;
//array list of images from drawable
int[] images = {R.drawable.image1, R.drawable.image2, R.drawable.image3, R.drawable.image4, R.drawable.image5,R.drawable.image6}; // array of images
ImageView imageview;
@Override
protected void onCreate(Bundle savedInstanceState) {
super.onCreate(savedInstanceState);
setContentView(R.layout.activity_main);
btnNext = (Button) findViewById(R.id.buttonNext);
simpleViewFlipper = (ViewFlipper) findViewById(R.id.viewFlipperId);
//create imageview view and add the view to viewflipper
for(int i = 0;i<images.length;i++){
imageview = new ImageView(this);
imageview.setImageResource(images[i]);
simpleViewFlipper.addView(imageview);
}
// Declare in and out animations and load them using AnimationUtils class
Animation out = AnimationUtils.loadAnimation(this, android.R.anim.slide_out_right);
Animation in = AnimationUtils.loadAnimation(this, android.R.anim.slide_in_left);
// set the animation type to ViewFlipper
simpleViewFlipper.setInAnimation(in);
simpleViewFlipper.setOutAnimation(out);
simpleViewFlipper.setFlipInterval(1000);
// set auto start for flipping between views
simpleViewFlipper.setAutoStart(true);
simpleViewFlipper.startFlipping();
btnNext.setOnClickListener(new View.OnClickListener() {
public void onClick(View v) {
// TODO Auto-generated method stub
// show the next view of ViewFlipper
simpleViewFlipper.showNext();
}
});
}
}
package com.example.viewflipper; import androidx.appcompat.app.AppCompatActivity; import android.os.Bundle; import android.view.View; import android.view.animation.Animation; import android.view.animation.AnimationUtils; import android.widget.Button; import android.widget.ImageView; import android.widget.TextView; import android.widget.ViewFlipper; public class MainActivity extends AppCompatActivity { private ViewFlipper simpleViewFlipper; Button btnNext; //array list of images from drawable int[] images = {R.drawable.image1, R.drawable.image2, R.drawable.image3, R.drawable.image4, R.drawable.image5,R.drawable.image6}; // array of images ImageView imageview; @Override protected void onCreate(Bundle savedInstanceState) { super.onCreate(savedInstanceState); setContentView(R.layout.activity_main); btnNext = (Button) findViewById(R.id.buttonNext); simpleViewFlipper = (ViewFlipper) findViewById(R.id.viewFlipperId); //create imageview view and add the view to viewflipper for(int i = 0;i<images.length;i++){ imageview = new ImageView(this); imageview.setImageResource(images[i]); simpleViewFlipper.addView(imageview); } // Declare in and out animations and load them using AnimationUtils class Animation out = AnimationUtils.loadAnimation(this, android.R.anim.slide_out_right); Animation in = AnimationUtils.loadAnimation(this, android.R.anim.slide_in_left); // set the animation type to ViewFlipper simpleViewFlipper.setInAnimation(in); simpleViewFlipper.setOutAnimation(out); simpleViewFlipper.setFlipInterval(1000); // set auto start for flipping between views simpleViewFlipper.setAutoStart(true); simpleViewFlipper.startFlipping(); btnNext.setOnClickListener(new View.OnClickListener() { public void onClick(View v) { // TODO Auto-generated method stub // show the next view of ViewFlipper simpleViewFlipper.showNext(); } }); } }
package com.example.viewflipper;

import androidx.appcompat.app.AppCompatActivity;

import android.os.Bundle;
import android.view.View;
import android.view.animation.Animation;
import android.view.animation.AnimationUtils;
import android.widget.Button;
import android.widget.ImageView;
import android.widget.TextView;
import android.widget.ViewFlipper;

public class MainActivity extends AppCompatActivity {

    private ViewFlipper simpleViewFlipper;
    Button btnNext;
    
    //array list of images from drawable
    int[] images = {R.drawable.image1, R.drawable.image2, R.drawable.image3, R.drawable.image4, R.drawable.image5,R.drawable.image6};     // array of images
    
    ImageView imageview;
    @Override
    protected void onCreate(Bundle savedInstanceState) {
        super.onCreate(savedInstanceState);
        setContentView(R.layout.activity_main);
        btnNext = (Button) findViewById(R.id.buttonNext);
        simpleViewFlipper = (ViewFlipper) findViewById(R.id.viewFlipperId);

       //create imageview view and add the view to viewflipper
        for(int i = 0;i<images.length;i++){
            imageview = new ImageView(this);
            imageview.setImageResource(images[i]);
            simpleViewFlipper.addView(imageview);
        }


        // Declare in and out animations and load them using AnimationUtils class
        Animation out = AnimationUtils.loadAnimation(this, android.R.anim.slide_out_right);
        Animation in = AnimationUtils.loadAnimation(this, android.R.anim.slide_in_left);


        // set the animation type to ViewFlipper
        simpleViewFlipper.setInAnimation(in);
        simpleViewFlipper.setOutAnimation(out);

        simpleViewFlipper.setFlipInterval(1000);
        // set auto start for flipping between views
        simpleViewFlipper.setAutoStart(true);
        simpleViewFlipper.startFlipping();

        btnNext.setOnClickListener(new View.OnClickListener() {

            public void onClick(View v) {
                // TODO Auto-generated method stub
                // show the next view of ViewFlipper
                simpleViewFlipper.showNext();
            }
        });
    }
}

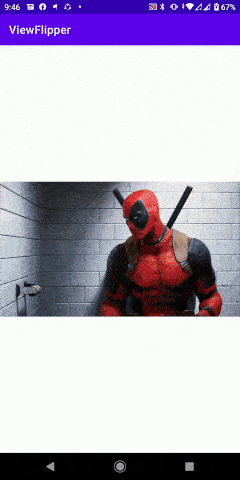
output – android viewFlipper Example

viewflipper image slider
View Flipper android