
")


Hi Guys Welcome to Proto Coders Point, In this article we will learn how to add calender in your flutter application.
Calender Widget in Flutter App
Using Calender you can organize the day, week and month, you can also check religious or any social event in flutter calender widget, It keeps a data of event or festival event that comes on a particular date or ant special event on calender.
In this tutorial article, we will check out how to use table_calender widget to display calender widget in flutter application.
So as you know that flutter team, keeps on work to build best UI widget so that developer work becames much easier, So our Flutter team has provided a best simple calender by name “Table_Calender“ that makes easy to display a calender in our flutter app.
The table calender widget in flutter is a powerful widget which comes with many feature, customizable feature and even such a gesture and animation etc.
Feature of table calender widget
- Easy to use API.
- UI can be controlled using Custom Builder calender
- Beautiful animation feature.
- Gesture Detector
- Has Multiple calender formats like year, month, week.
- It has vertical auto sizing.
So, Let’s begin adding calender in flutter app
Step 1: Create a new Flutter Project
OffCourse, you need to open an existing flutter where you want to add calender or create a new flutter project,
Start your favorite IDE, In my case i make use of Android studio to build flutter apps.
New -> New Flutter Project -> Give a project title for example “Flutter Calender Example”.
Step 2 : Adding Dependencies
In your flutter project structure, you will file a file by name ‘pubspec.yaml’ open it, you need to add the dependencies ‘table_calender’ .
As shown in below screenshot
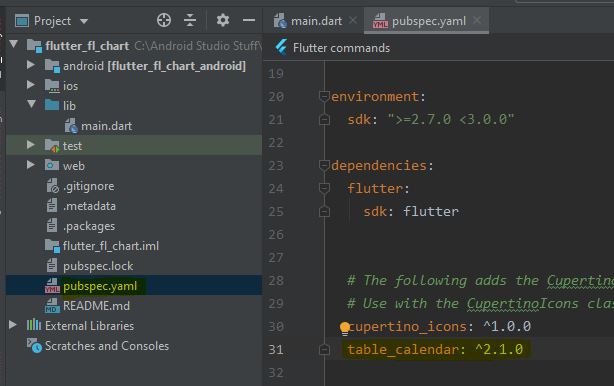
for the latest version of this package, kindly visit official site : https://pub.dev/packages/table_calendar/install
Step 3: Importing the calender dart file
Then now, once you have added the dependencies then you need to import the library/packge of calender where you want to use/display calender.
import 'package:table_calendar/table_calendar.dart';
Step 4: Code Process Explaination
1 : First we need to create a object for CalenderController that controls all the evven/action happening in calender & you need to initialize it in initState().
class _HomeCalendarPageState extends State<HomeCalendarPage> {
  CalendarController _controller;   //controller creation

  @override
  void initState() {
    super.initState();
    _controller = CalendarController();  //initializing it
  }Flutt
2 : Now you need to use calenderWidget i.e TableCalender as a child of Scafford Widget.
Scaffold(
    body: SingleChildScrollView(
      child: Column(
        children: <Widget>[
          TableCalendar()   // snippet code   // you need to customize it as per your UI // check below for full source code
        ],
      ),
    ),
above code is just a snipet code, you need to customize it as per you UI needs.
Flutter Calender Widget – Table Calender – Full Source Code
main.dart
Copy paste below code in main.dart file of your flutter project
import 'package:flutter/material.dart';
import 'package:table_calendar/table_calendar.dart';

void main() => runApp(MyApp());

class MyApp extends StatelessWidget {
  @override
  Widget build(BuildContext context) {
    return MaterialApp(
      theme: ThemeData(
        primarySwatch: Colors.green,
      ),
      home: HomeCalendarPage(),
    );
  }
}

class HomeCalendarPage extends StatefulWidget {
  @override
  _HomeCalendarPageState createState() => _HomeCalendarPageState();
}

class _HomeCalendarPageState extends State<HomeCalendarPage> {
  CalendarController _controller;

  @override
  void initState() {
    super.initState();
    _controller = CalendarController();
  }

  @override
  Widget build(BuildContext context) {
    return Scaffold(
      appBar: AppBar(
        title: Text('Flutter Calendar Example'),
      ),
      body: SingleChildScrollView(
        child: Column(
          crossAxisAlignment: CrossAxisAlignment.start,
          children: <Widget>[
            TableCalendar(
              initialCalendarFormat: CalendarFormat.month,
              calendarStyle: CalendarStyle(
                  todayColor: Colors.blue,
                  selectedColor: Theme.of(context).primaryColor,
                  todayStyle: TextStyle(
                      fontWeight: FontWeight.bold,
                      fontSize: 22.0,
                      color: Colors.white)
              ),
              headerStyle: HeaderStyle(
                centerHeaderTitle: true,
                formatButtonDecoration: BoxDecoration(
                  color: Colors.brown,
                  borderRadius: BorderRadius.circular(22.0),
                ),
                formatButtonTextStyle: TextStyle(color: Colors.white),
                formatButtonShowsNext: false,
              ),
              startingDayOfWeek: StartingDayOfWeek.monday,
              onDaySelected: (date, events,e) {
                print(date.toUtc());
              },

              builders: CalendarBuilders(
                selectedDayBuilder: (context, date, events) => Container(
                    margin: const EdgeInsets.all(5.0),
                    alignment: Alignment.center,
                    decoration: BoxDecoration(
                        color: Theme.of(context).primaryColor,
                        borderRadius: BorderRadius.circular(8.0)),
                    child: Text(
                      date.day.toString(),
                      style: TextStyle(color: Colors.white),
                    )),
                todayDayBuilder: (context, date, events) => Container(
                    margin: const EdgeInsets.all(5.0),
                    alignment: Alignment.center,
                    decoration: BoxDecoration(
                        color: Colors.blue,
                        borderRadius: BorderRadius.circular(8.0)),
                    child: Text(
                      date.day.toString(),
                      style: TextStyle(color: Colors.white),
                    )),
              ),
              calendarController: _controller,
            )
          ],
        ),
      ),
    );
  }
}
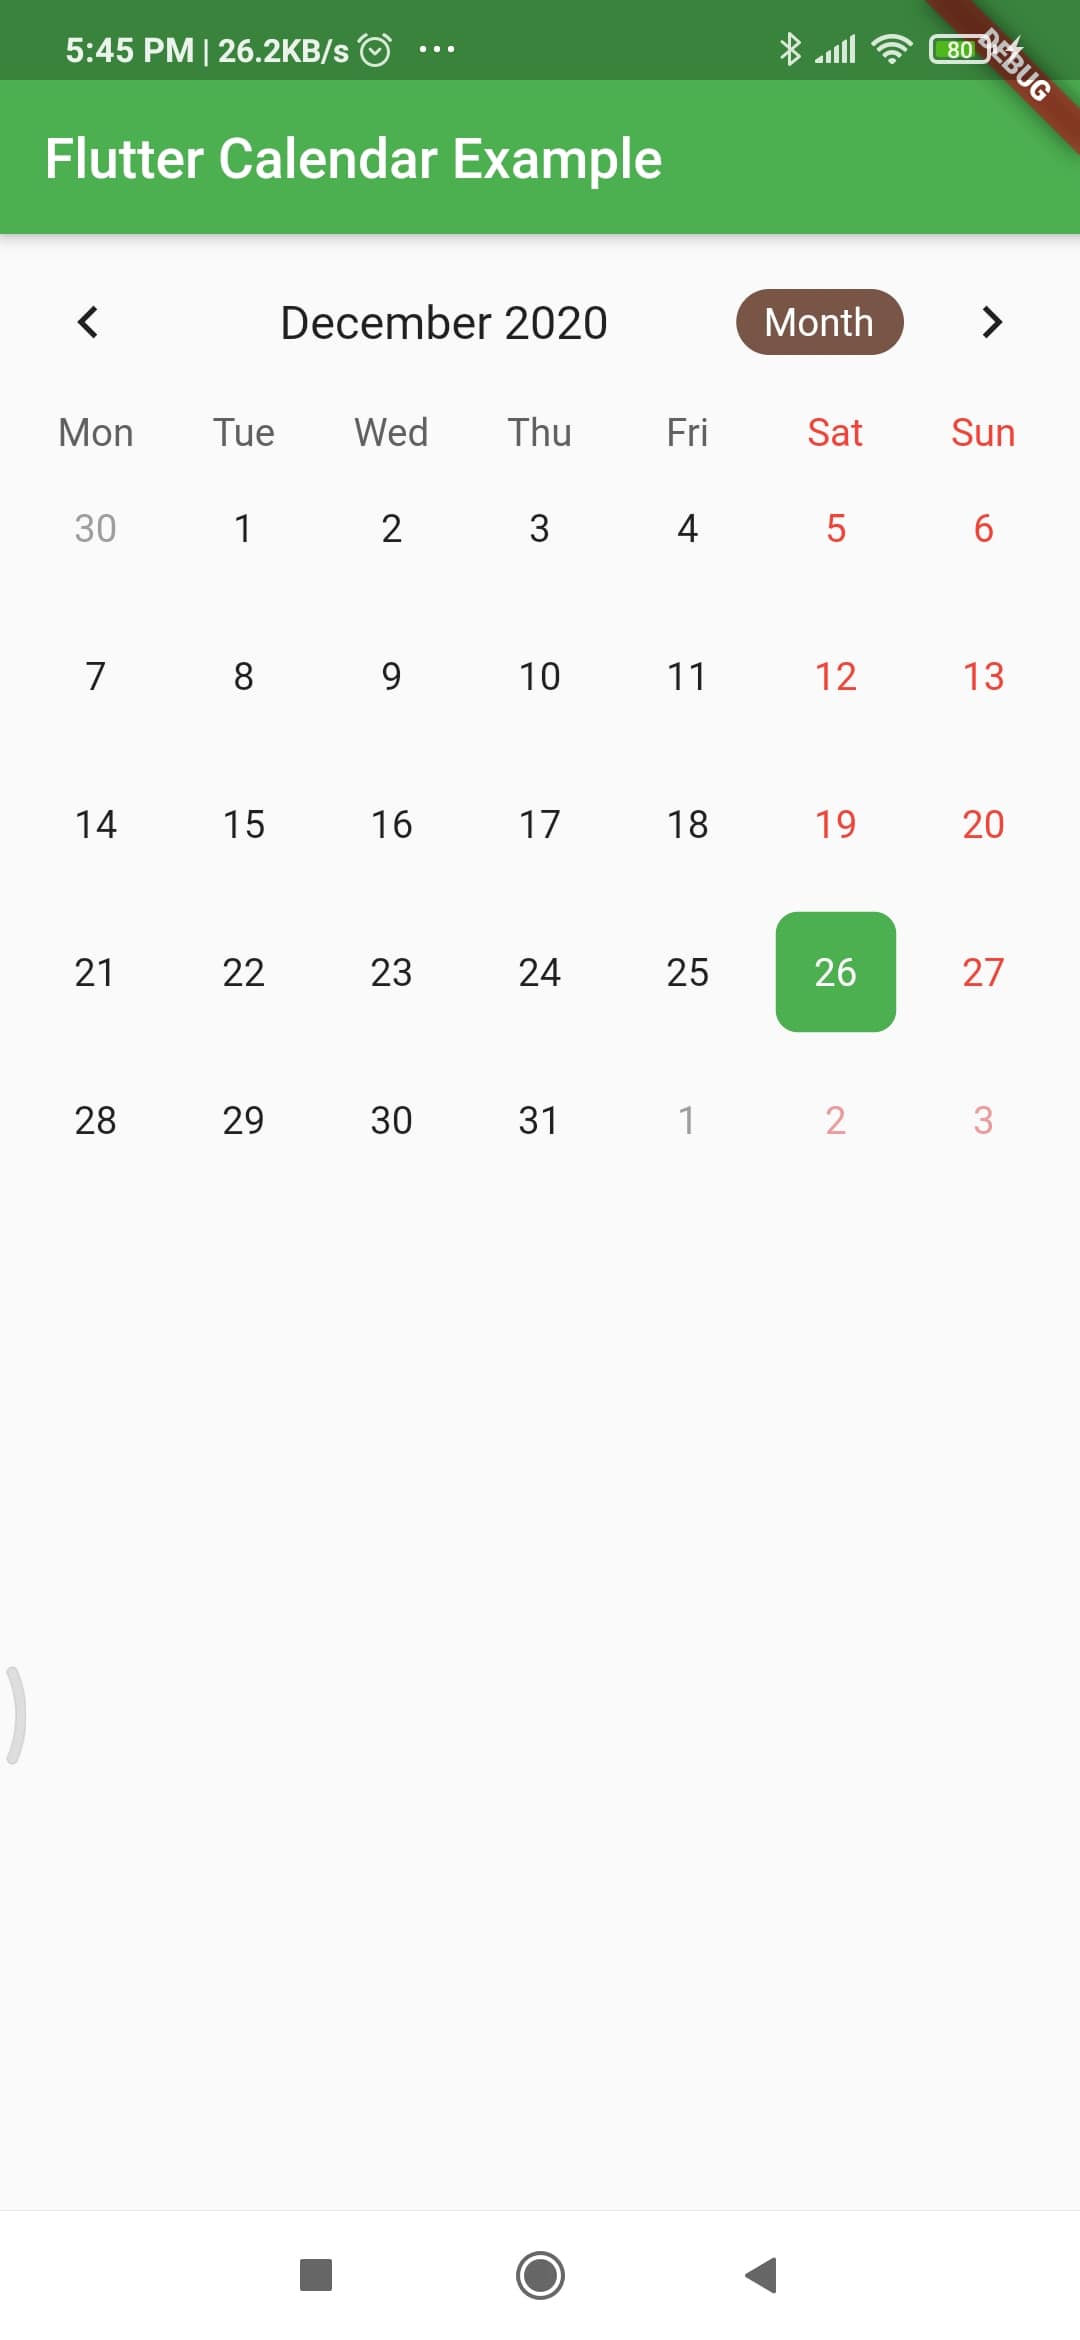
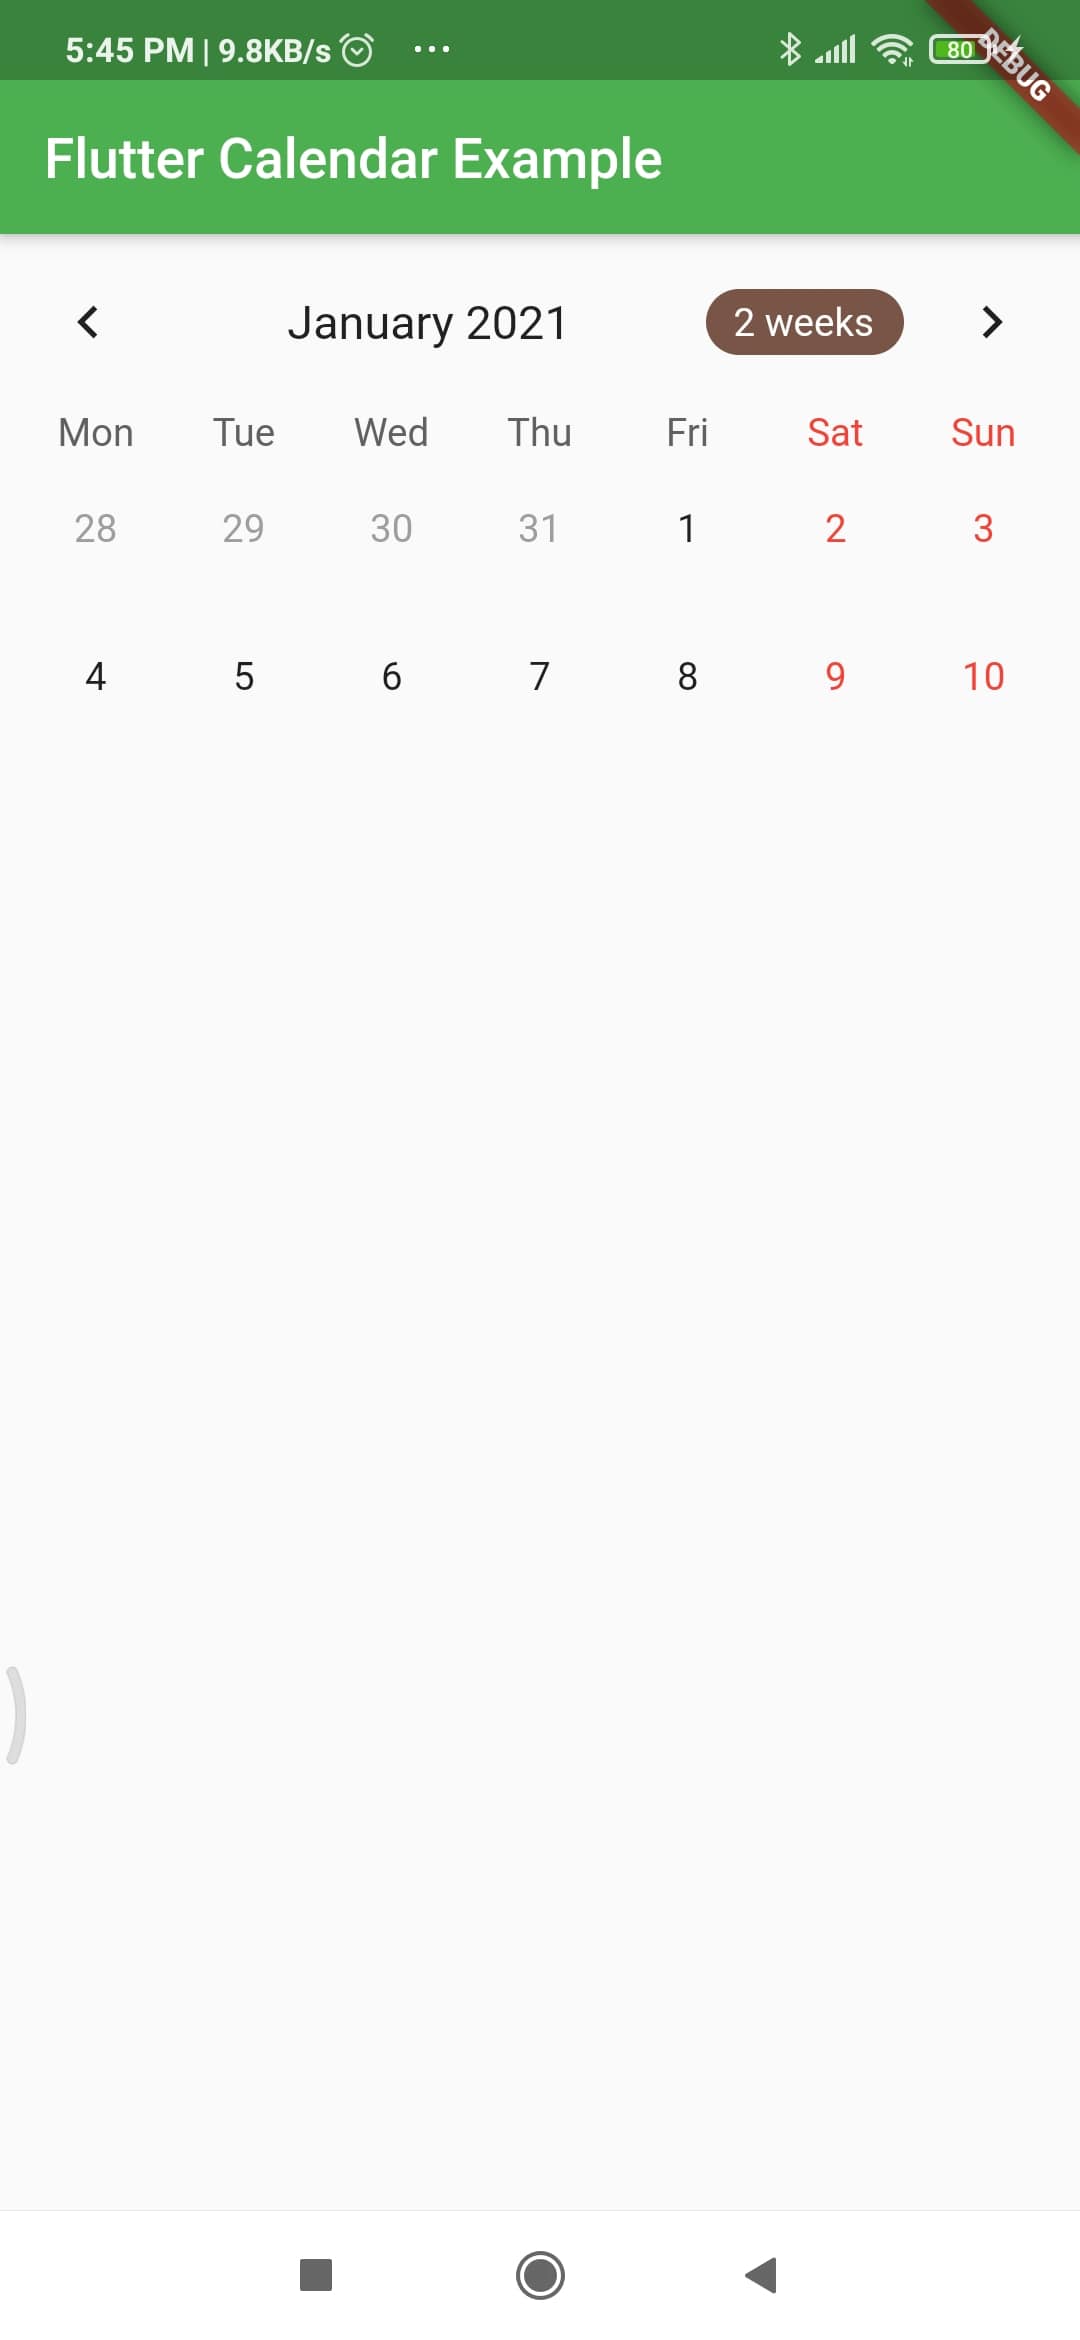
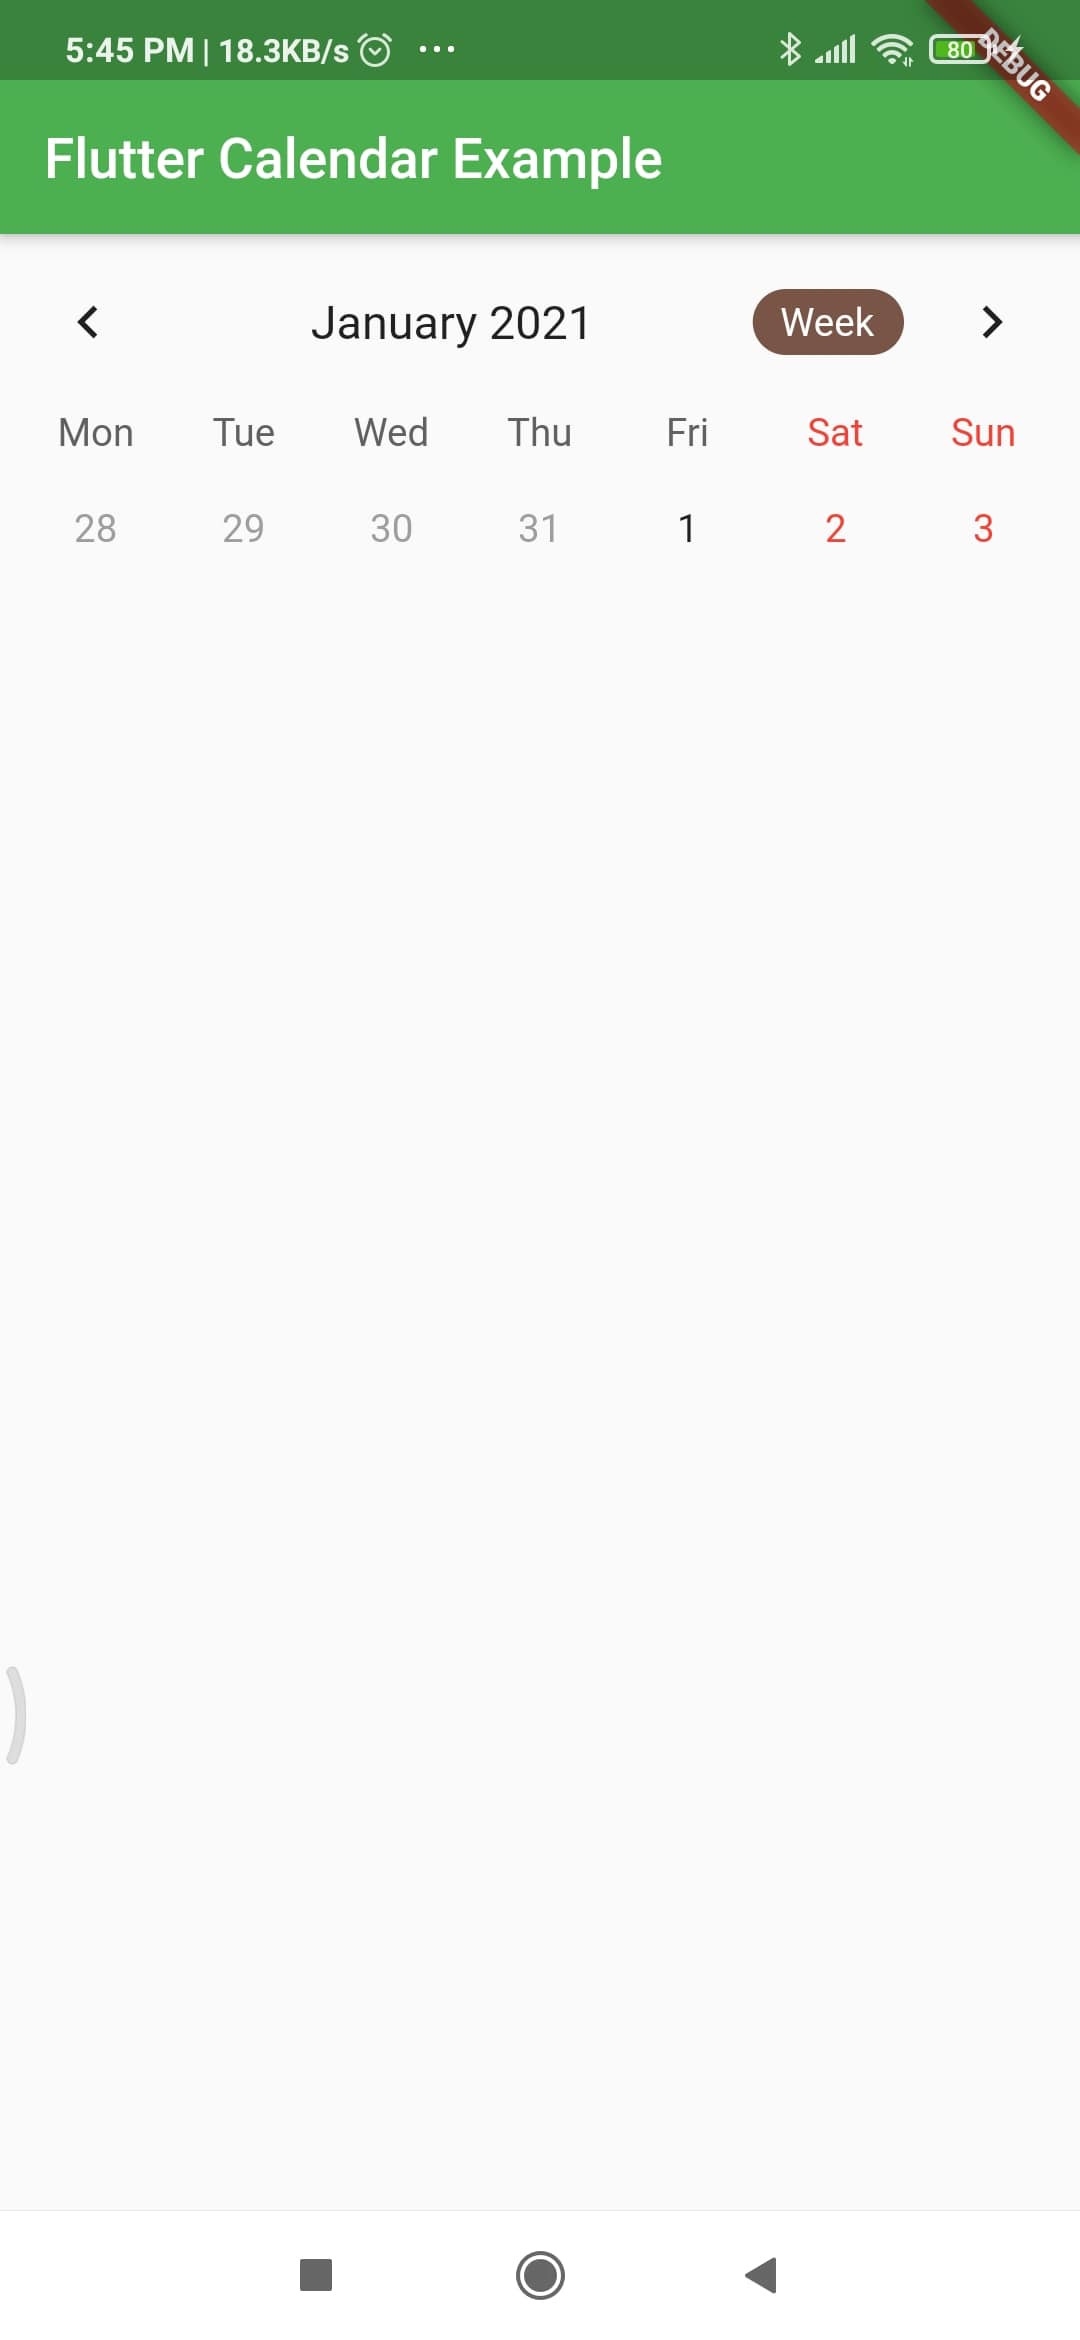
Output


