Hi Guys, Welcome to Proto Coders Point, In this flutter tutorial we will build an application to demonstrate new feature of Flutter 1.20 that is Flutter Interactive Wiewer Widget.
What is Interactive Viewer Flutter?
Recently on August 4th 2020 Flutter team have launched V1.20, that comes with awesome developement tools.
one of it is Flutter Interactive Viewer
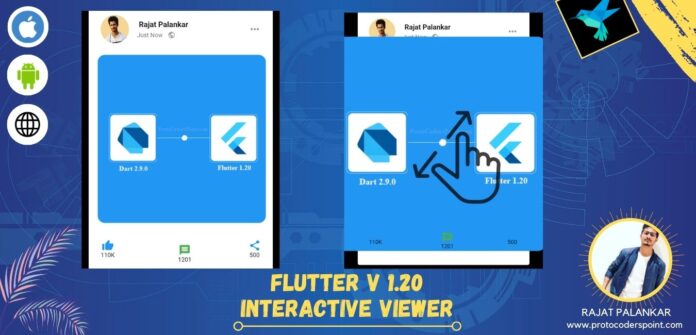
This Interactive Viewer is designed for developing simple & commonly interaction that happens into your application, such as Pan, Zooming or drag n drop events and using this widget user can easily resize the widget child.
Basically Interactive Viewer class is a widget that let’s us with the feature of pan(Drag),Zooming with 2 finger touch.
Implementation of interactive viewer in android-studio(IDE)
So Let’s Implement it in our flutter project
Step 1: Create a new flutter project
I am using Android-Studio as my IDE to build Flutter Apps, you my make use of Android-studio or VSCode editor.
File > New > New Flutter Project
Give a name to the project as per your choose and continue.
Explanation of Flutter Interactive Viewer (Snippet Code)
Here is the basic explanation of each properties used in below snippet code.
InteractiveViewer(
                    boundaryMargin: EdgeInsets.all(20.0),
                    transformationController: transformationController,

                    minScale: 0.1,
                    maxScale: 1.6,

                    // You can off zooming by setting scaleEnable to false
                    //scaleEnabled: false,
                    onInteractionStart: (_)=>print("Interaction Started"),
                    onInteractionEnd: (details) {
                      setState(() {
                        transformationController.toScene(Offset.zero);
                      });
                    },
                    onInteractionUpdate: (_)=>print("Interaction Updated"),
                    child: ClipRRect(borderRadius: BorderRadius.circular(15),child: Image.network("https://pbs.twimg.com/profile_images/1243950916362895361/Z__-CJxz_400x400.jpg")),
                  )
boundrymargin: it is just to define the space or margin from all the sides of the interactive viewer child.
minScale: here minimun scale means how much a uses can zoom out the widget, here 0.1 for example means 10% scale of the widget.
maxScale: Basically the maximum size that the widget can be Zoomed in by the user.
onInteractionStart: what event should occur when user try to interact with the widget either when user try to zoom or when user try to drag the widget.
OnInteractionUpdate: what event/function should occur when user drag or zoom the widget to new view/position.
OnInteractionEnd: when user drag and drop or when user simple interaction with widget leave free the widget, what event should happens
for example: when user zoom the image and then leave it, onInteractionEnd will get triggered and event like image get auto resized back to its original position.
In above Snippet code, in child tag we have a image widget that will simply load image from internet using IMAGE URL.
Step 2: Complete code of Flutter Interactive Viewer
Then in main.dart file under lib directory of you flutter project just copy below full code and run the project.
main.dart
import 'package:flutter/cupertino.dart';
import 'package:flutter/material.dart';

void main() {
  runApp(MyApp());
}

class MyApp extends StatelessWidget {
  // This widget is the root of your application.
  @override
  Widget build(BuildContext context) {
    return MaterialApp(
      title: 'Flutter Demo',
      theme: ThemeData(
        primarySwatch: Colors.blue,
        visualDensity: VisualDensity.adaptivePlatformDensity,
      ),
      home: MyHomePage(),
      debugShowCheckedModeBanner: false,
    );
  }
}

class MyHomePage extends StatefulWidget {
  @override
  _MyHomePageState createState() => _MyHomePageState();
}

class _MyHomePageState extends State<MyHomePage> {
  final transformationController = TransformationController();
  @override
  Widget build(BuildContext context) {
    return Scaffold(
      appBar: AppBar(title: Text("Interactive Viewer"),),
      backgroundColor: Colors.black38,
      body: Center(
        child: Container(
          width: MediaQuery.of(context).size.width-50,
          height: MediaQuery.of(context).size.height-250,
          child: Card(
            child: Column(
              mainAxisAlignment: MainAxisAlignment.start,
              children: [
                Padding(
                  padding: const EdgeInsets.all(8.0),
                  child: ListTile(
                    leading: ClipRRect(borderRadius: BorderRadius.circular(50.0),child: Image.network("https://protocoderspoint.com/wp-content/uploads/2019/10/mypic-300x300.jpg")),
                    title: Text(" Rajat Palankar",style: TextStyle(fontSize: 15,fontWeight: FontWeight.bold),),
                    subtitle: Row(
                      children: [
                        Text("Just Now",style: TextStyle(fontSize: 12),),
                        SizedBox(width: 10,),
                        Icon(Icons.public,size: 15,color: Colors.grey,)
                      ],
                    ),
                    trailing: Icon(Icons.more_horiz),
                  )
                ),

                Padding(
                  padding: const EdgeInsets.all(8.0),
                  child: InteractiveViewer(
                    transformationController: transformationController,
                    boundaryMargin: EdgeInsets.all(20.0),
                    minScale: 0.1,
                    maxScale: 1.6,

                    // You can off zooming by setting scaleEnable to false
                    //scaleEnabled: false,
                    onInteractionStart: (_)=>print("Interaction Started"),
                    onInteractionEnd: (details) {
                      setState(() {
                        transformationController.toScene(Offset.zero);
                      });
                    },
                    onInteractionUpdate: (_)=>print("Interaction Updated"),
                    child: ClipRRect(borderRadius: BorderRadius.circular(15),child: Image.network("https://pbs.twimg.com/profile_images/1243950916362895361/Z__-CJxz_400x400.jpg")),
                  ),
                ),
                Padding(
                  padding: const EdgeInsets.all(8.0),
                  child: ListTile(
                    leading: Column(children: [Icon(Icons.thumb_up,color: Colors.blue,),Text("110K",style: TextStyle(fontSize: 12),)],),
                    title: Column(children: [Icon(Icons.message,color: Colors.green,),Text("1201",style: TextStyle(fontSize: 12))],),
                    trailing: Column(children: [Icon(Icons.share,color: Colors.blue,),Text("500",style: TextStyle(fontSize: 12))],),
                  ),
                )
              ],
            ),
          ),
        ),
      )
    );
  }
}
Recommended Articles learn more
Integration of Google Maps in Flutter
Flutter Photo View widget with zoomable image gallery
Flutter provider login example – Firebase login registration using Provider
Development made easy with GetX Plugin

![AWS Load Balancers with EC2 Instances – Complete Tutorial [2025] Overview image of AWS Load Balancer tutorial setup steps](https://protocoderspoint.com/wp-content/uploads/2025/06/AWS-Load-Balancer-741x486.png)










![AWS Load Balancers with EC2 Instances – Complete Tutorial [2025] Overview image of AWS Load Balancer tutorial setup steps](https://protocoderspoint.com/wp-content/uploads/2025/06/AWS-Load-Balancer-324x160.png)