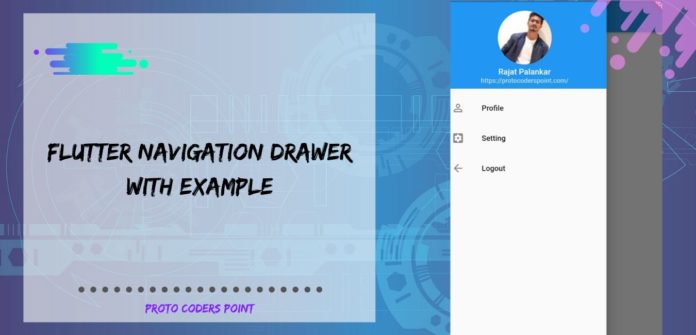
Hi Guys Welcome to Proto Coders Point, In this Flutter Tutorial we gonna Talk about Flutter Navigation Drawer which is basically a Flutter Slide Menu.
In Flutter Application Development Navigation Drawer are basically used with the Scaffold.drawer Property, where Scaffold must have an appBar to show Drawer opening icon, The Drawer child usually is a ListView which first child is a DrawerHeader that are normally used to show current logIn user data.
The Remaining Drawer children are often been filled using ListTiles.
let’s Start implementing Flutter Navigation drawer Slide menu into our project
Flutter Navigation Drawer with Example
Step 1 : Create a new Flutter Project
offCourse you need to create a new Flutter project or open you existing Flutter project all left to your choice
File > New > New Flutter Project
Fill all the required details to create a new project.
Step 2 : Create 3 new Dart files in your flutter project
To create new dart file under your project,
Your_project > lib > (right click) New > Dart File
Then in lib directory you need to create 3 Dart Files and name it as ProfilePage.dart , Setting Page.dart , DrawerCode.dart.
Step 3 : Add a Scaffold Widget with appBar widget and drawer widget in main.dart
class _MyHomePageState extends State<MyHomePage> {
  @override
  Widget build(BuildContext context) {
    return Scaffold(
      appBar: AppBar(
        title: Text("Navigation Drawer"),
      ),
      drawer: DrawerCode(),
    );
  }
}
add a Scaffold widget with a appBar and drawer property in it.
Here DrawerCode is an class that has drawer widget in it.
The complete code of main.dart file is below just copy paste it in main page.
main.dart
import 'package:flutter/material.dart';
import 'DrawerCode.dart';

void main() => runApp(MyApp());

class MyApp extends StatelessWidget {
  // This widget is the root of your application.
  @override
  Widget build(BuildContext context) {
    return MaterialApp(
      title: 'Flutter Demo',
      theme: ThemeData(
        primarySwatch: Colors.blue,
      ),
      home: MyHomePage(),
    );
  }
}

class MyHomePage extends StatefulWidget {
  @override
  _MyHomePageState createState() => _MyHomePageState();
}

class _MyHomePageState extends State<MyHomePage> {
  @override
  Widget build(BuildContext context) {
    return Scaffold(
      appBar: AppBar(
        title: Text("Navigation Drawer"),
      ),
      drawer: DrawerCode(), // this is drawerCode page
    );
  }
}
Step 4 : Adding Required widget in Navigation Drawer Code
Snippet Code
Drawer(
      child: ListView(
        padding: EdgeInsets.zero,
        children: <Widget>[
          DrawerHeader(
            decoration: BoxDecoration(color: Colors.blue),
            child: Text("Drawer"),
          ),
        ],
      ),
The above Snippet code is for explaination about Flutter Drawer
In Flutter Drawer their must be a child widget i.e ListView.
Then this listView that can have any numbers of children : <Widget>, Here in above snippet code i gave Flutter DrawerHeader widget that will aquire some space in the top of Drawer with some decoration to it, the DrawerHeader in turn has a child which are be any widget here have just for simple added a Text Widget.
Then the Second widget will be a ListTiles here is the Snippet code for that.
ListTile(
           leading: Icon(Icons.person_outline),
           title: Text("Profile"),
           onTap: () {
             Navigator.pop(context);
             Navigator.push(
                 context, MaterialPageRoute(builder: (context) => Profile()));
           },
         ),
ListTile widget has a leading property with Icon as an Widget you can set a icon to the flutter Drawer, title property as a Text , and an onTap method property that will handle all the task when user clicks on the ListTile.
The Complete Code is below just create a DrawerCode.dart file and copy paste the below lines of Flutter Drawer Code.
DrawerCode.dart
import 'package:flutter/material.dart';
import 'package:flutter/services.dart';
import 'package:flutter_drawer/ProfilePage.dart';
import 'package:flutter_drawer/SettingPage.dart';

class DrawerCode extends StatelessWidget {
  @override
  Widget build(BuildContext context) {
    return Drawer(
      child: ListView(
        padding: EdgeInsets.zero,
        children: <Widget>[
          DrawerHeader(
            decoration: BoxDecoration(color: Colors.blue),
            child: Column(
              children: <Widget>[
                Flexible(
                  child: Container(
                    width: 100,
                    height: 100,
                    margin: EdgeInsets.only(bottom: 5),
                    decoration: BoxDecoration(
                      shape: BoxShape.circle,
                      image: DecorationImage(
                          image: NetworkImage(
                              'https://secure.gravatar.com/avatar/3a719607819fc579c2aafd4d21dad3d1?s=96&d=mm&r=g'),
                          fit: BoxFit.fill),
                    ),
                  ),
                ),
                Text(
                  "Rajat Palankar",
                  style: TextStyle(
                      fontSize: 15.0,
                      fontWeight: FontWeight.w500,
                      color: Colors.white),
                ),
                Text(
                  "https://protocoderspoint.com/",
                  style: TextStyle(
                      fontSize: 12.0,
                      fontWeight: FontWeight.w500,
                      color: Colors.white70),
                ),
              ],
            ),
          ),
          ListTile(
            leading: Icon(Icons.person_outline),
            title: Text("Profile"),
            onTap: () {
              Navigator.pop(context);
              Navigator.push(
                  context, MaterialPageRoute(builder: (context) => Profile()));
            },
          ),
          ListTile(
            leading: Icon(Icons.settings_applications),
            title: Text("Setting"),
            onTap: () {
              Navigator.pop(context);
              Navigator.push(
                  context, MaterialPageRoute(builder: (context) => Setting()));
              print("Go to Settings");
            },
          ),
          ListTile(
            leading: Icon(Icons.arrow_back),
            title: Text("Logout"),
            onTap: () {
              print("Logout Users");
              Navigator.pop(context);
              SystemNavigator.pop();
            },
          ),
        ],
      ),
    );
  }
}
Step 5 : adding codes for Navigated Drawer pages
Both the below pages will simply show a Text Widget indicating which page is been open.
ProfilePage.dart
When user Tap on menus listTitles from Navigation drawer the user will navigate to the selected option.
import 'package:flutter/material.dart';
import 'package:flutter_drawer/DrawerCode.dart';

class Profile extends StatefulWidget {
  @override
  _ProfileState createState() => _ProfileState();
}

class _ProfileState extends State<Profile> {
  @override
  Widget build(BuildContext context) {
    return Scaffold(
      appBar: AppBar(
        title: Text("Navigator Drawer"),
      ),
      drawer: DrawerCode(),
      body: Center(
        child: Text("Profile Page"),  // this is profile page
      ),
    );
  }
}
SettingPage.dart
import 'package:flutter/material.dart';

import 'DrawerCode.dart';

class Setting extends StatefulWidget {
  @override
  _SettingState createState() => _SettingState();
}

class _SettingState extends State<Setting> {
  @override
  Widget build(BuildContext context) {
    return Scaffold(
      appBar: AppBar(
        title: Text("Navigator Drawer"),
      ),
      drawer: DrawerCode(),
      body: Center(
        child: Text("Setting Page"), // Then here is setting page
      ),
    );
  }
}
All set, Now your Flutter Project with Navigation Drawer is ready to test and use.


