In this flutter tutorial we will implement flutter listview widget that simply displays list of items in a form of listview.
Also we will explore basic feature of flutter list view like onTap anonymous Event handler, add some of basic properties like leading icon, title to listview, subtitle.
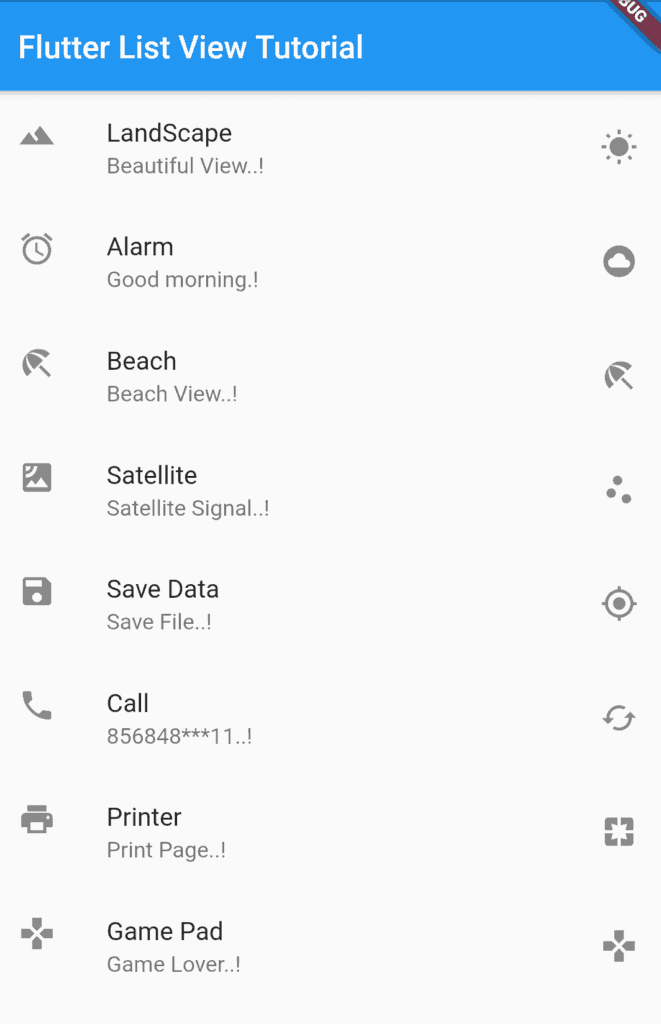
Here is demo of how final listview will look
Flutter ListView Tutorial
Application final UI Demo
flutter listview UI Design
How to Create a Flutter listview?
Dart is the programming language used to code Flutter apps. Dart is another product by Google. So
main class function
snippet code
void main() {
  runApp(MaterialApp(
    home: Scaffold(
      appBar: AppBar(
        title: Text("Flutter List View Tutorial"), // title of appbar
      ),
      body: getListView(), //list widget function is been called
    ),
  ));
}
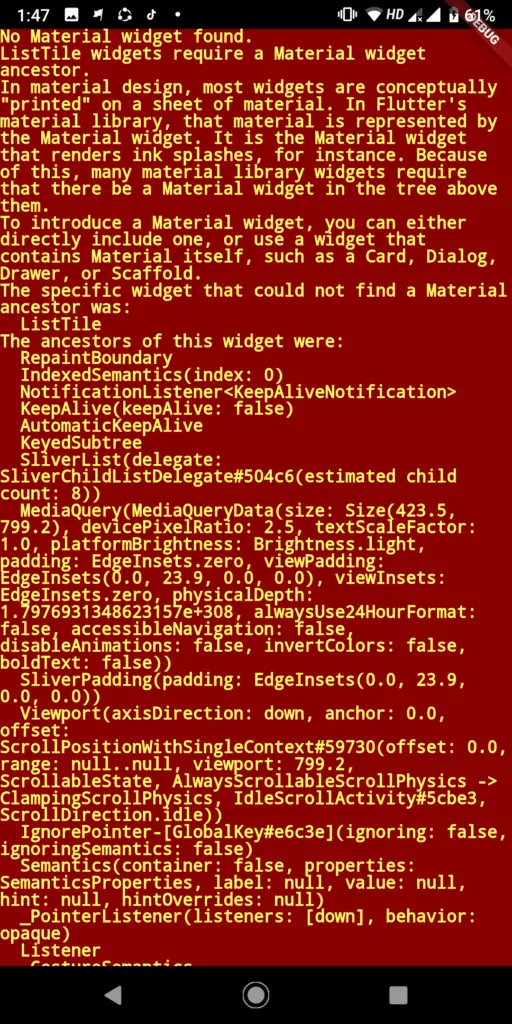
Here we have used scaffold widget because all the content should be visible inside the device screen size i.e if we don’t use Scaffold you may get error “ListTile widget require a Material widget ancestor” some think like below screenshot
Error: ListTile widget require a Material widget ancestor
Inside Scaffold we have AppBar widget that show a app bar at the top of device screen with some Title to it.
and a body of Application which calls a function getListView(); that display listview in the body tag.
ListView is the most commonly used scrolling widget. It displays its children one after another in the scroll direction. In the cross axis, the children are required to fill the ListView.
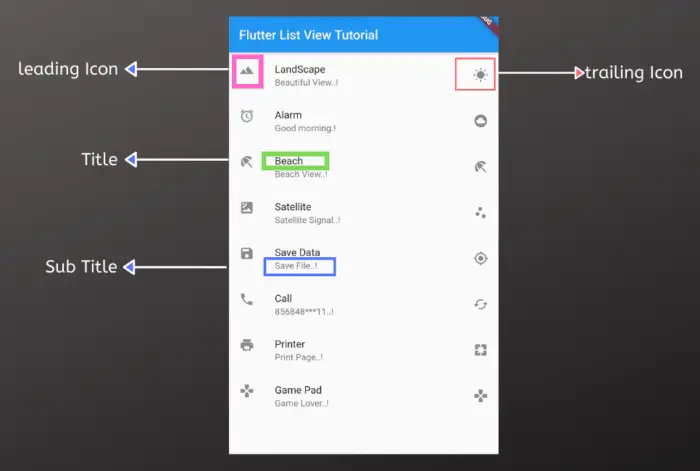
ListTile contains one to three lines of widget, such as checked box, leading icons and trailing icons, Title with is main text of listviews, subtitle which is basically a meta derscription of title.
Full Source Code of Flutter listview UI Design
main.dart
Final Full Source : Copy paste this code into main.dart file of your flutter project, and you are done the app will run successfully
[…] where Scaffold must have an appBar to show Drawer opening icon, The Drawer child usually is a ListView which first child is a DrawerHeader that are normally used to show current logIn user […]
[…] you have an application that simply show a ListView and some times items may get updated ( inserted or removed from the list but with normal listView […]

")


[…] basic of flutter listview […]
[…] where Scaffold must have an appBar to show Drawer opening icon, The Drawer child usually is a ListView which first child is a DrawerHeader that are normally used to show current logIn user […]
[…] Coders Point In this Flutter Tutorial we will implement Flutter Slidable action on ListView with ListTile […]
[…] you have an application that simply show a ListView and some times items may get updated ( inserted or removed from the list but with normal listView […]
[…] the above snippet code i have simply created a list of ListTile widgets […]
[…] flutter library to Fetch data from Internet which is in JSON format and display the data in Flutter ListView builder with ListTile […]