
Hi, Guys Welcome to Proto Coders Point, In this android tutorial, we will learn about android jetpack compose and will build a simple app using state management (MutableState) in jetpack that will update UI when State or Variable value changes on button click.
Android Jetpack Compose tutorial – A declarative UI Toolkit
What is Android Jetpack Compose?
A Jetpack compose is a modern toolkit using which we can build a Native android UI Application, It’s based on the declarative programming model, so all you need is to simply describe how your app UI should look like and the compose will take care of the rest of app state changes, and UI gets Automatically Changed.
What do we mean by declarative UI?
Declarative UI means the developer can design the UI by the means of Programming Code, This Android Jetpack compose is been inspired by React.js and Flutter development.
Why Compose Jetpack?
Easy way to Explain you :
Whenever we design a screen in android we are making use of XML to create UI design & then giving functionality to the UI using code in Java or kotlin.
- Fewer Lines of Code
- No XML Needed
When we use Android JetPack compose there is no need to write XML UI Files, we just need to write the whole UI Code in Kotlin language itself.
Building Block of jetpack
- Composable
- Model
- Preview
If you are designing a UI using jetpack compose, then you are basically writing function by making use of @Composable,
Then to check the preview display of your android application UI design in the android studio preview section you just need to add @Preview on top of @Composable.
A Composing is a function whatever we write in it get printed on the mobile screen as a widget view.
Note: As in Flutter all everything is a widget likewise in android jetpack every view is a widget
For Now, Android-Studio Stable version does not support Jetpack Compose so you need to make use of the Android Studio Canary version
Download Canary version from here https://developer.android.com/studio/preview?authuser=1
Project Creation
Start Android-Studio and create a new Android project and in the Template section select “Empty Compose Activity” then finish building a project
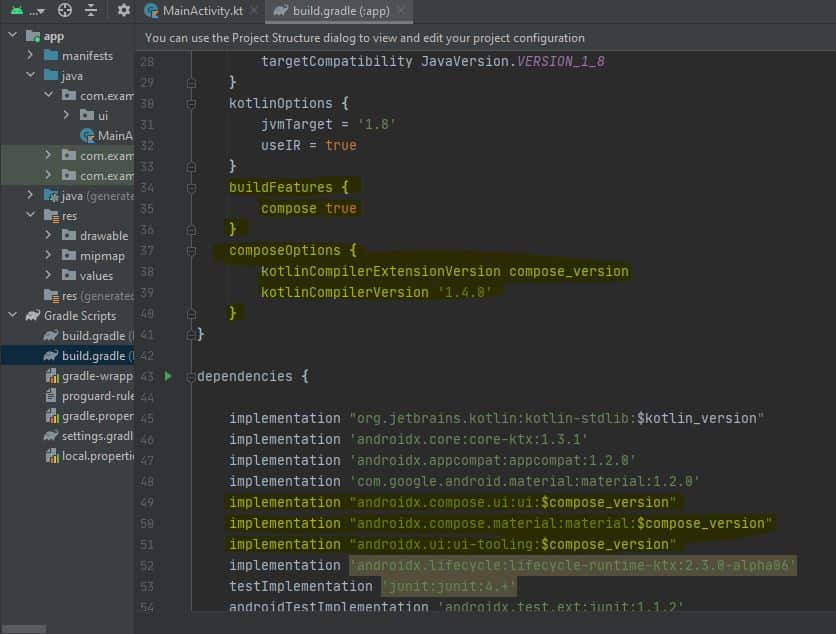
Now, Let’s go into build.gradle file & check what new is been added for the Android Jetpack Compose project
As you can see in the below screenshot of build.gradle file everything is same as in normal android project except, you can see highlighted, there is a new thing that is integrated.
There are 2 new things you would see in this Gradle file
the first is to build features with compose as true
second, there are 3 new dependencies added. UI, material, tooling
Android jetpack android example – Increment number on Button Click
MainActivity.kt
package com.example.myapplication

import android.os.Bundle
import android.text.Layout
import androidx.appcompat.app.AppCompatActivity
import androidx.compose.foundation.Text
import androidx.compose.foundation.layout.Column
import androidx.compose.material.Button
import androidx.compose.material.MaterialTheme
import androidx.compose.material.Surface
import androidx.compose.material.TopAppBar
import androidx.compose.runtime.Composable
import androidx.compose.runtime.MutableState
import androidx.compose.runtime.state
import androidx.compose.ui.Alignment
import androidx.compose.ui.graphics.Color
import androidx.compose.ui.platform.setContent
import androidx.compose.ui.unit.TextUnit
import androidx.ui.tooling.preview.Preview
import com.example.myapplication.ui.MyApplicationTheme

class MainActivity : AppCompatActivity() {
    override fun onCreate(savedInstanceState: Bundle?) {
        super.onCreate(savedInstanceState)
        setContent {
            MaterialTheme() {
                MyApp()
            }

        }
    }
    @Preview
    @Composable
    private fun MyApp() {
       setupStateUsingState()

    }

    @Composable
    private fun setupStateUsingState() {

        Column {

            //Using MutableState in Compose
            var counterState: MutableState<Int> = state { 0 }

            TopAppBar(
                    title = { Text(text = "State Management") }
            )

            Text(
                    text = "Clicked:  ${counterState.value}",color = Color.White,fontSize = TextUnit.Sp(20)//set new value
            )
            Button(onClick = {
                //update value
                counterState.value +=1

            }) {
                Text(text = "Click to Add by +1")
            }
        }

    }
}
Output
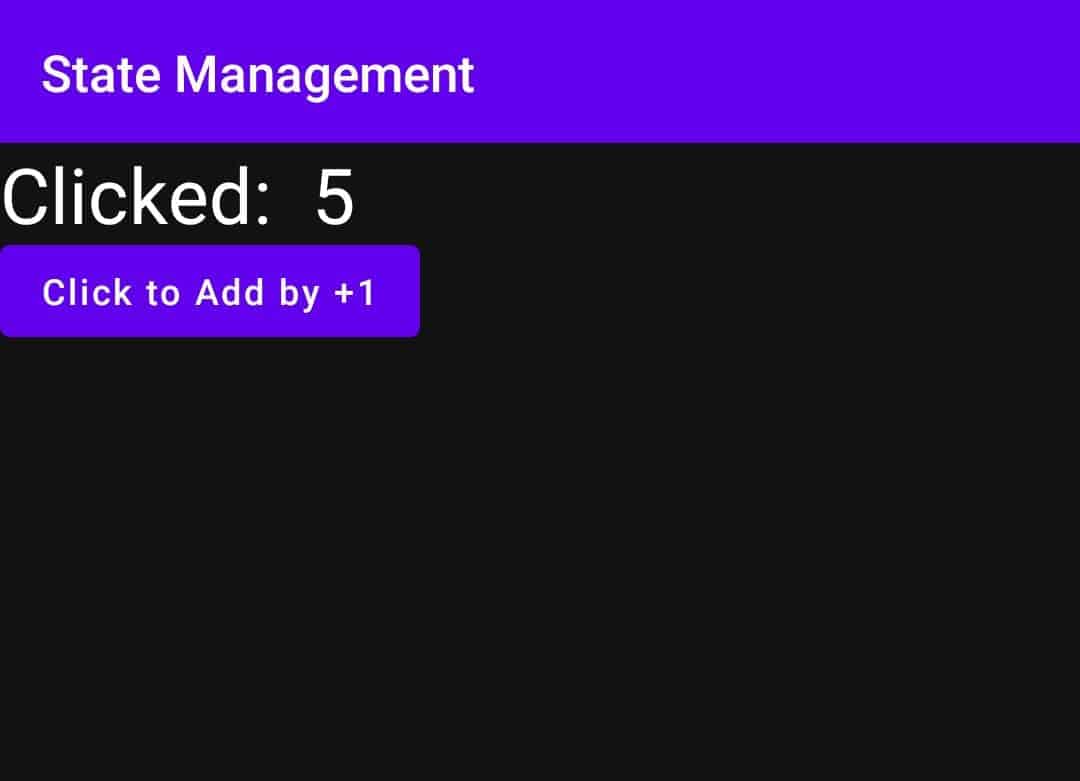
As you can see in the above kotlin code,
I have created a @Composable function by the name “MyApp()” and this, in turn, calls another Composable function names “setupStateUsingState()”
It has a Column widget that has 3 children, i.e TopAppBar, Text, and a Button
Then, I have a variable of MutableState dataType Int initial value is set to 0.
And The value is printed into Text Widget.
whenever the user clicks on the button the variable counterState gets incremented by +1 and the changed value is printed on the screen.
Any Question/Query please do comment below
Thank You
")


[…] Jetpack Compose tutorial with State management Example […]