Hi Guys, Welcome to Proto Coders Point.
In this Flutter Hive Tutorial, Will learn the basic of Hive Database in flutter and also perform CRUD Operations using HIVE DB.
What is Hive Database in flutter
- A HIVE is a lightweight & fast key-value pair NoSQL Database used in flutter application to store data locally.
- Hive is been developed using pure DART Language.
- It stands out to be very fast to perform CRUD Operations(full form CREATE, READ, UPDATE, DELETE),
- most important all the data saved in Flutter hive database is highly secured by using AES-256 encrypted method.
- Hive is a NoSQL database, it can be used as best alternative of SQLite Database.
When to use hive database in flutter app?
Suppose you are building a flutter app that is fully offline, for Example: ToDo Note App, Where a user can store his daily todo notes in mobile app itself (local database).
To build Todo list app there is not need of online server database, all the app data we can store locally in mobile itself.
Here are some example where you can use HIVE NoSQL database:
- Create Offline Apps Eg: ToDo App
- To store user login details.
- To keep user logged In.
- To save user selected Theme ( dark theme / light theme)
I have Created a playlist on Flutter Hive Tutorial on my youtube channel. Check it out, In those Flutter Hive tutorial, I am going to cover all the above feature using HIVE DATABASE.
Let’s get started
Create a new flutter project in your android Studio IDE or any of your favourite IDE.
Installing Hive in flutter project
1. Add hive dependencies
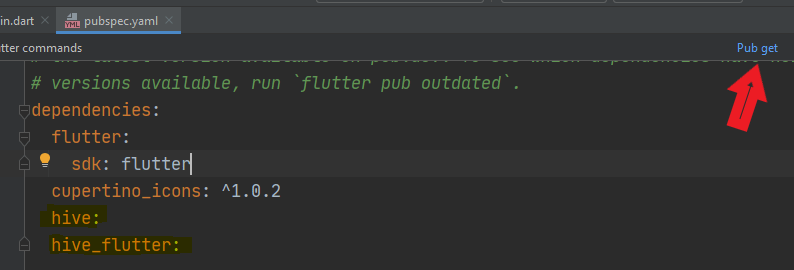
To install hive into your flutter project, open pubspec.yaml file and under dependencies section add this 2 packages
dependencies:
  hive:
  hive_flutter:
Keep the version empty if you want to install latest version available, else specify the version that you want to use.
Then after added above dependencies, just hit pub get button or run flutter pub get command in your IDE terminal.
2. Import hive.dart and hive_flutter.dart
Once the package is been installed successfully, To use Hive in flutter you need to import them.
import 'package:hive/hive.dart';
import 'package:hive_flutter/hive_flutter.dart';
How to Implement Hive Database in flutter app
To use Hive in flutter, you need to initialize it
Initialization Hive Database
You need to Start/initialize hive before loading your flutter app content, so the best place to initialize hive is before runApp(…..), As show in below snippet code
void main() async{
  await Hive.initFlutter();   //init hive
  runApp(const MyApp());
}
Open Hive Box – A Data Box in HIVE

Box box1 = await Hive.openBox('database1');
If we compare openBox with SQLITE database, it’s similar to table in SQL.
So as you know that hive is NoSQL database (non-relational), Here we simply opening a BOX and then add data into that box.
How to Store data in hive box
To store data in Hive Database, first of all we need to create a hive box, that we have already done as above.
let’s store some data in Hive box
There are 2 ways to store data in hive Box
First: Simply add data in box
We can add data using add() method the value will get added into the Hive box in index wise. Therefore we can read the get using it’s index id.
box.add('RAJAT PALANKAR');
This is how value been stored

Second: Storing data in hive using Key-Value pair
In Hive Box Data can be stored in key-value pair as below
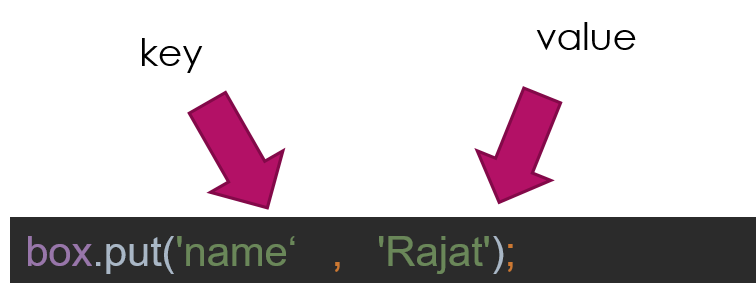
box1.put('name', 'proto coders point');
box1.put('myname', 'Rajat palankar');
This is how data get stored if you save it using key-value
{myname: Rajat palankar, name: proto coders point}
You can make use of it’s key to access the value
Reading Data from Hive Database
We can read data by using two methods getAt(index) and get(‘key’)
getAt(index): This will fetch the value from hive box which specified index Eg: getAt(0)
get(‘key’): This will fetch value from specified key Eg: get(‘myname’) with return : Rajat Palankar.
box.getAt(0);
print(box.get('name'));
Delete data from Hive db
1. Deleting data of specific key
box.delete('name');
2. Completely clear/erase all the data from HIVE BOX
Hive.box('database1').clear();
Real all the data from HIVE Box
box1.toMap()
Flutter Hive Database – Example – Source Code
main.dart
import 'package:flutter/material.dart';
import 'package:hive/hive.dart';
import 'package:hive_flutter/hive_flutter.dart';

void main() async{
 await Hive.initFlutter();
  runApp(const MyApp());
}

class MyApp extends StatelessWidget {
  const MyApp({Key? key}) : super(key: key);

  // This widget is the root of your application.
  @override
  Widget build(BuildContext context) {
    return MaterialApp(
      title: 'Flutter Demo',
      theme: ThemeData(

        primarySwatch: Colors.blue,
      ),
      home: const HomePage(),
    );
  }
}

class HomePage extends StatefulWidget {
  const HomePage({Key? key}) : super(key: key);

  @override
  _HomePageState createState() => _HomePageState();
}

class _HomePageState extends State<HomePage> {

  late Box box1;
  @override
  void initState() {
    // TODO: implement initState
    super.initState();
    createBox();
  }

  void createBox() async{
    box1 = await Hive.openBox('database1');
  }

  @override
  Widget build(BuildContext context) {
    return Scaffold(
      body: Center(
        child: Column(
          mainAxisAlignment: MainAxisAlignment.center,
          children: [

            ElevatedButton(onPressed: (){
              box1.put('name', 'proto coders point');
              box1.put('myname', 'Rajat palankar');
              print('DATA ADDED');
            }, child: const Text("Add")),

            ElevatedButton(onPressed: () async{
              print(box1.get('myname'));
              print(box1.get('name'));
            }, child: const Text("Read")),

            ElevatedButton(onPressed: (){
              box1.put('name', 'RAJAT');
            }, child:const   Text("Update")),

            ElevatedButton(onPressed: (){
               box1.delete('name');
            }, child: const Text("Delete")),

            ElevatedButton(onPressed: (){
               print(box1.toMap());
            }, child: const Text("Read All Data")),


            ElevatedButton(onPressed: (){
              Hive.box('database1').clear();
            }, child: const  Text("Delete BOX")),
          ],
        ),
      ),
    );
  }
}
")