Hi Guys, Welcome to Proto Coders Point. We will learn how to implement press back again to exit flutter app, you might have used some app that has feature like double back press to exit app, So
Just wrap DoubleBack Widget to root page, i mean Home page or Dashboard Page.
For example: Support you have a login page & after successful login you navigate user to dashboad/home page and from there, you want to app press back to exit feature.
Time for second back press to exit, default is 2 sec.
onFirstBackPress:
A Callback function, which is called when user click back button once.
textStyle:
Change text styling of toast meesage.
background:
Change background color.
backgroundRadius:
Alter Radius of toast message
condition:
show press back again to exit, only when specific conditin is true Eg: if user is on HomePage then exit if user is in some other page do nothing.
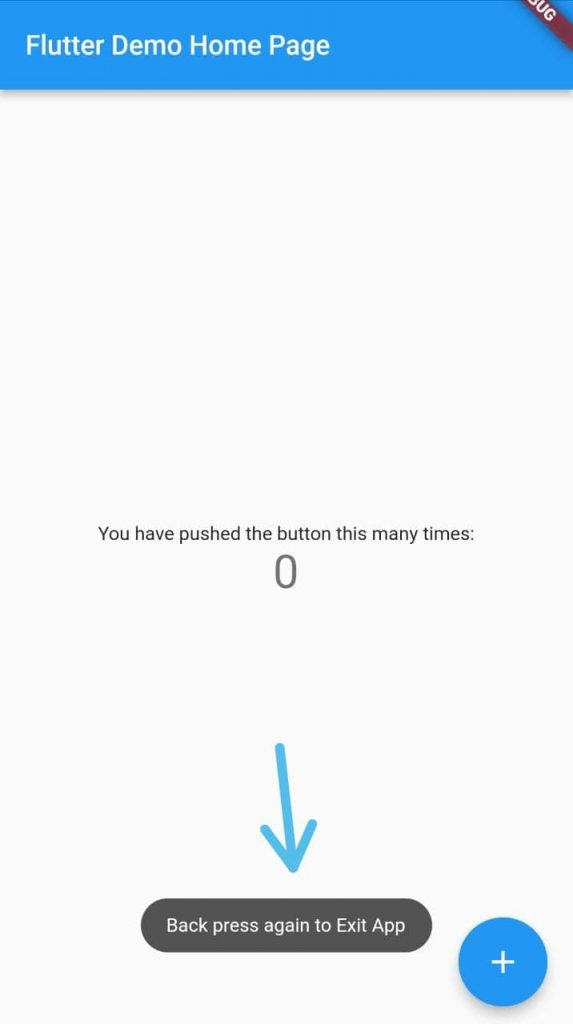
Default ( Toast message before exit app)
class MyApp extends StatelessWidget {
  const MyApp({Key? key}) : super(key: key);

  // This widget is the root of your application.
  @override
  Widget build(BuildContext context) {
    return MaterialApp(
      title: 'Flutter Demo',
      theme: ThemeData(

        primarySwatch: Colors.blue,
      ),
      home: const DoubleBack(
          message: "Back press again to Exit App",
          child: MyHomePage(title: 'Flutter Demo Home Page')
      ),
    );
  }
}
double back press to exit
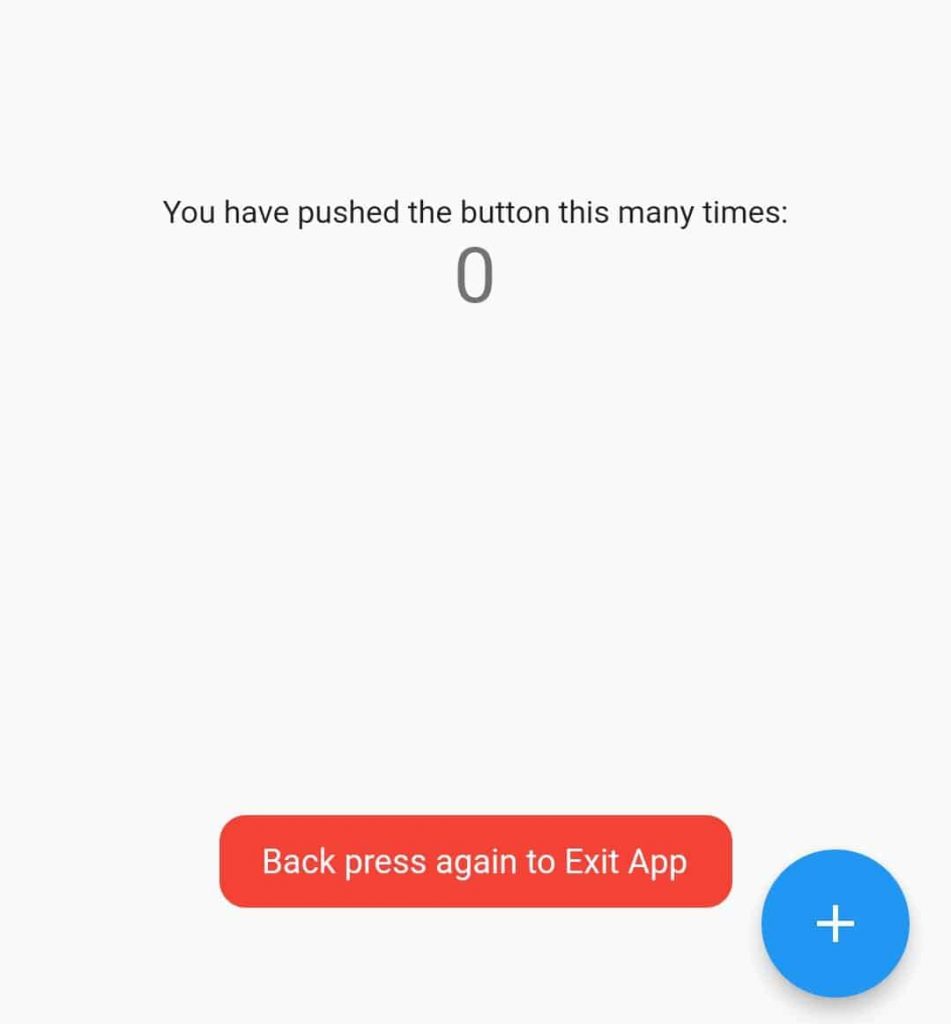
Custom Styling to toast message on backpress to exit
class MyApp extends StatelessWidget {
  const MyApp({Key? key}) : super(key: key);

  // This widget is the root of your application.
  @override
  Widget build(BuildContext context) {
    return MaterialApp(
      title: 'Flutter Demo',
      theme: ThemeData(

        primarySwatch: Colors.blue,
      ),
      home: const DoubleBack(
          message: "Back press again to Exit App",
          textStyle: TextStyle(fontSize: 15,color: Colors.white),
          background: Colors.red,
          backgroundRadius: 10,
          child: MyHomePage(title: 'Flutter Demo Home Page')
      ),
    );
  }
}
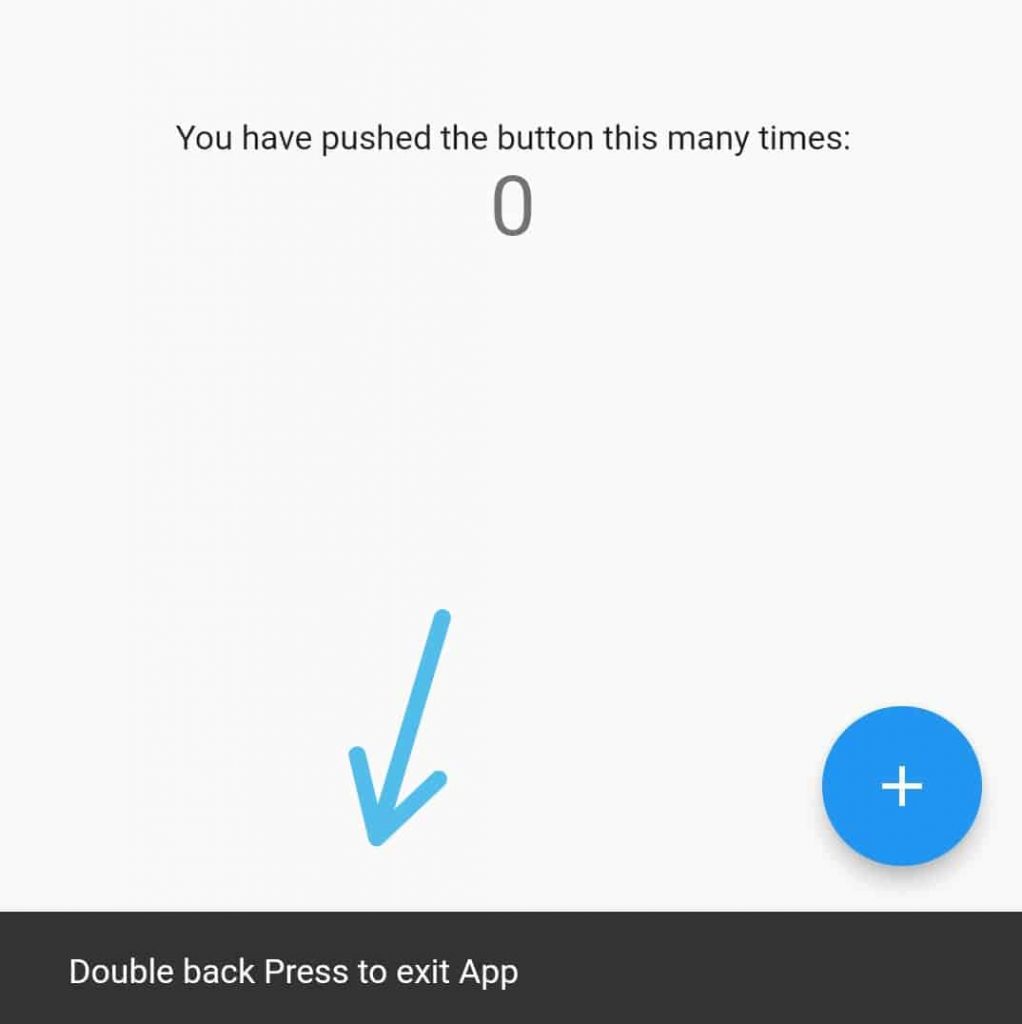
Show snackbar on Press again to exit app
class MyApp extends StatelessWidget {
  const MyApp({Key? key}) : super(key: key);

  // This widget is the root of your application.
  @override
  Widget build(BuildContext context) {
    return MaterialApp(
      title: 'Flutter Demo',
      theme: ThemeData(

        primarySwatch: Colors.blue,
      ),
      home: DoubleBack(
          onFirstBackPress: (context){
            final snackBar = SnackBar(content: Text("Double back Press to exit App"),);
            ScaffoldMessenger.of(context).showSnackBar(snackBar);
          },
          textStyle: TextStyle(fontSize: 15,color: Colors.white),
          background: Colors.red,
          backgroundRadius: 10,
          child: MyHomePage(title: 'Flutter Demo Home Page')
      ),
    );
  }
}
Custom condition
Show press back again to exit, only when specific condition is true Eg: if user is on HomePage then exit the app, if user is in some other page do other event.
class MyApp extends StatelessWidget {
  @override
  Widget build(BuildContext context) {
    return MaterialApp(
      // Imagine that you are using materialbottom and only want to close when tabIndex = 0

      home: DoubleBack(
          condition: tabIndex == 0, // only show message when tabIndex=0
          onConditionFail: (){
            setState((){
                tabIndex = 0; // if not 0, set pageview jumptopage 0
            });
          }
          child: Home(),
        ),
    );
  }
}
Hi Guys, Welcome to Proto Coders Point, In this Article we will checkout how to screen mirror your phone to laptop using scrcpy, Basically we will cast mobile screen or project phone to laptop by using scrcpy.
Scrcpy – A Screencopy Android
The SCRCPY application is a software that is used to easily cast mobile screen to laptop and even control your mobile from laptop, This application can project phone screen to laptop or PC.
screen cpy will screen mirror android phone screen display to laptop & can be easily controlled from laptop.
The Scrcpy is a open source project.
Can scrcpy be used as wireless screen cast
You can cast screen/share screen to laptop in 2 ways:
Wired: using USB connected to Phone.
Wireless: over TCP/IP.
Mandatory Requirement
This are the Mandatory Requirement to share screen to laptop using scrcpy
Android: Version 5.0 & above, (API level 21).
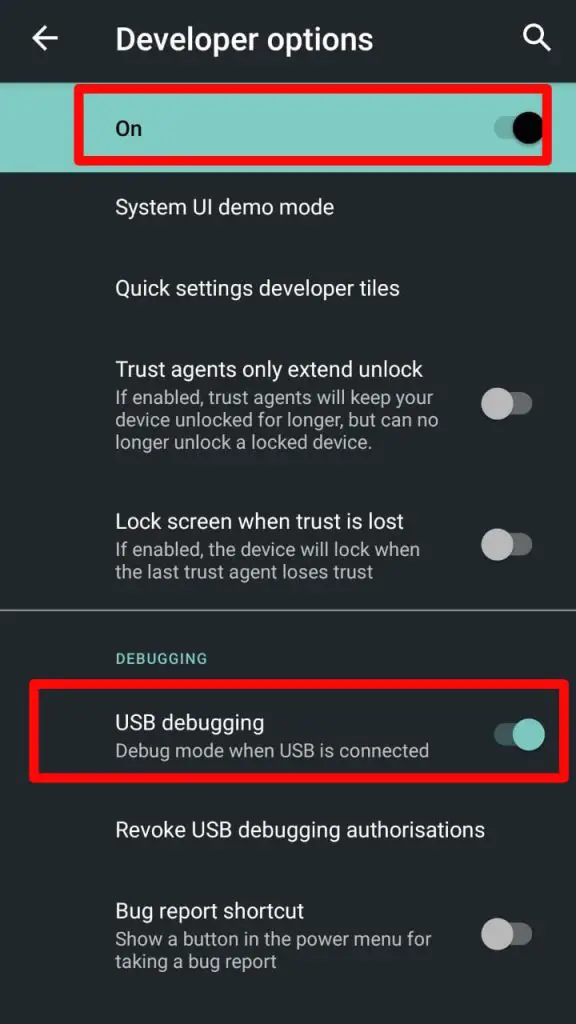
Enable adb debugging.
How to Enable adb debugging
Connect Android Device to Laptop via USB.
Goto Settings > About Phone > Build Number. Click 5 Times on Build Number to turn on developer option.
Search for developer Option Setting > System > Advanced > Developer Option. (path may very)
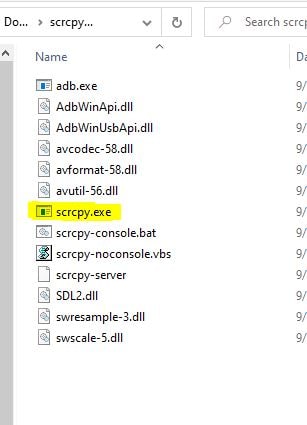
Download the application from above button, The Zip file will get downloaded unzip it.
How to Cast Mobile Screen to Laptop using USB Debugging – WIRED
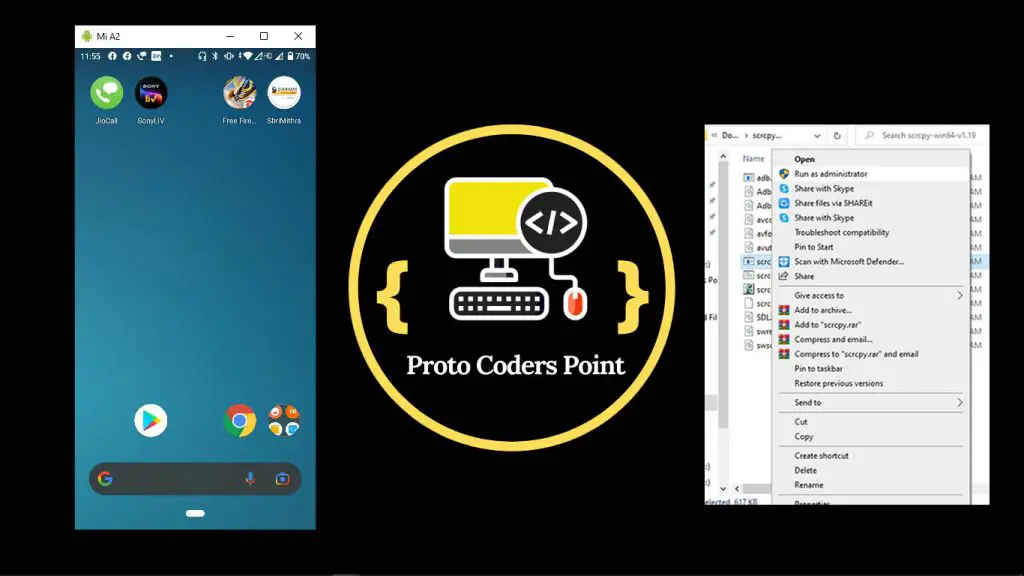
Connect your phone to your laptop or PC and make sure USB Debugging is enabled in your mobile, Then just run scrcpy.exe file as Run As Admin.
And thus phone screen mirroring will start on your laptop through Wired.
Another Best Screen Sharing Software I would like to recommended,Kumospace Screen Sharing Software Why choose Kumospace for screen sharing? Transform your meeting with Kumospace. Our screen sharing enhances collaboration, increases productivity, and fosters privacy, providing a dynamic platform for all team types. Elevate your remote communication experience with Kumospace.
How to Cast Mobile Screen share to Laptop WIRELESS using TCP/IP
By using Scrcpy you can even share your mobile screen to laptop wirelessly using TCP/IP
Step to follow
Both Device(Mobile & Laptop) should be connected to same Network(WIFI)
Find IP Address of Mobile Device ( Goto Settings > About Phone > Status)
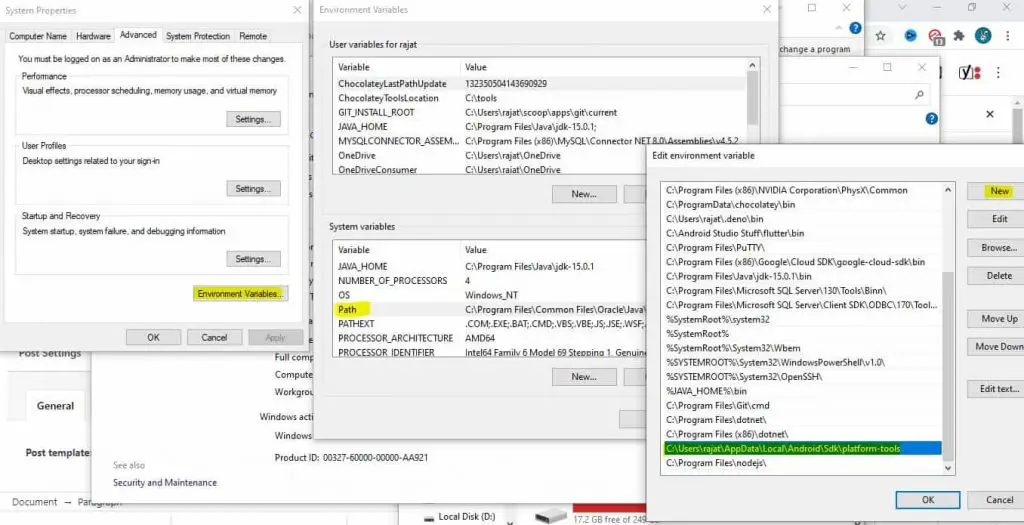
Laptop: Turn on adb TCP/IP, Open Terminal and Run adb tcpip 5555
Set adb connection to your device IP address adb connect DEVICE_IP:5555 (Replace DEVICE_IP with your mobile IP)
After login success, we will store login user details in Hive database using which we can keep user logged in flutter app so then whenever user re-visit the app again he will directly get logged in & Navigate to HomePage or Dashboard Page.
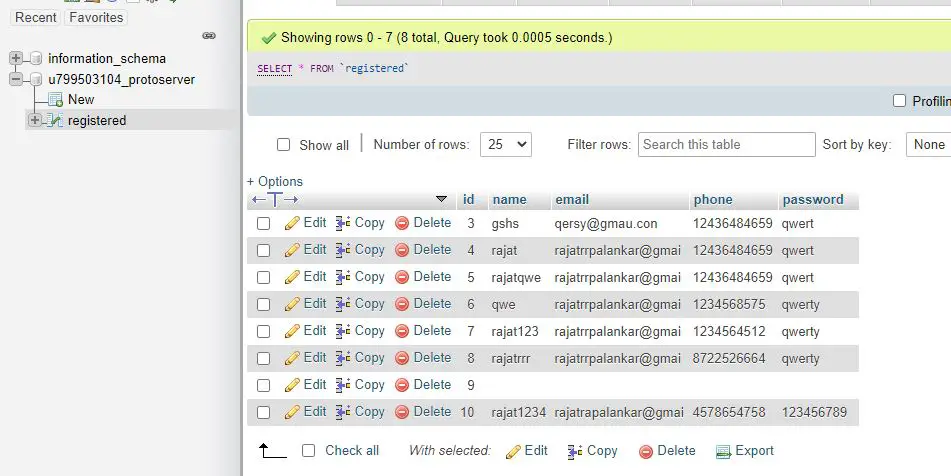
In my database, I have created a table by name “registered”, In the table there are 5 field i.e. id, name, email, phone, password. In registered table all our users data will get stored from flutter app.
PHP API SCRIPT – To get and store data to server database
1. Connection to my database server
connect.php
<?php

//replace username with your phpmyadmin username
//replace password with your phpmyadmin password
// replacce database name with your database name
$conn = mysqli_connect("localhost", "username", "password", "databasename");

if($conn)
{
  //echo "Connection Success";
}
else
{
  //echo "Connection Failed";

}

?>
The above code is used to get connected to phomyadmin database.
2. Inserting data into our registered database table
The registration.php code will help us in registrating user in our database.
From our flutter app registration page, we will send user data to registration.php file server side, the will help us to store/register use in database.
In above code, we have 2 query,
1st Query, will check if same user data is present is database, if user data exist then php code will send response as ‘success’ code as ‘3’ means ‘user exist’.
2nd Query, will insert user data in our database, if user do not exist then insert the user data in database table and send response as ‘success’ code as ‘1’ means ‘registration success’.
The Login.php code will help user to login into flutter app.
From our flutter app we will send 2 parameter (i.e. Email & password) to login.php code.
The above login.php code, will run a query select all the details of a user, if user exist in registrated table, we will store user data in a var $response which is of kind json format & send the response back to flutter app.
Hosting the PHP Script Code in my hosting Provider
I have hosting in Hostinger.com.
So, This php Codes are on my WebHosting Provider Directory, which i can access by using domain name & the path to the php files.
So, Now we are done with server side setup, Therefore now our php script is ready to get data from our flutter app.
Now Let’s check out how to send data from flutter app to php script to insert data into database for registration & then login & keep user logged in app.
Flutter Side – Coding – Snippet
Complete Source Code will be below at the end, Here you will get only the important snippet code.
Library Used – http, Hive, Hive_Flutter
http: To make network http calls, to send & retrive network response data.
hive: hive nosql local database, used to keep all the data of a user and keep user signed in.
Future Registration() async{
    var regAPIUrl = "https://protocoderspoint.com/php/registration.php";

    Map maped = {
      'name':_name.text,
      'email':_email.text,
      'phone': _phone.text,
      'password':_pass.text
    };

    http.Response response = await http.post(Uri.parse(regAPIUrl),body: maped);

    var data = jsonDecode(response.body);

    print("Data: ${data}");
  }
In Registration process, We are asking the user to input his/her name, email, phone, password.
TextEditingController is been attached as a controller to TextField to retrive text entered in it.
The above, Registration Method will be called when user enters all the details in form and click on register button.
In Registration() method, We have:
A URL Path to registration.php.
Map all the user enter data in key-value pair map object.
http.post(url,body): using post method send data to server.
http.Response get response from php file.
Therefore, registration() will send all the data to php code to insert data into database table.
User login – snippet Code
  void login() async {
    var regAPIUrl = "https://protocoderspoint.com/php/login.php";

    Map maped = {
      'email':email.text,
      'password':pass.text,

    };

    http.Response response = await http.post(Uri.parse(regAPIUrl),body: maped);

    var data = jsonDecode(response.body);

    //after successful login, save user data in hive DB.
    if(data['success']=='1'){
      if(isChecked){
        box1.put('email', email.value.text);
        box1.put('pass', pass.value.text);
      }
      box1.put('WelPage_name', data['name']);
      box1.put('WelPage_email', data['email']);
      box1.put('WelPage_phone', data['phone']);
      box1.put('isLogged',true);
      Navigator.pushReplacement(context, MaterialPageRoute(builder: (builder)=>WelcomePage()));
    }
  }
In Login Process, As usual we ask user to enter his login credential i.e. email & password.
TextEditingController is been attached as a controller to TextField to retrive text entered in it.
In above login() method we have:
A URL path to login.php file.
Map all the user enter login credential in key-value pair map object.
http.post to send login credential to login.php from authentication.
http.Response to get response from login.php, The response will hold all the details of user such as name, phone, email that we can store in hive database.
Here after successful login, Save all the response from server in HIVE Database & navigate user to WelcomePage or DashboardPage.
As you can see in above login() method after successful login, we are storing user data in hive database, with that we also put a key-value i.e.
box1.put('isLogged',true);
isLogged : true : Means a user is logged In.
isLogged : false: Means the user is LoggedOut from app.
Depending on this value, when user re-visit the app, if isLogged = true, we navigate the user direct to dashboard page else user will be sent to login page.
Complete Source Code – Flutter keep user logged in using hive database example
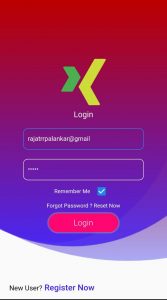
Hi Guys, Welcome to Proto Coders Point. In this flutter tutorial article, will learn how to implement remember me feature in flutter app to save login details by using HIVE local database.
So the feature is very useful, if a user don’t want to enter his login credential in login form everytime he visits the app.
How to implement login remember me in flutter app
The Idea that works behind this is, When a user put his login credential for first time for login purpose in the login textField & check the checkbox ‘Remember me’, We will store/save his/her details in local data store in mobile device itself i.e by using Hive NoSQL database, and when user re-visit the flutter app, we will retrive the data from HIVE database(local database) & put it into TextField, so that their is no need for a user to enter the login credential again & again.
In flutter there are many ways to store data locally. In our case, we are going to make use of HIVE database to save user login details in app itself.
I have wrote a complete article of flutter login-registration, you can just check the below article to learn login UI or else simply download/clone the flutter login registration UI from my github repo.
Now, to make use of Hive db, you need to initialize Hive, to make use of local storage, therefore the best place to do it is in main() method, before loading your app.
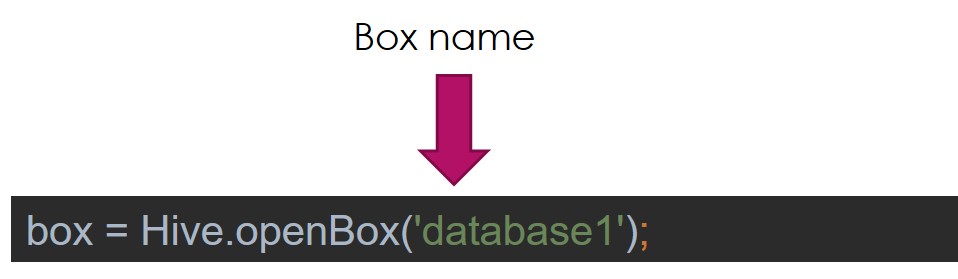
After initializing HIVE, We need to create/open a HIVE BOX.
In short, Hive box is a box where we will store our data in flutter NOSQL database form.
The best place to create Boxes is immediate after Hive.InitFlutter(). Therefore we can create/open HIVE box in initState().
let’s create flutter hive box
late Box box1;
 @override
  void initState() {
    // TODO: implement initState
    super.initState();
    createOpenBox();

  }
void createOpenBox()async{
box1 = await Hive.openBox('logindata');
//getdata(); // when user re-visit app, we will get data saved in local database
//how to get data from hive db check it in below steps
}
7. Save login detail in HIVE BOX
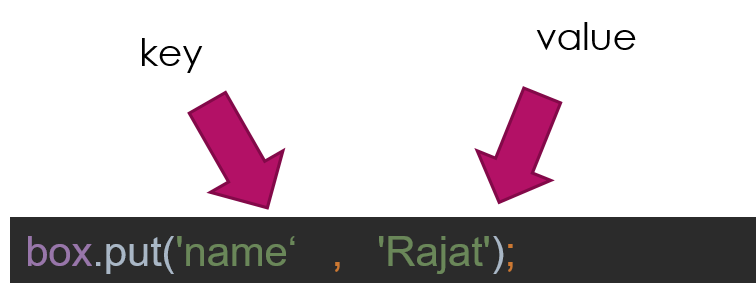
To save data in hive db box we will use put() method.
syntax:
box.put('key',value);
In Hive, data are stored in key-value pair.
In our case, we need to save login detial if remember me checkbox is checked.
Therefore, when login button is pressed we will call a method(login()), In that method we will check if remember me login checkbox is checked, if yes then save login details in HIVE DB.
void login(){
// perform your login authentication
// is login success then save the credential if remember me is on
if(isChecked){
box1.put('email', email.value.text);
box1.put('pass', pass.value.text);
}
}
8. Get data saved in HIVE database
To get data from hive database, we can make use of get() method and pass the key.
syntax:
box1.get('email')
The above syntex will return the data stored in the database using key, if data don’t exist it simply return null.
code: to get login remember me data in login form.
we will call getData() method immediatly after opening hive box, so if data is saved in database will set the data to Login TextField, if data is null then will do nothing.
In this Flutter Hive tutorial we learn how to implement flutter dark mode switch and store the user selected theme using HIVE database, So that whenever user revisit the app again the selected theme i.e dark theme or light theme should be loaded.
In above snippet code, In main() method i.e. before loading your flutter UI content we are initializing flutter hive and then opening the box by using Hive.openBox so the later we can easily use Hive.box() and avoid async code
Using ValueListenableBuilder
We need to refresh the app when user make a switch in flutter theme(dark or light), So the efficient way to refresh is when there is change in HIVE database. Therefore to listen to the changes will make use of ValueListenableBuilder and box.listenable().
We need to refresh MaterialApp themeMode to either ThemeMode.dark else ThemeMode.light
In above code we have a flutter switch, by using which a user can switch dark mode or to light mode theme, On Switch Changed() we are storing the switch data i.e. (true or false) in Hive box.
Here true mean : flutter dark theme false mean: flutter light theme
and by using ValueListenableBuildervalueListenable properties we are listening to any changes in HIVE BOX, and if any change is listened then refresh the builder property, in our case we are MaterialApp Widget that get refreshed when changed happens in Hive data base box.
Complete Source Code – Hive database to save selected dark / light theme switch
It stands out to be very fast to perform CRUD Operations(full form CREATE, READ, UPDATE, DELETE),
most important all the data saved in Flutter hive database is highly secured by using AES-256 encrypted method.
Hive is a NoSQL database, it can be used as best alternative of SQLite Database.
When to use hive database in flutter app?
Suppose you are building a flutter app that is fully offline, for Example: ToDo Note App, Where a user can store his daily todo notes in mobile app itself (local database).
To build Todo list app there is not need of online server database, all the app data we can store locally in mobile itself.
Here are some example where you can use HIVE NoSQL database:
I have Created a playlist on Flutter Hive Tutorial on my youtube channel. Check it out, In those Flutter Hive tutorial, I am going to cover all the above feature using HIVE DATABASE.
Let’s get started
Create a new flutter project in your android Studio IDE or any of your favourite IDE.
Installing Hive in flutter project
1. Add hive dependencies
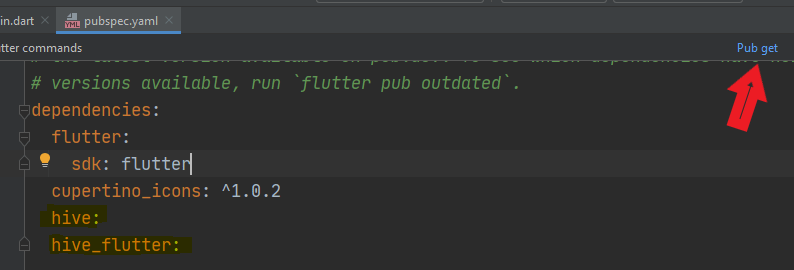
To install hive into your flutter project, open pubspec.yaml file and under dependencies section add this 2 packages
dependencies:
  hive:
  hive_flutter:
Keep the version empty if you want to install latest version available, else specify the version that you want to use.
Then after added above dependencies, just hit pub get button or run flutter pub get command in your IDE terminal.
2. Import hive.dart and hive_flutter.dart
Once the package is been installed successfully, To use Hive in flutter you need to import them.
You need to Start/initialize hive before loading your flutter app content, so the best place to initialize hive is before runApp(…..), As show in below snippet code