
")


Hello Guys, Welcome to Proto Coders Point, In this Android Article we will implement an android GitHub library called Ripple-background used to give device searching or ‘ripple animation android effect’
Which is the Ripple Effect Background?
An Android Ripple Background Github Library that provide an app with an beautiful ripple animation android.
To Learn in detail of this library visit official github site
This Beautiful Ripple background library is been created by Jason Yu Check out his other library they are an awesome android library and very easy to use and understand here
Demo of Ripple Searching device UI
Implementing Searching Device Ripple UI Background
Before we start implementing this library, I just want to say that in this tutorial we are simply Createing a ripple wave backgroud UI(User Interface), This tutorial will not actually search or find real time actual device near by.
So let’s begin adding some required staff into our project.
I assume that you have already created a new android project in your android-studio or you may also add this library in your existing project, all left to you it your choice.
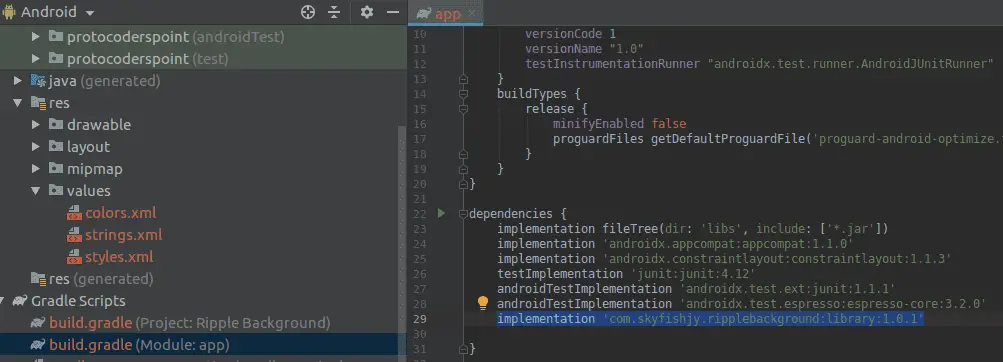
Adding Dependencies in our project
Now, you to add library depencencies in your project. Open build.gradle(module: app)
dependencies {
        implementation 'com.skyfishjy.ripplebackground:library:1.0.1'
}
Then, Just copy paste the above ripple background dependencies into dependencies section.
Then, all set, So the project can now easily use this library.
Adding UI of Ripple wave background in XML file
Here is a xml snippet code that will create a UI for the app, add the below lines of xml code into activity_main.xml file
<com.skyfishjy.library.RippleBackground
    xmlns:android="http://schemas.android.com/apk/res/android"
    xmlns:app="http://schemas.android.com/apk/res-auto"
    android:layout_width="match_parent"
    android:layout_height="match_parent"
    android:id="@+id/content"
    app:rb_color="#0099CC"
    app:rb_radius="32dp"
    app:rb_rippleAmount="4"
    app:rb_duration="3000"
    app:rb_scale="6">
    <ImageView
        android:layout_width="64dp"
        android:layout_height="64dp"
        android:layout_centerInParent="true"
        android:id="@+id/centerImage"
        android:src="@drawable/demoImage"/>
</com.skyfishjy.library.RippleBackground>
Explaination of above code
app:rb_color: used to set the color of ripple background, i have set it to light blue.
app:rb_radius: Radius is been used to set the cornor radius of the circle.
app:rb_rippleAmount: this will show ripple circle waves with some number.
app:rb_duration: set the duration of the ripple circle animation.
app:rb_scale: set the scale of the one last animation cycle.
Ok so inside rippleBackground library their is a ImageView that i have used to start and stop the animation effect on click.
How to start the Animation Effect of ripple wave?
final RippleBackground rippleBackground=(RippleBackground)findViewById(R.id.content);
 ImageView imageView=(ImageView)findViewById(R.id.centerImage);
 imageView.setOnClickListener(new View.OnClickListener() {
     @Override
     public void onClick(View view) {
         rippleBackground.startRippleAnimation();
     }
 });
same like of you want to stop the animation effect then use
rippleBackground.stopRippleAnimation();
Complete Code of Searching Device near by an Ripple Background – Android Github Library
Main_Activity.java
Copy paste the below lines of code in Main_Activity.java file
package protocoderspoint.com.ripplebackground;

import androidx.appcompat.app.AppCompatActivity;

import android.animation.Animator;
import android.animation.AnimatorSet;
import android.animation.ObjectAnimator;
import android.os.Bundle;
import android.os.Handler;
import android.view.View;
import android.view.animation.AccelerateDecelerateInterpolator;
import android.widget.ImageView;

import com.skyfishjy.library.RippleBackground;

import java.util.ArrayList;

public class MainActivity extends AppCompatActivity {

     boolean stop = false;
     Handler handler= new Handler();

     ImageView device;

    @Override
    protected void onCreate(Bundle savedInstanceState) {
        super.onCreate(savedInstanceState);
        setContentView(R.layout.activity_main);

        final RippleBackground rippleBackground=(RippleBackground)findViewById(R.id.content);
        device=(ImageView)findViewById(R.id.device);
        ImageView imageView=(ImageView)findViewById(R.id.centerImage);
        imageView.setOnClickListener(new View.OnClickListener() {
            @Override
            public void onClick(View view) {
                if(!stop) // if stop is not true
                {
                    //then start the
                    rippleBackground.startRippleAnimation();
                    stop=true;
                    handler.postDelayed(new Runnable() {
                        @Override
                        public void run() {
                            foundDevice();
                        }
                    },3000);
                }
                else{
                    rippleBackground.stopRippleAnimation();
                    stop=false;
                    device.setVisibility(View.GONE);
                }

            }
        });
    }
    private void foundDevice(){
        AnimatorSet animatorSet = new AnimatorSet();
        animatorSet.setDuration(400);
        animatorSet.setInterpolator(new AccelerateDecelerateInterpolator());
        ArrayList<Animator> animatorList=new ArrayList<Animator>();
        ObjectAnimator scaleXAnimator = ObjectAnimator.ofFloat(device, "ScaleX", 0f, 1.2f, 1f);
        animatorList.add(scaleXAnimator);
        ObjectAnimator scaleYAnimator = ObjectAnimator.ofFloat(device, "ScaleY", 0f, 1.2f, 1f);
        animatorList.add(scaleYAnimator);
        animatorSet.playTogether(animatorList);
        device.setVisibility(View.VISIBLE);
        animatorSet.start();
    }
}
In the above lines of code i have make use of IF ELSE statement to perform start and stop of the animation effect.
I have used a trigger which is of type Booleon to check if the animation of ripple is in start or stop state.
and if the animation of searching device started we will show an device found after 3 sec of start.
and set the found device to invisible as the user stops the amination.
activity_main.xml
Copy paste the above lines of code in activity_main.xml file
<?xml version="1.0" encoding="utf-8"?>
<LinearLayout xmlns:android="http://schemas.android.com/apk/res/android"
    xmlns:app="http://schemas.android.com/apk/res-auto"
    xmlns:tools="http://schemas.android.com/tools"
    android:layout_width="match_parent"
    android:layout_height="match_parent"
    tools:context=".MainActivity"
    android:orientation="vertical">

    <TextView
        android:layout_width="wrap_content"
        android:layout_height="wrap_content"
        android:gravity="center"
        android:layout_marginTop="15dp"
        android:textStyle="bold|italic"
        android:textSize="20sp"
        android:layout_gravity="center"
        android:text="Searching New Device UI Animation"
        />

    <com.skyfishjy.library.RippleBackground

        android:layout_width="match_parent"
        android:layout_height="match_parent"
        android:id="@+id/content"
        app:rb_color="#0099CC"
        app:rb_radius="32dp"
        app:rb_rippleAmount="5"
        app:rb_duration="3000"
        app:rb_scale="6">
        <ImageView
            android:layout_width="64dp"
            android:layout_height="64dp"
            android:layout_centerInParent="true"
            android:id="@+id/centerImage"
            android:src="@drawable/searching"/>
        <ImageView
            android:layout_width="80dp"
            android:layout_height="80dp"
            android:id="@+id/device"
            android:layout_above="@id/centerImage"
            android:layout_marginBottom="32dp"
            android:layout_toLeftOf="@id/centerImage"
            android:layout_marginRight="6dp"
            android:src="@drawable/device"
            android:visibility="invisible"/>
    </com.skyfishjy.library.RippleBackground>

</LinearLayout>
")


