
Use Twitter to verify your apps authentication.
In this article, we’ll integrate Twitter login and Firebase authentication into our Flutter application. This will allow us to retrieve user information from the home page after a user has been authenticated by logging in with their Twitter account.
Any application can benefit from user authentication. Once an app recognises each unique user using the app. The content of your app can then be altered so that it appears to have been created with a particular user in mind.
One of the options for user authentication in applications is Twitter. Users of the application can log in using the Twitter APIs. By simply using their Twitter account to log in, users can avoid filling out a lengthy registration form. It is much quicker and simpler to get users signed into your app using an account they’ve already created with an external authentication provider, like Facebook or Twitter, with the aid of social networks.
We’re going to integrate Twitter into our Flutter application in this post.
You will discover how to Create a New Application on Twitter Developer Console here.
The user can log in to get their name and authentication.
Firebase project setup
1). Log in to the Firebase console, then click Add project.
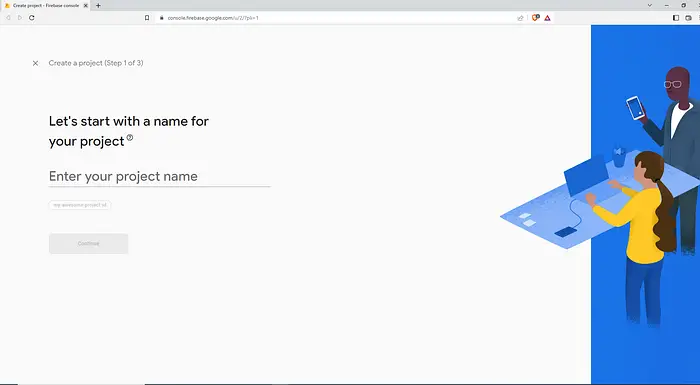
Open the firebase console and tap the “Add project option” , and get this type of screen.
Here add your firebase project name.
2). Select your existing Google Cloud project from the dropdown menu, then click Continue.
3). (Optional) Enable Google Analytics for your project, then follow the prompts to select or create a Google Analytics account.
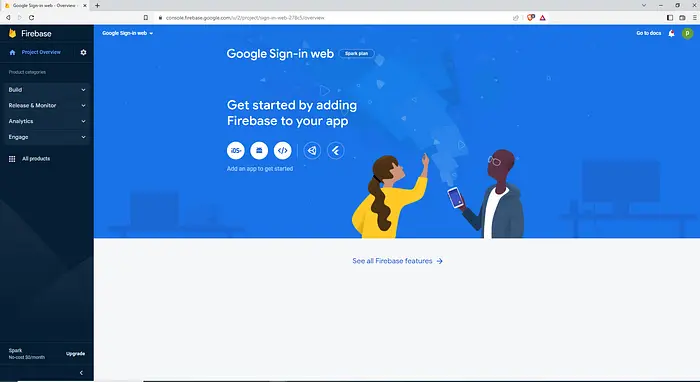
The firebase console might take some few seconds to go through your application. Once that is completed, then click the continue option to open the overview page of the project you made.
Android app set up with firebase console
For android app set up 👍
1). To create an android app in the Firebase console for twitter sign-in flutter, select the option android from this list.
2). Fill up this whole information and register your application on firebase console
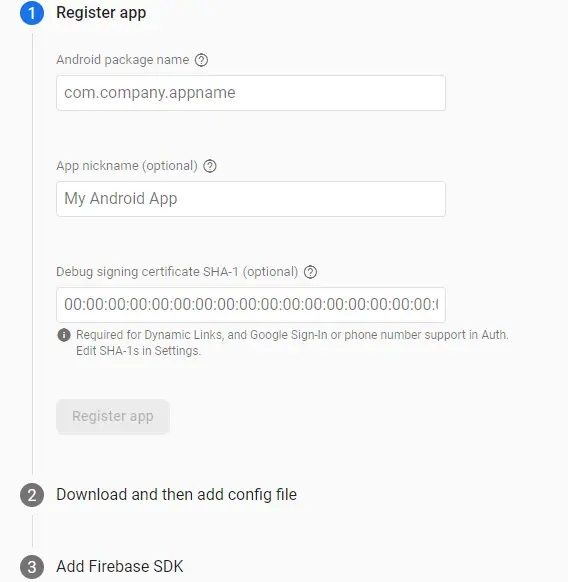
App registration and console progress.
i) Install the necessary command-line tools as the first step. Get the Firebase CLI installed if you haven’t already.
ii) Configure your apps to use Firebase in step two. To set up a connection between your Flutter apps and Firebase, use the Flutter Fire CLI.
iii) Initialize Firebase in your application.
iv) Add Firebase plugins in the app.
Authentication
1). Click on the Authentication.
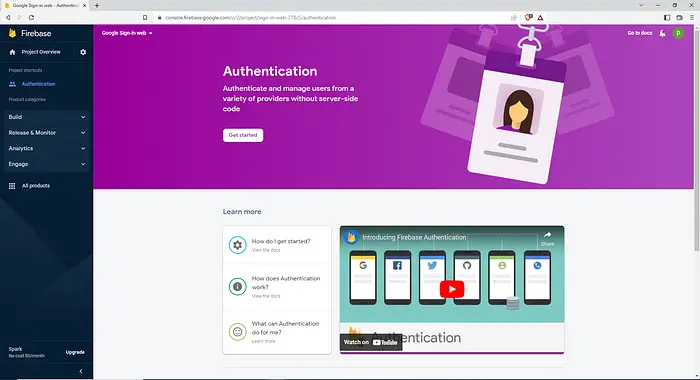
2). Click Get started with the sign-in method and select twitter.
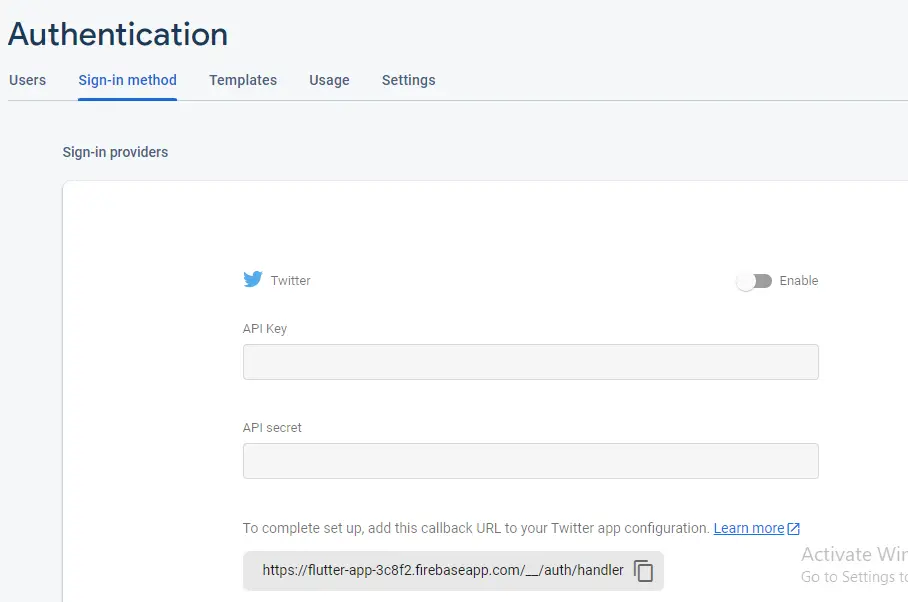
- Presently enable twitter , and you need to enter the project apikey and api secrate. Empower this by tapping the switch on the upper right corner. At that point, click Save.
To obtain a consumer key and a consumer secret, register the Twitter app.
You need a Twitter consumer key and consumer secret, which are used to make Twitter API calls, in order to implement the Twitter login feature in a Flutter application. Therefore, you can get the keys by registering a new Twitter application and following the steps below:
1). Register a new application on the Twitter developer page.
The Twitter sign-in is enabled and authenticated. You will be prompted for the API secret and key.
You must visit the Twitter developer console to do these things.
2). Complete the app’s fields:
The callback URL provided by Firebase is the same as this one (during twitter authentication).
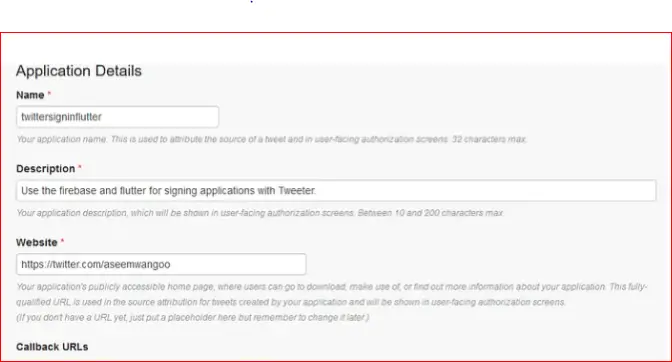
You can enter any url, such as your Twitter profile url, or any website, such as https://test.com, in the website area of Twitter.
The last step is to obtain your API-Key and API-Secret, which you must enter in the Firebase console.
Implementing Twitter Login into Flutter App using firebase authentication
Now , let’s move on flutter coding part and implement twitter login in flutter
Step 1: add the following dependency in .yaml file
flutter_twitter_login: ^any
firebase_auth: ^any
This package provides a simple and easy-to-use API for authenticating users with Twitter.
Step 2: enter the below command on terminal and get the package
Flutter pub get
Step 3: Anonymous auth
Enable anonymous authentication from the Sign-In Option by going to the authentication tab in the Firebase console.
Sign in function ::
Future<void> _signInAnonymously() async {
 try {
   await FirebaseAuth.instance.signInAnonymously();
 } catch (e) {
   print(e);
 }
}
Calling FirebaseAuth.instance is what this function does. a user is returned by signInAnonymously().
Sign out function ::
Future<void> _signOut() async {
 try {
   await FirebaseAuth.instance.signOut();
 } catch (e) {
   print(e);
 }
}
This method causes the user to be signed out by the signOut method.
Create FirebaseAuth instance
FirebaseAuth _auth = FirebaseAuth.instance;
The TwitterLogin class, which is provided by flutter twitter login, accepts the consumerKey and consumerSecret that we obtained when we created the Twitter developer account.
final TwitterLogin twitterLogin = new TwitterLogin(
 consumerKey: 'YOUR CONSUMER_KEY',
 consumerSecret: 'YOUR SECRET_KEY',
);
Sign-in function
void _signInWithTwitterT(String token, String secret) async {
 final AuthCredential credential = TwitterAuthProvider.getCredential(
     authToken: token, authTokenSecret: secret);
 await _auth.signInWithCredential(credential);
}
User login
void _loginT() async {
 final TwitterLoginResult result = await twitterLogin.authorize();
 String ?newMessage;
 if (result.status == TwitterLoginStatus.loggedIn) {
   _signInWithTwitter(result.session.token, result.session.secret);
 } else if (result.status == TwitterLoginStatus.cancelledByUser) {
   newMessage = 'Login canceled by user …..';
 } else {
   newMessage = result.errorMessage;
 }
 setState(() {
   message = newMessage ?? ‘’;
 });
}
Logout function
void _logoutT() async {
 await twitterLogin.logOut();
 await _auth.signOut();
}
Complete Source Code – Twitter Authentication in your Flutter app
import 'package:flutter/material.dart';
import 'package:twitter_login/twitter_login.dart';

class HomePage extends StatefulWidget {
  const HomePage({super.key});

  @override
  _HomePageState createState() => _HomePageState();
}

class _HomePageState extends State<HomePage> {
  final String apiKey = "Your_api_key";
  final String apiSecretKey = 'Your_secret_api_key';

  @override
  Widget build(BuildContext context) {
    return Scaffold(
      backgroundColor: Colors.white,
      appBar: AppBar(
        title: const Text('twitter login sample'),
      ),
      body: Center(
        child: ListView(
          children: [
            Center(
              child: TextButton(
                style: ButtonStyle(
                  foregroundColor:
                      MaterialStateProperty.all<Color>(Colors.white),
                  backgroundColor:
                      MaterialStateProperty.all<Color>(Colors.blueAccent),
                  minimumSize:
                      MaterialStateProperty.all<Size>(const Size(160, 48)),
                ),
                onPressed: () async {
                  await login();
                },
                child: const Text('Login'),
              ),
            ),
            const SizedBox(height: 24),
          ],
        ),
      ),
    );
  }

  /// Use Twitter API v1.1
  Future login() async {
    final twitterLogin = TwitterLogin(
      /// Consumer API keys
      apiKey: apiKey,

      /// Consumer API Secret keys
      apiSecretKey: apiSecretKey,

      /// Registered Callback URLs in TwitterApp
      /// Android is a deeplink
      /// iOS is a URLScheme
      redirectURI: 'example://twitter_auth',
    );

    /// Forces the user to enter their credentials
    /// to ensure the correct users account is authorized.
    /// If you want to implement Twitter account switching, set [force_login] to true
    /// login(forceLogin: true);
    final authResult = await twitterLogin.login();
    switch (authResult.status) {
      case TwitterLoginStatus.loggedIn:
        // success
        print('====== Login success ======');
        print(authResult.authToken);
        print(authResult.authTokenSecret);
        break;
      case TwitterLoginStatus.cancelledByUser:
        // cancel
        print('====== Login cancel ======');
        break;
      case TwitterLoginStatus.error:
      case null:
        // error
        print('====== Login error ======');
        break;
    }
  }
}
For example app code github link
https://github.com/Mitali8620/twitter_auth_app.git
Conclusion
This was a brief introduction to Twitter sign-in using Firebase authentication from my side and how it works using Flutter. I have described the fundamental architecture of Twitter sign In in the article; you are free to adapt this code as you see fit.
I’m hoping that the material on this blog will be adequate for you to try out Twitter Sign-In in your Flutter projects. Please give this demo programme a try to see how Twitter Sign-In with Firebase Authentication works with flutter.
We appreciate you reading this article.
Thank you …..
Have a great day………
")


