
Hi Guys, Welcome to Proto Coders Point. In this AWS article let’s learn how to discontinue a PEM/PPK file by which a user can connect to server – basically remove access for using a particular PEM/PPK file (aws instance change key pair).
Why and when you should stop using old PEM/PPK file
Assume you work as a full stack developer in a startup company along with a colleague on a project where you both manage a server. Both you and your colleague are now given a pem or ppk to connect to an AWS server.
After 1-2 years of working in the same company, your colleague may resign or be fired by the company CEO.
Now your manager has asked you to collect all of the necessary documents, such as a pem or ppk file, from colleague who has a pem file and can access the server instance.
The pem file copies can be made right, and anyone with a pem/ppk file can easily gain access to and hijack your server instance.
As a result, it is preferable to phase out the old pem/ppk file (change key pair).
Now, let’s remove the old pem/ppk key file to gain access to the server by following the procedures below.
In AWS, How do I delete/deactivate the existing PEM file and generate a new one
Video Tutorial
Replace public key from aws server / change key pair ec2 Instance
Here is a simple Solution
On your server EC2 instance inside authorized_keys file the public_key is been stored, all you need to do is simply replace the existing public key with new key pair.
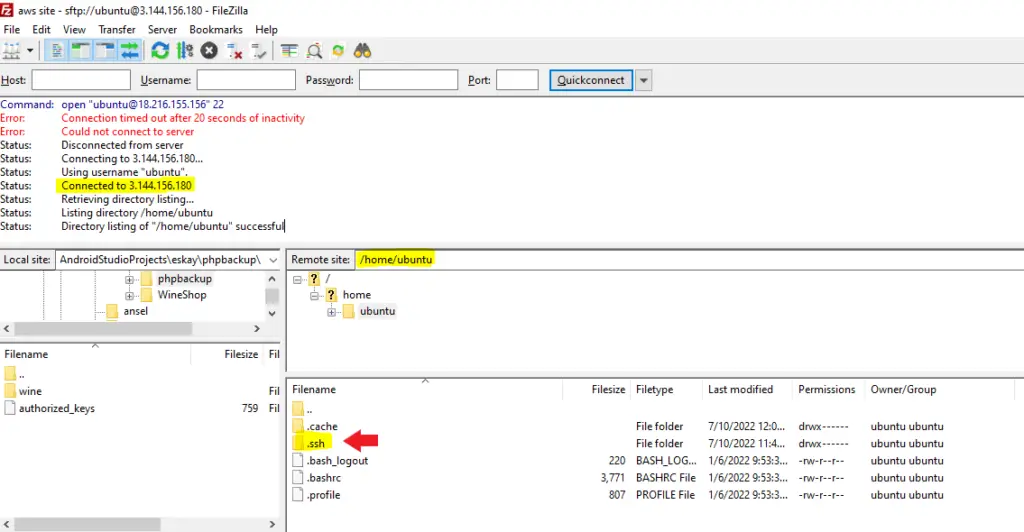
To do so, find the authorized_keys file in this path (/home/ubuntu/.ssh/authorized_keys) for ubuntu instance and (/home/ec2-user/.ssh/authorized_keys) for Amazon Linux instance.
Step by Step Guide to change key pair of aws server instance
Step 1: Login into AWS dashboard
Login from here – > https://aws.amazon.com/
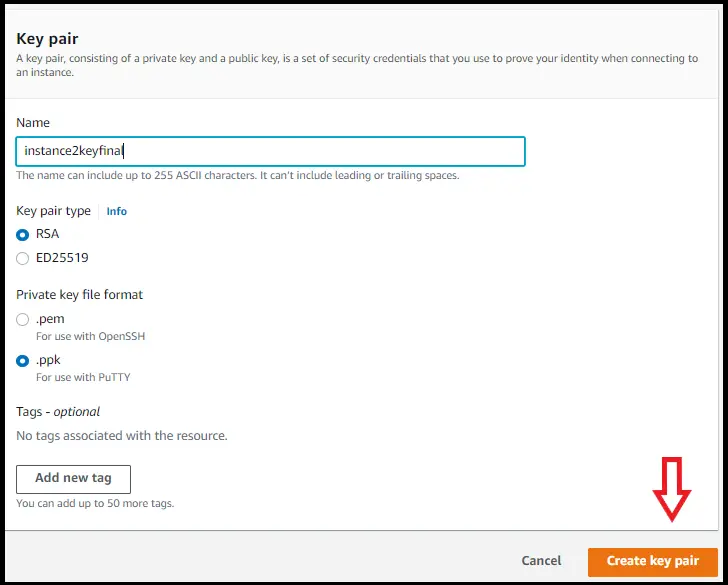
Step 2: Create a fresh new key pair (pem)
Now, as we are discontinuing using old pem or ppk file to connect to server file system, we need to create a pem file on aws server.
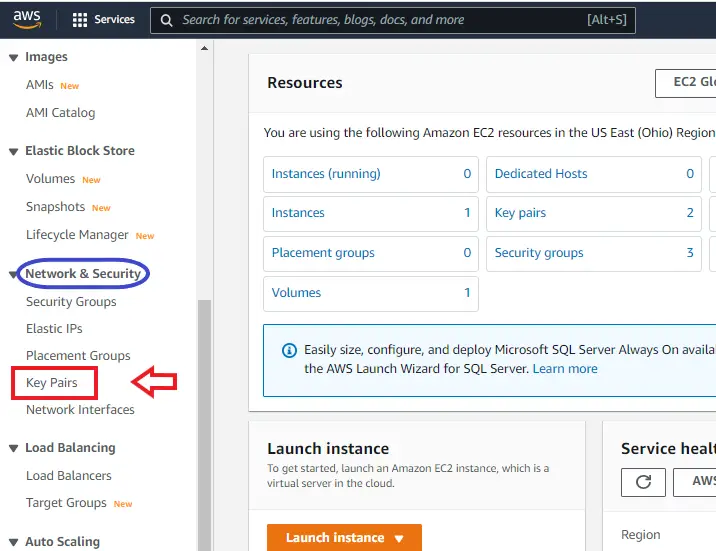
In amazon dashboard, goto key Pairs page , on the left side you may see Network & Security - > Key Pair.
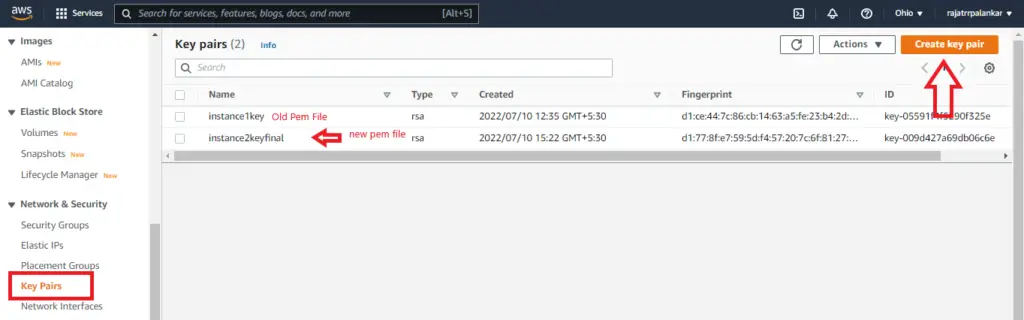
As you can see in above image, I have 2 key pair i.e PEM file, One is Old Pem file and one is newly created pem file.
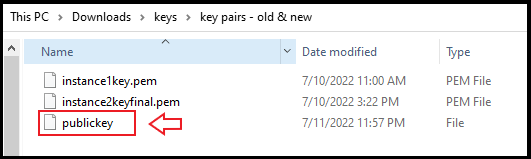
This are two pem file downloaded, by which I can connect to server.
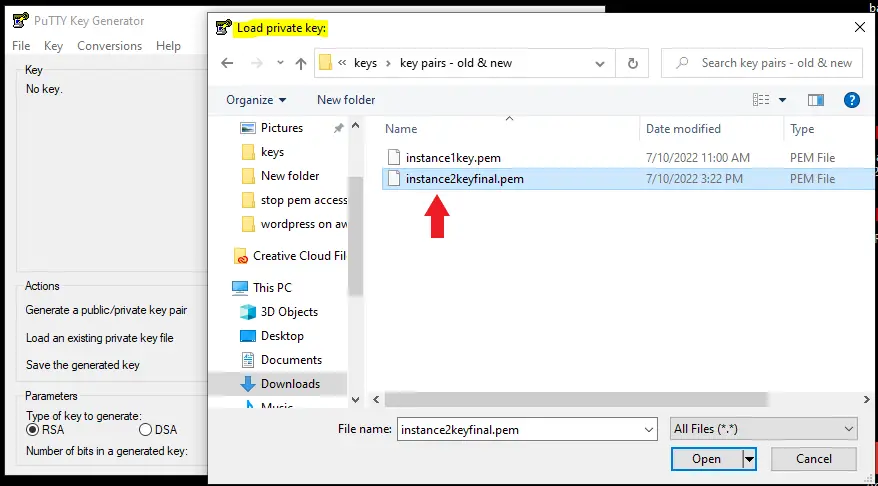
Step 3: Create a public key using puttyGen

Open PuttyGen, Click on Load button and browse to newly created pem file.
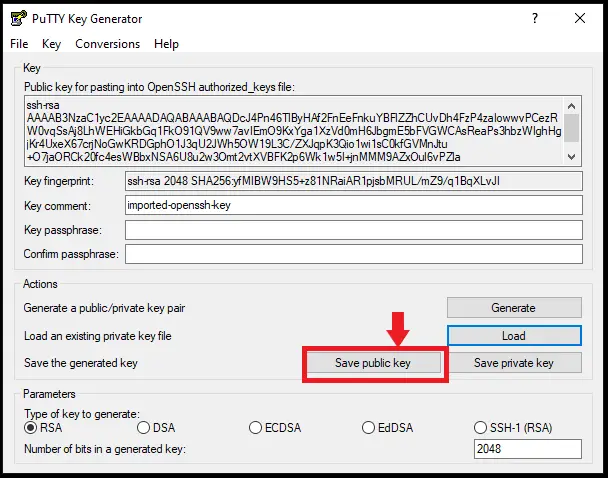
Now we have successfully got pubic key from freshly created PEM file.
Step 4: Open the public key and copy the openssh key
Now as you have the public key file created in above step using puttygen.
Open the file in any editor
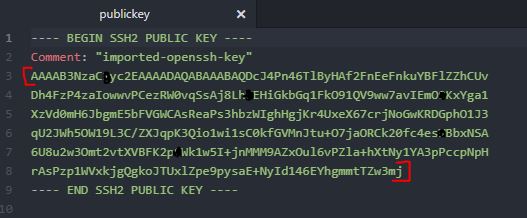
Convert this key text into a single line and Copy the marked key character.
We need copy this key in authorized_keys file on server .ssh folder.
Step 5: Replacing old PEM key with new PEM key
Now the final step.
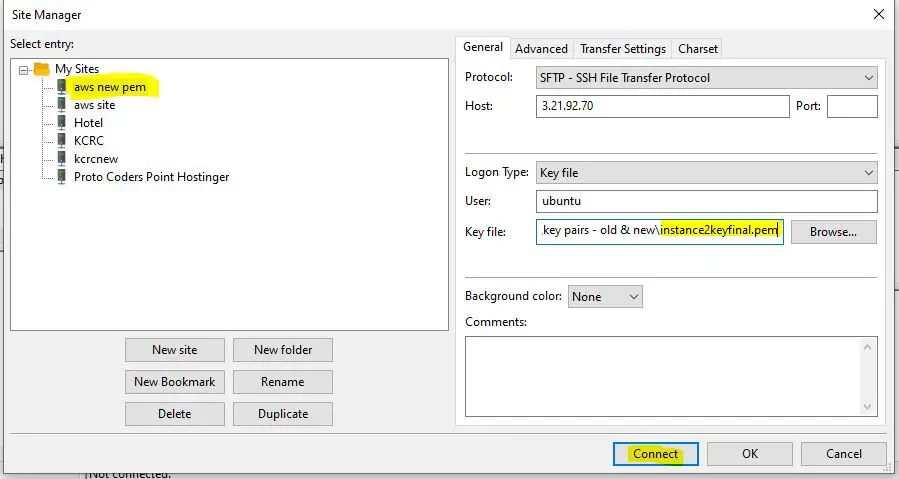
Using FileZilla or Winscp tools to connect to server.
We have to edit/replace old public key with new public in authorized_keys, To do so navigate to /home/ubuntu/.ssh in .ssh folder you will find authorized_keys file Open it in any editor or using putty terminal (vim or gedit).
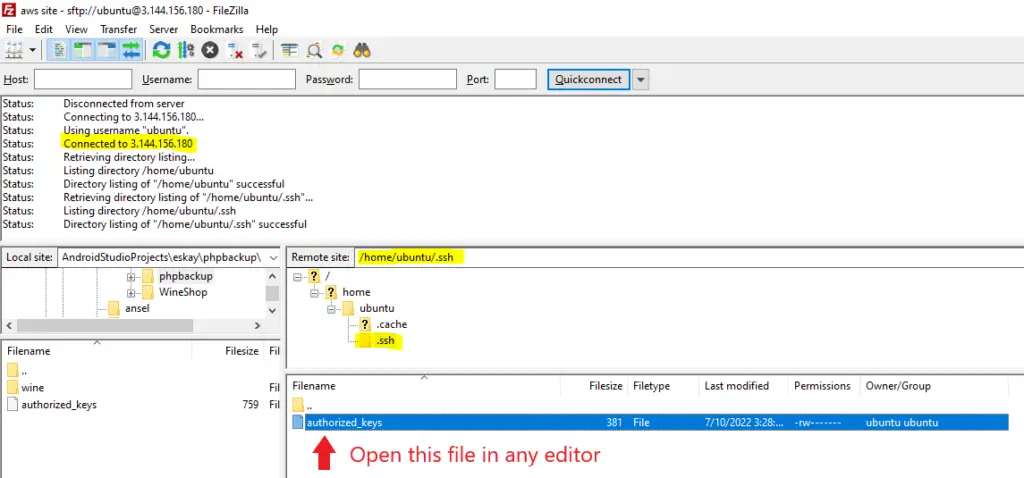
Then in authorized_keys file, you have to add new public key that you create by pem key pair using puttygen in above steps.
This is the format to ssh-rsa <public key>.

In above image, you see I have old key, down of it I added new public. (Note: you can add as many as ssh-rsa public key you want).
Here I my case I want to discontinue usage of old pem/ppk file to access server. Therefore from above image I have to remove old public key from authorized_keys file from server.
Now save the file.
Warning: Before removing old ssh-rsa public key from authorized_key file, make sure that the newly added ssh-rsa public key(.pem key pair) is working and giving you access to the server.
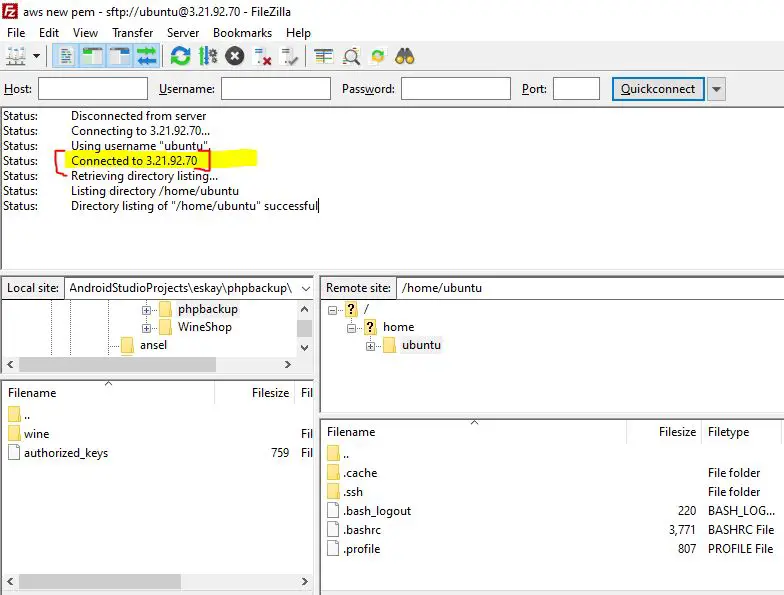
Step 6: Verify that is new .pem is working
Now, you have added newly created pem file public key in authorized key file, It’s time verify if new .pem key is working or no.
Therefore, We have successfully removed old pem/ppk file authority to access AWS server and created a new pem file to access the same server instance.


