Home Blog Page 57

Flutter Change App Language – Multi Languages – GetX Localization

0
flutter getx localization change app language
flutter localization change app language

Hi Guys, Welcome to Proto Coders Point.

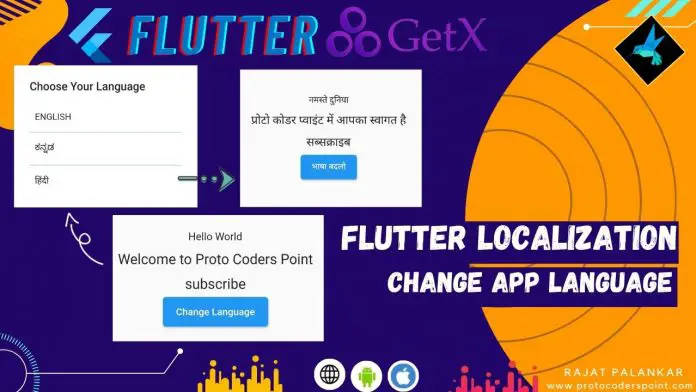
In this flutter tutorial Article, We will learn how do you change whole app language in flutter.

Allow the app user to select his desired language to use your flutter app.

To Add Localization in flutter app, We will use flutter getX Internationalization to change app language in flutter.

Video Tutorial

Flutter GetX Localization – Change App Language

1. Create a New Flutter Project or open Exisiting Project

Use your favorite IDE( Android Studio, VSCode or IntelliJS) to build Flutter App, Create a new Flutter Project.
I use Android Studio to build Flutter Application.

2. Install/Add Flutter GetX Dependencies

Open pubspec.yaml file & add getx Package under dependencies like this as shown below:

dependencies:
   get: #any version

After adding the dependencies hit pub get button or run flutter pub get command in your IDE Terminal.

Now, you have successfully added getx package in your flutter, Now to make use of getx you need to import get.dart in flutter dart code to use it.

import 'package:get/get.dart';

How to use GetX Flutter library to add multiple language in flutter app

1. Change root Widget ‘MaterialApp’ to ‘GetMaterialApp’

By using ‘GetMaterialApp’, you can pass 2 parameter i.e. locale & translations.

GetMaterialApp Properties

There are many properties(parameter) that can be used.
In this project example we will use locale & translations.

  • locale: initial/default language translations of App.
  • translations: pass your translation class that contain translated strings of locales language.
Eg: runApp(MyApp());

//root class (MyApp)

return GetMaterialApp(
      debugShowCheckedModeBanner: false,
      translations: LocaleString(),
      locale: Locale('en','US'),
      title: 'Flutter Demo',
      theme: ThemeData(
        primarySwatch: Colors.blue,
      ),
      home: HomePage(),
    );

2. Create custom locale key-value translation class

Create a new Dart file, that extends Translations class.

This class has Translations as key-value dictionary map language strings.

Here we will define our locale language translated Strings.

import 'package:get/get.dart';

class Messages extends Translations {
  @override
  Map<String, Map<String, String>> get keys => {
        'en_US': {
          'hello': 'Hello World',
        },
        'hi_IN': {
          'hello': 'नमस्ते दुनिया',
        }
      };
}

Here For Example ‘en’ stands for ENGLISH LANGUAGE and ‘US’ stands for Country(United States), Likewise other locale is been defined HINDI, ‘hi’ and Country ‘IN’ INDIA.


3. How to use translations in flutter with Getx

You have defined your locale languages in translations class.

you can use the specified ‘key’ & just append with .tr & thus the locale language will be translated in your flutter app.

 Eg:
         Text('hello'.tr),

Note: Here ‘hello’ is the key specified in translation class above.

4. How to change app language in flutter – Change Locale

GetX Provide a function to change locale language

Get.updateLocale(locale);

you need to pass locale to change the language. Eg:

var locale = Locale('hi','IN');
Get.updateLocale(locale);

Now, your app will use the key- value strings from hindi language as defined in Translations class.

Translations will automatially make use of new locale & your app language will get changed.


Flutter Change whole app language – GetX Localization

My Project Source Code for Reference

Project File Structure.
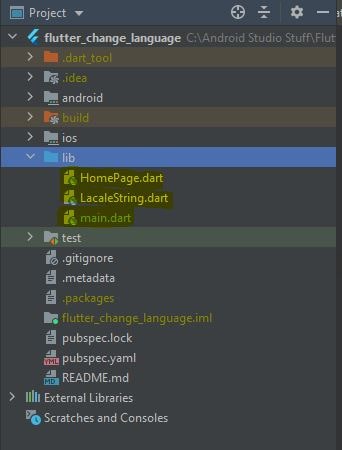
1. localeString.dart

This file will have string of translated langauge Country wise in a form of key-value pair.

import 'package:get/get.dart';

class LocaleString extends Translations{
  @override
  // TODO: implement keys
  Map<String, Map<String, String>> get keys => {
     //ENGLISH LANGUAGE
    'en_US':{
      'hello':'Hello World',
      'message':'Welcome to Proto Coders Point',
      'title':'Flutter Language - Localization',
      'sub':'Subscribe Now',
      'changelang':'Change Language'
    },
     //HINDI LANGUAGE
    'hi_IN':{
      'hello': 'नमस्ते दुनिया',
      'message':'प्रोटो कोडर प्वाइंट में आपका स्वागत है',
      'title':'स्पंदन भाषा - स्थानीयकरण',
      'subscribe':'सब्सक्राइब',
      'changelang':'भाषा बदलो'
    },
    //KANNADA LANGUAGE
    'kn_IN':{
      'hello': 'ಹಲೋ ವರ್ಲ್ಡ್',
      'message':'ಪ್ರೋಟೋ ಕೋಡರ್ ಪಾಯಿಂಟ್‌ಗೆ ಸುಸ್ವಾಗತ',
      'title':'ಬೀಸು ಭಾಷೆ - ಸ್ಥಳೀಕರಣ',
      'subscribe':'ವಂತಿಗೆ ಕೊಡು',
      'changelang':'ಭಾಷೆ ಬದಲಿಸಿ'
    }
  };

}

2. main.dart

This page will have root widget ‘GetMaterialApp’ which will load HomePage.dart & we have parameter translations class & locale language to be used as default.

import 'package:flutter/material.dart';
import 'package:flutter_change_language/LacaleString.dart';
import 'HomePage.dart';
import 'package:get/get.dart';

void main() {
  runApp(MyApp());
}

class MyApp extends StatelessWidget {
  // This widget is the root of your application.
  @override
  Widget build(BuildContext context) {
    return GetMaterialApp(
      debugShowCheckedModeBanner: false,
      translations: LocaleString(),
      locale: Locale('en','US'),
      title: 'Flutter Demo',
      theme: ThemeData(
        primarySwatch: Colors.blue,
      ),
      home: HomePage(),
    );
  }
}

3. HomePage.dart

In HomePage.dart we have a AlertDialog Box by which a user can change the language of your flutter app.

import 'package:flutter/material.dart';
import 'package:get/get.dart';

class HomePage extends StatelessWidget {

  final List locale =[
    {'name':'ENGLISH','locale': Locale('en','US')},
    {'name':'ಕನ್ನಡ','locale': Locale('kn','IN')},
    {'name':'हिंदी','locale': Locale('hi','IN')},
  ];

  updateLanguage(Locale locale){
    Get.back();
    Get.updateLocale(locale);
  }

  buildLanguageDialog(BuildContext context){
    showDialog(context: context,
        builder: (builder){
           return AlertDialog(
             title: Text('Choose Your Language'),
             content: Container(
               width: double.maxFinite,
               child: ListView.separated(
                 shrinkWrap: true,
                   itemBuilder: (context,index){
                     return Padding(
                       padding: const EdgeInsets.all(8.0),
                       child: GestureDetector(child: Text(locale[index]['name']),onTap: (){
                         print(locale[index]['name']);
                         updateLanguage(locale[index]['locale']);
                       },),
                     );
                   }, separatorBuilder: (context,index){
                     return Divider(
                       color: Colors.blue,
                     );
               }, itemCount: locale.length
               ),
             ),
           );
        }
    );
  }

  @override
  Widget build(BuildContext context) {
    return Scaffold(
      appBar: AppBar(title: Text('title'.tr),),
      body: Column(
        mainAxisAlignment: MainAxisAlignment.center,
        children: [
          Text('hello'.tr,style: TextStyle(fontSize: 15),),
          SizedBox(height: 10,),
          Text('message'.tr,style: TextStyle(fontSize: 20),),
          SizedBox(height: 10,),
          Text('subscribe'.tr,style: TextStyle(fontSize: 20),),
        
          ElevatedButton(onPressed: (){
            buildLanguageDialog(context);
          }, child: Text('changelang'.tr)),
        ],
      )
    );
  }
}

Flutter custom AppBar – Curved Bottom shape Appbar using ClipPath

0
custom appbar flutter curved shaped appbar

Hi Guys, Welcome to Proto Coders Point.

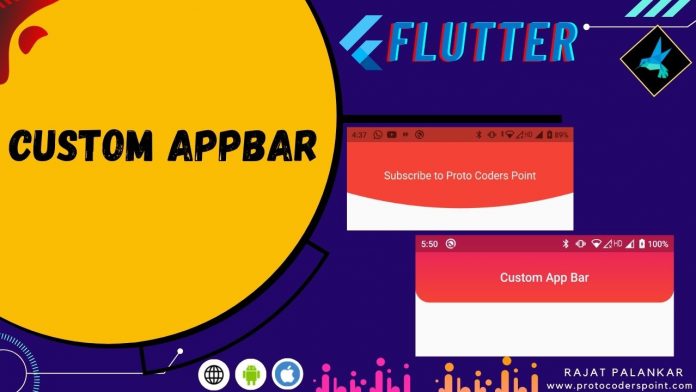
In this Flutter tutorial, we will create custom appbar in flutter.

Building a beautiful custom appbar will Enhance the UI look of a flutter app. Flutter allows us to build a awesome & Interactive application by which a business can Grab it’s customer atttention.

In this tutorial, We will create 2 designs of a appbar in flutter.

  1. Flutter AppBar with border radius.
  2. Curved Button shape Appbar using ClipPath with CustomClipper<Path>.

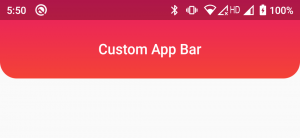
1. Flutter Appbar with Gradient Color, Border Radius – How to Give Rounded Border to AppBar

custom appbar gradient color with border radius flutter.png
Flutter Appbar gradient color with border radius

Video Tutorial

Inside AppBar Widget we have a property called as ‘flexiableSpace’, by using flexiableSpace, We can add any widget inside appbar, so let’s add a container into it.

Let’s Create a custom appbar, As you can see in above Appbar UI design, it has a Gradient background color & it also has a border radius.

Snippet Code
flexibleSpace: Container(
            decoration: BoxDecoration(
                borderRadius: BorderRadius.only(bottomLeft: Radius.circular(20),bottomRight: Radius.circular(20)),
                gradient: LinearGradient(
                    colors: [Colors.red,Colors.pink],
                    begin: Alignment.bottomCenter,
                    end: Alignment.topCenter
                )
            ),
          ),

Complete Source code – Flutter Custom AppBar with Border Raduis

main.dart

import 'package:flutter/cupertino.dart';
import 'package:flutter/material.dart';

void main() {
  runApp(MyApp());
}

class MyApp extends StatelessWidget {
  // This widget is the root of your application.
  @override
  Widget build(BuildContext context) {
    return MaterialApp(
      title: 'Flutter Demo',
      debugShowCheckedModeBanner: false,
      theme: ThemeData(
        primarySwatch: Colors.blue,
      ),
      home: MyHomePage(),
    );
  }
}

class MyHomePage extends StatefulWidget {
  const MyHomePage({Key? key}) : super(key: key);

  @override
  _MyHomePageState createState() => _MyHomePageState();
}

class _MyHomePageState extends State<MyHomePage> {
  @override
  Widget build(BuildContext context) {
    return Scaffold(
        appBar: AppBar(
          brightness: Brightness.dark,
          backgroundColor: Colors.transparent,
          elevation: 0.0,
          toolbarHeight: 70,
          title: Text("Custom App Bar"),
          centerTitle: true,
          flexibleSpace: Container(
            decoration: BoxDecoration(
                borderRadius: BorderRadius.only(bottomLeft: Radius.circular(20),bottomRight: Radius.circular(20)),
                gradient: LinearGradient(
                    colors: [Colors.red,Colors.pink],
                    begin: Alignment.bottomCenter,
                    end: Alignment.topCenter
                )
            ),
          ),
        ),
    );
  }
}

2. Curved Bottom Shape AppBar

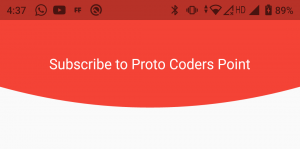
Flutter Curved Bottom – Rounded shape Appbar

Video Tutorial

As you can see in above Appbar UI Design, We have a AppBar that is been curved from bottom like a Rounded Circular Appbar in flutter.

To acheive curved shape in flutter we will make use of clipPath with CustomClipper, By which we can clip a Container as per our needs.

So let’s begin.

1. Create a CustomShape.dart class

Create a new dart file in lib directory by name ‘ CustomShape.dart’, THis class extends CustomClipper<Path> that we can use to clip any widget inside ClipPath Class.

CustomClipper<Path> has 2 override methods

  1. getClip: We can define our clipping path over here.
  2. shouldReclip: Re-clip the widget by using oldClipper( We are not using this, In this tutorial)

CustomShape.dart ( Code )

import 'package:flutter/cupertino.dart';
import 'package:flutter/material.dart';

class Customshape extends CustomClipper<Path>{
  @override
  Path getClip(Size size) {
    double height = size.height;
    double width = size.width;

    var path = Path();
    path.lineTo(0, height-50);
    path.quadraticBezierTo(width/2, height, width, height-50);
    path.lineTo(width, 0);
    path.close();
    return path;
  }

  @override
  bool shouldReclip(covariant CustomClipper<Path> oldClipper) {
    // TODO: implement shouldReclip
    return true;
  }

}

2. Use ClipPath to Give shape to Container

Now, Apply the CustomShape to container by using ClipPath Clipper Property.

//Snippet

ClipPath(
          clipper: Customshape(),
          child: Container(
            height: 250,
            width: MediaQuery.of(context).size.width,
            color: Colors.red,
            child: Center(child: Text("Subscribe to Proto Coders Point",style: TextStyle(fontSize: 20,color: Colors.white),)),
          ),
        ),

Complete Code – Curved Bottom Shape Flutter Appbar

import 'package:customized_appbar/customShape.dart';
import 'package:flutter/cupertino.dart';
import 'package:flutter/material.dart';

void main() {
  runApp(MyApp());
}

class MyApp extends StatelessWidget {
  // This widget is the root of your application.
  @override
  Widget build(BuildContext context) {
    return MaterialApp(
      title: 'Flutter Demo',
      debugShowCheckedModeBanner: false,
      theme: ThemeData(
        primarySwatch: Colors.blue,
      ),
      home: MyHomePage(),
    );
  }
}

class MyHomePage extends StatefulWidget {
  const MyHomePage({Key? key}) : super(key: key);

  @override
  _MyHomePageState createState() => _MyHomePageState();
}

class _MyHomePageState extends State<MyHomePage> {
  @override
  Widget build(BuildContext context) {
    return Scaffold(
      appBar:  AppBar(
        toolbarHeight: 130,
        backgroundColor: Colors.transparent,
        elevation: 0.0,
        flexibleSpace: ClipPath(
          clipper: Customshape(),
          child: Container(
            height: 250,
            width: MediaQuery.of(context).size.width,
            color: Colors.red,
            child: Center(child: Text("Subscribe to Proto Coders Point",style: TextStyle(fontSize: 20,color: Colors.white),)),
          ),
        ),
      ),
       body: Container(),
    );
  }
}

Recommended Post

Curved Navigation Bar flutter

Implement Dotted Border or Dashed Border to Widget

Flutter double back press to Exit – Press back button again to Exit

0
double press back button to exit app
press back button again to exit the app

Hi Guys, Welcome to Proto Coders Point.

There are some flutter app that has a feature like app exit when user double press back button.

When back buton is pressed for first time a toast message or a snackbar popup can be shown to user sayingpress back button again to exit the app, Then immediatly in a seconds, if back button is pressed again, your flutter app will Exit.

So, In this flutter tutorial, we will learn how to implement “Press back button to exit” in flutter, also called as double back press to exit app.

We will make use of WillPopScope Widget to acheive this.

What is WillPopScope Widget

WillPopScope widget is used to detect when user press the back button.

So, whenever a user press back button, you will get a callback at onWillPop function, which return Future value i.e. Either True or False.

If it returned value is true, the screen will be popped and exit the .

Syntax:

WillPopScope(
      onWillPop: () async{
          //callback function when back button is pressed
      },
      child: Scaffold(),
);

Here if onWillPop() async function return true, then you flutter app will get exited.


How to Implement Double back press to exit in flutter

1. Simply Wrap your Scaffold Widget with WillPopScope Widget.

Snippet Example

WillPopScope(
      onWillPop: () async{
          //callback function when back button is pressed
      },
      child: Scaffold(),
);

so now whenever your flutter app user press back button, WillPopScope will detect it and send the a callback to onWillPop() function in it.

Note: if onWillPop return true that means it will close the screen i.e. back press exit the app.

2. How to implement back press again to exit flutter app

To implement press back button again in flutter, we will make use of DateTime.now(), DateTime.now() will return current time.

DateTime pre_backpress = DateTime.now();

So, We will create 2 time variable & find the time gap between both the time vairable.

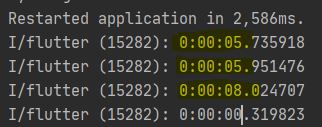
final timegap = DateTime.now().difference(pre_backpress);

print('$timegap');

The above code will return the timegap between them.

Now, let’s initialize booleon variable, where will check if timegap duration is greater then 2 seconds.

final cantExit = timegap >= Duration(seconds: 2);

if timegap is more than 2 second we will set ‘cantExit’ variable to true.

if cantExit = true; that means we can’t exit app, so will show snackbar to user saying ‘‘Press back button again to Exit app”

if cantExit = false; i.e. Timegap between second back press is less then 2 second, that means user can exit the app.

Complete Snippet code of onWillPop

onWillPop: () async{

           final timegap = DateTime.now().difference(pre_backpress);

           final cantExit = timegap >= Duration(seconds: 2);

           pre_backpress = DateTime.now();

           if(cantExit){
             //show snackbar
             final snack = SnackBar(content: Text('Press Back button again to Exit'),duration: Duration(seconds: 2),);

             ScaffoldMessenger.of(context).showSnackBar(snack);

             return false; // false will do nothing when back press
           }else{
             return true;   // true will exit the app
           }

      },

Complete Source Code – Implement double back press to exit flutter app

main.dart

import 'package:flutter/material.dart';
import 'package:passing_data/FruitDataModel.dart';
import 'package:passing_data/FruitDetail.dart';

void main() {
  runApp(MyApp());
}

class MyApp extends StatelessWidget {
  // This widget is the root of your application.
  @override
  Widget build(BuildContext context) {
    return MaterialApp(
      title: 'Flutter Demo',
      theme: ThemeData(
        primarySwatch: Colors.blue,
      ),
      home: HomePage(),
      debugShowCheckedModeBanner: false,
    );
  }
}

class HomePage extends StatelessWidget {
  
  DateTime pre_backpress = DateTime.now();
  @override
  Widget build(BuildContext context) {
    return WillPopScope(
      onWillPop: () async{
        final timegap = DateTime.now().difference(pre_backpress);

        final cantExit = timegap >= Duration(seconds: 2);

        pre_backpress = DateTime.now();

        if(cantExit){
          //show snackbar
          final snack = SnackBar(content: Text('Press Back button again to Exit'),duration: Duration(seconds: 2),);

          ScaffoldMessenger.of(context).showSnackBar(snack);
          return false;
        }else{
          return true;
        }
      },
      child: Scaffold(
        body: Container(),
      ),
    );
  }
}

Flutter Listview onTap on Selected Item – send data to new screen

0
flutter listview item ontap pass data to next screen

Hi Guys, Welcome to Proto Coders Point.

There are some situation when you want to pass data from one page to another page.

For Example: We Have a listview with a list of data and each item in the list has some data. Eg: Title, a Image & when a user select a item from the list we want to send same selected data to another screen to view in detail.

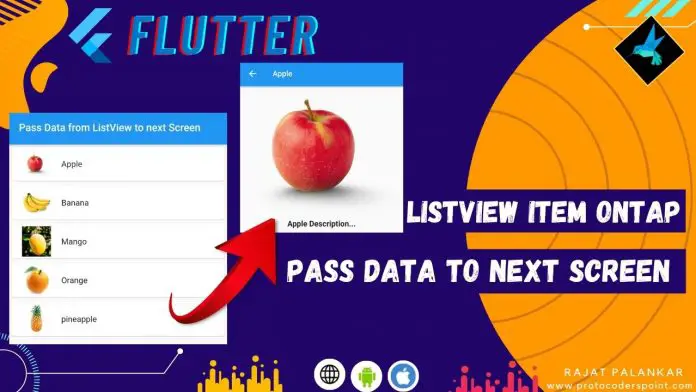
So In this flutter tutorial example, We will create a listview with items in it & will learn listview onTap selected item send data to next screen.

In other words flutter send data to another page.

Demo

Video Tutorial


So let’s begin with flutter tutorial to send selected data from listview to next page

Flutter Listview onTap on Selected Item – send data to new screen

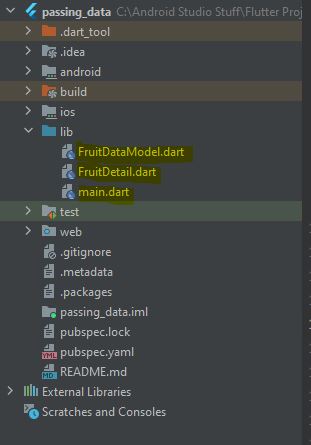
Here we need to create 2 screens and a DataModel

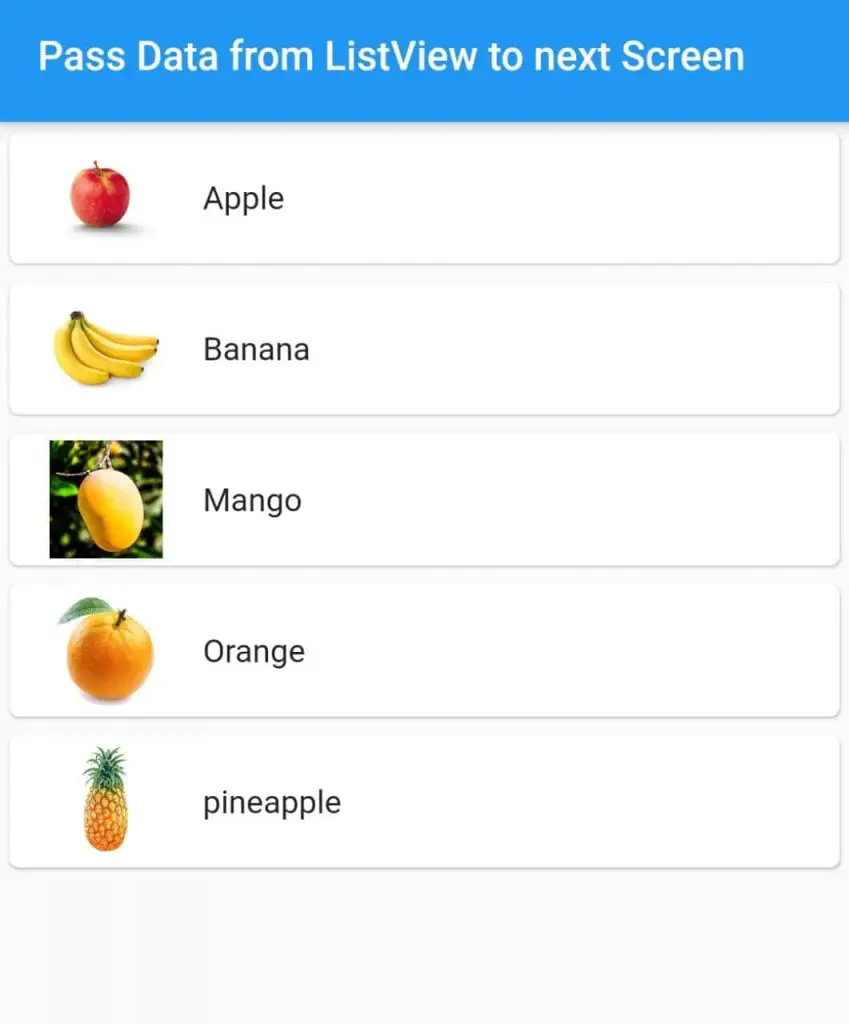
(Screen 1) main.dart: Will generate list of data and show in listview.

(Screen 2) FruitDetail.dart: User selected item data will be shown here.

(DataModel) FruitDataModel: Holds Information or a data.

Create files as below and add respectively code in it. Refer my project file structure.

1. FruitDataModel.dart

A Data Model are class of entities that holds information or a data.

In our app, DataModel hold String data.

Eg: Name of Fruit.
ImageUrl of Fruit.
Description of Fruit.

class FruitDataModel{
  final String name,ImageUrl,desc;

  FruitDataModel(this.name, this.ImageUrl, this.desc);
}

DataModel will have a constructor to assign the value to variables strings.


2. FruitDetail.dart

This is UI Screen 2 to display detail of Selected Item from the listview.

FruitDetail has a constructor that accept Fruitdata object list of type<FruitDataModel>.

by using the FruitDataModel we can access the data of selected item using indexId. & FruitDataModel class object that holds the details of selected fruit from the listview in main.dart

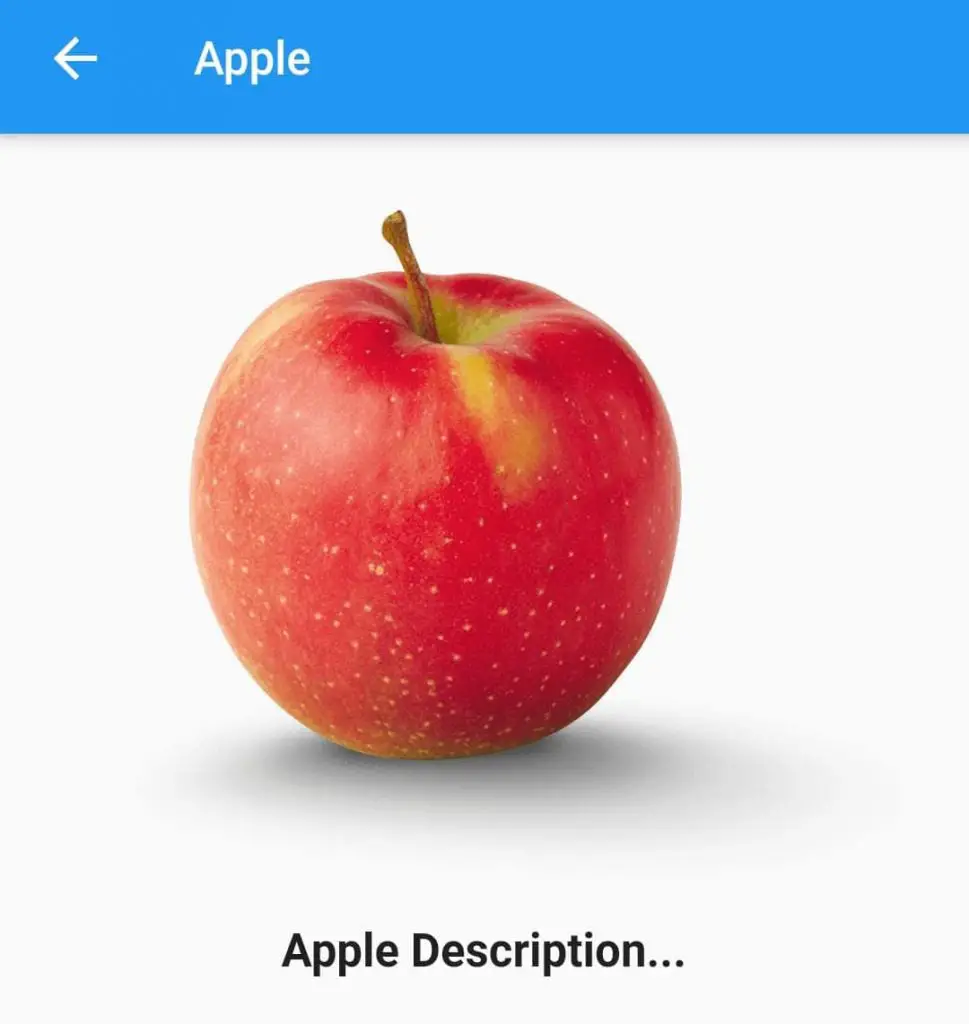
The FruitDetail page will have UI like Appbar, Image.network to load url images & a Text Widget.
In AppBar will print fruit name.
Image.Network will load Image from url.
Text will show description detail of Fruit.

Screen 2 – Show detail of selected item from listview flutter

FruitDetail.dart – code

import 'package:flutter/material.dart';
import 'package:passing_data/FruitDataModel.dart';

class FruitDetail extends StatelessWidget {
  final FruitDataModel fruitDataModel;

  const FruitDetail({Key? key, required this.fruitDataModel}) : super(key: key);

  @override
  Widget build(BuildContext context) {
    return Scaffold(
      appBar: AppBar(title: Text(fruitDataModel.name),),
      body: Column(
        children: [
          Image.network(fruitDataModel.ImageUrl),
          SizedBox(
            height: 10,
          ),
          Text(fruitDataModel.desc,style: TextStyle(fontWeight: FontWeight.bold,fontSize: 20),)
        ],
      ),
    );
  }
}

3. main.dart – generate list and display it in listview

Screen 1 – will load data in listview- listview selected send data to screen 2

This is the screen 1, Where we will generate static list of data(just for an example) & then show the data in listview.builder.

let’s create list of data(fruit name & imageUrl array list in flutter)

 static List<String> fruitname =['Apple','Banana','Mango','Orange','pineapple'];

static List url = ['https://www.applesfromny.com/wp-content/uploads/2020/05/Jonagold_NYAS-Apples2.png',
      'https://cdn.mos.cms.futurecdn.net/42E9as7NaTaAi4A6JcuFwG-1200-80.jpg',
      'https://upload.wikimedia.org/wikipedia/commons/thumb/9/90/Hapus_Mango.jpg/220px-Hapus_Mango.jpg',
      'https://5.imimg.com/data5/VN/YP/MY-33296037/orange-600x600-500x500.jpg',
      'https://5.imimg.com/data5/GJ/MD/MY-35442270/fresh-pineapple-500x500.jpg'];

In above snippet, We have created list of fruitName & fruit ImageUrl.

Now Let’s merge the array and generate list of data object which will be of type ‘FruitDataModel’.

final List<FruitDataModel> Fruitdata = List.generate(
        fruitname.length,
            (index)
        => FruitDataModel('${fruitname[index]}', '${url[index]}','${fruitname[index]} Description...'));

above ‘Fruitdata’ list object will hold each fruit combined data.

How to access data from DataModel object

Now to access data from list of datamodel object, simply use like shown below.

1. Fruitdata.length: Will return int value, saying size of the given list.

2. Fruitdata[index_no].name: Will return Fruitname of particular index no.
Eg: Fruitdata[0].name = ‘ Apple’.
Fruitdata[1].name = ‘Mango’.

3. Fruitdata[index_no].ImageUrl: will return Url of Image.

Let’s Build list using listview builder

ListView.builder(
           itemCount: Fruitdata.length,
          itemBuilder: (context,index){
             return Card(
               child: ListTile(
                 title: Text(Fruitdata[index].name),
                 leading: SizedBox(
                   width: 50,
                   height: 50,
                   child: Image.network(Fruitdata[index].ImageUrl),
                 ),
                 onTap: (){
                   Navigator.of(context).push(MaterialPageRoute(builder: (context)=>FruitDetail(fruitDataModel: Fruitdata[index],)));
                 },
               ),
             );
          }
      )

Here in above snippet code, we are loading and show the item in a listview using Fruitdata object, and when a user Tap on any listview item, we are Navigating the user to FruitDetail.dart page by passing selected data from listview.

The data will be passed from page one(main.dart) to page two to constructor of page two (i.e. FruitDetail.dart)

main.dart – complete Code

import 'package:flutter/material.dart';
import 'package:passing_data/FruitDataModel.dart';
import 'package:passing_data/FruitDetail.dart';


void main() {
  runApp(MyApp());
}

class MyApp extends StatelessWidget {
  // This widget is the root of your application.
  @override
  Widget build(BuildContext context) {
    return MaterialApp(
      title: 'Flutter Demo',
      theme: ThemeData(
        primarySwatch: Colors.blue,
      ),
      home: MyHomePage(),
      debugShowCheckedModeBanner: false,
    );
  }
}

class MyHomePage extends StatefulWidget {
  const MyHomePage({Key? key}) : super(key: key);

  @override
  _MyHomePageState createState() => _MyHomePageState();
}

class _MyHomePageState extends State<MyHomePage> {

    static List<String> fruitname =['Apple','Banana','Mango','Orange','pineapple'];

    static List url = ['https://www.applesfromny.com/wp-content/uploads/2020/05/Jonagold_NYAS-Apples2.png',
      'https://cdn.mos.cms.futurecdn.net/42E9as7NaTaAi4A6JcuFwG-1200-80.jpg',
      'https://upload.wikimedia.org/wikipedia/commons/thumb/9/90/Hapus_Mango.jpg/220px-Hapus_Mango.jpg',
      'https://5.imimg.com/data5/VN/YP/MY-33296037/orange-600x600-500x500.jpg',
      'https://5.imimg.com/data5/GJ/MD/MY-35442270/fresh-pineapple-500x500.jpg'];

    final List<FruitDataModel> Fruitdata = List.generate(
        fruitname.length,
            (index)
        => FruitDataModel('${fruitname[index]}', '${url[index]}','${fruitname[index]} Description...'));

  @override
  Widget build(BuildContext context) {
    return Scaffold(
      appBar: AppBar(title: Text('Pass Data from ListView to next Screen'),),
      body: ListView.builder(
           itemCount: Fruitdata.length,
          itemBuilder: (context,index){
             return Card(
               child: ListTile(
                 title: Text(Fruitdata[index].name),
                 leading: SizedBox(
                   width: 50,
                   height: 50,
                   child: Image.network(Fruitdata[index].ImageUrl),
                 ),
                 onTap: (){
                   Navigator.of(context).push(MaterialPageRoute(builder: (context)=>FruitDetail(fruitDataModel: Fruitdata[index],)));
                 },
               ),
             );
          }
      )
    );
  }
}

Flutter Passing data between screens – send data to another page

0
flutter pass data between screens

Hi Guys, Welcome to Proto Coders Point.

Sometime, you not only want to navigate user to next screen page, but also want to pass data from screen 1 to screen 2.

For Example: A Screen 1 in your flutter app has a TextField & user enter the data, same data you want on screen 2 for further action.

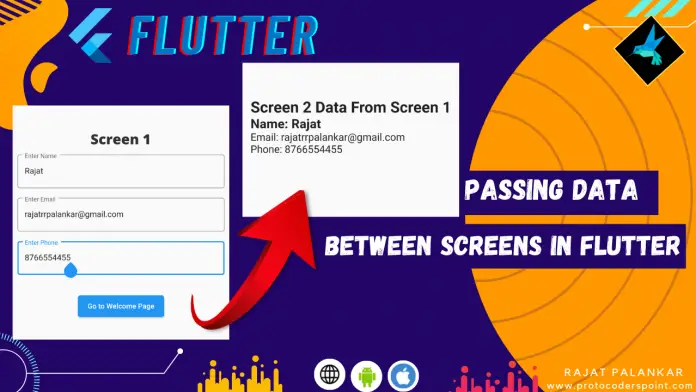
In this flutter tutorial example, we will learn how to pass data between screens – In other words flutter send data to another page.

Flutter pass data between screens – Complete Video tutorial

Here we will have 2 Screens.

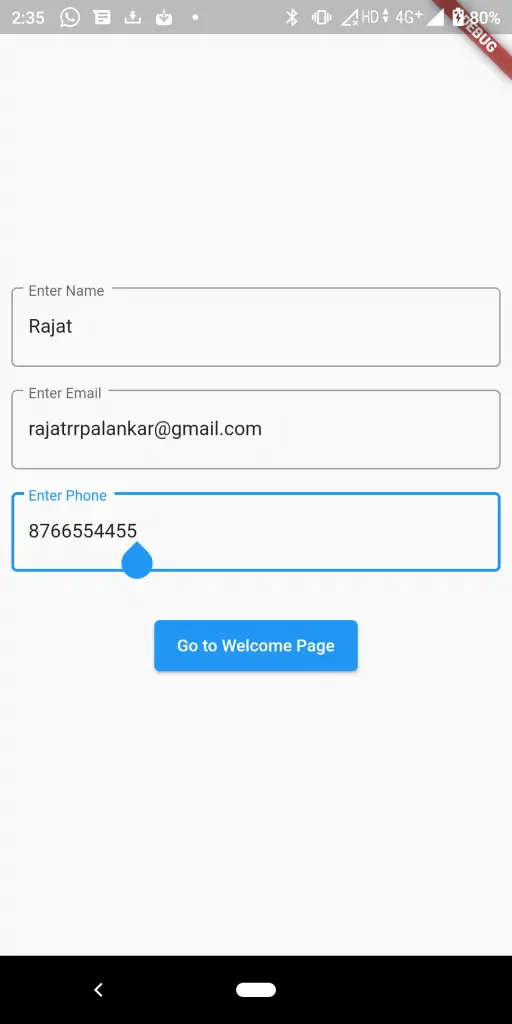
1. main.dart(Screen 1): Has TextField ( Name, Email, Phone ) where user can enter data & a button when pressed sends data from screen 1 to screen 2 using Navigator.push() to screen 2 with data passed through a constructor.

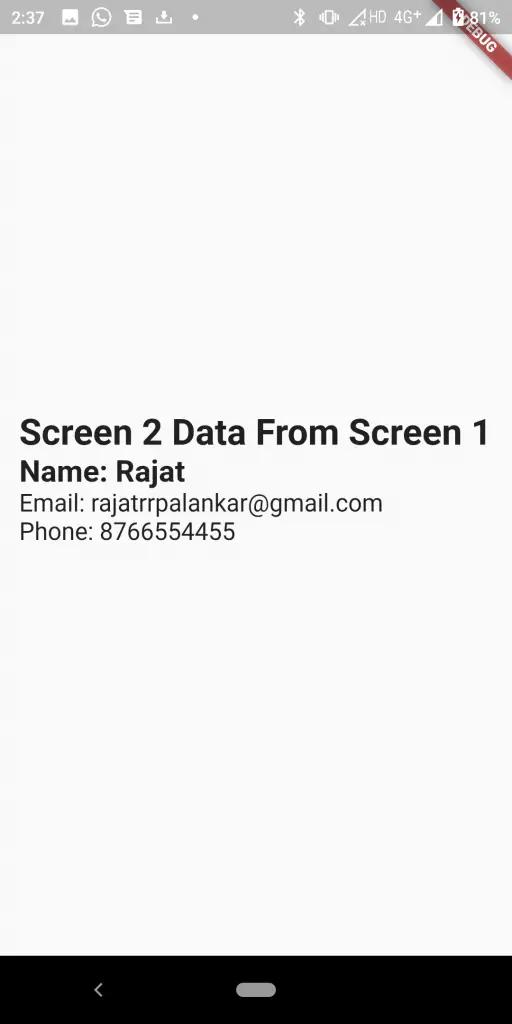
2. WelcomePage.dart(Screen 2): Will have a constructor that received data from screen 1 and then display the data in Text Widget in Screen 2.

So let’s begin with Code

1. Create a dart file – WelcomePage.dart

In Welcome page, we will just show the data received from main.dart page in a Text Widget.

As i said above, WelcomePage.dart will have a Constructor that accepts some Required data String parameter such as Name, Email, Phone.

   #constructor Snippet Code
   String name,email,phone;
   WelcomePage({Key? key,required this.name,required this.email,required this.phone}) : super(key: key);

Then use the String data to print in Text Widget.

Text('Name: $name'),

Note: If you are using Stateful Widget, then you cannot directly use the data, for that you need to use widget.data as below.

 Text('Name: ${widget.name}'),

WelcomePage.dart Complete Code

import 'package:flutter/material.dart';

class WelcomePage extends StatelessWidget {
   String name,email,phone;
   WelcomePage({Key? key,required this.name,required this.email,required this.phone}) : super(key: key);

  @override
  Widget build(BuildContext context) {
    return Scaffold(
    body: Center(
      child: Center(
        child: Column(
          crossAxisAlignment: CrossAxisAlignment.start,
          children: [
            Text('Name: $name'),
            Text('Email: $email'),
            Text('Phone: $phone'),
          ],
        ),
      ),
    ),
    );
  }
}

2. main.dart – Where user will Enter The Data in TextField.

In main.dart, we will have 3 TextField where user can enter his Name, Email & Phone No and a button when pressed will send the entered data to Page 2(WelcomePage.dart) using Navigator.push() & pass the data through WelcomePage Constructor.

In each TextField we have attached TextEditingController that will hold the data entered by the user in textField.

Navigator to pass data to screen 2 ( Welcomepage)

Navigator.of(context).push(MaterialPageRoute(
                                             builder: (context) => WelcomePage(
                                                                  name: _name.text,
                                                                  email: _email.text,
                                                                  phone: _phone.text)
                                                            )
                                             );

main.dart complete code

import 'package:flutter/material.dart';
import 'package:passing_data/ToDoDetail.dart';
import 'package:passing_data/Todo.dart';
import 'package:passing_data/WelcomePage.dart';

void main() {
  runApp(MyApp());
}

class MyApp extends StatelessWidget {
  // This widget is the root of your application.
  @override
  Widget build(BuildContext context) {
    return MaterialApp(
      title: 'Flutter Demo',
      theme: ThemeData(
        primarySwatch: Colors.blue,
      ),
      home: Form(),
    );
  }
}

class Form extends StatefulWidget {
  const Form({Key? key}) : super(key: key);

  @override
  _FormState createState() => _FormState();
}

class _FormState extends State<Form> {
  TextEditingController _name = TextEditingController();
  TextEditingController _email = TextEditingController();
  TextEditingController _phone = TextEditingController();
  @override
  Widget build(BuildContext context) {
    return  Scaffold(
      body: Center(
        child: Column(
          mainAxisAlignment: MainAxisAlignment.center,
          children: [
            Padding(
              padding: const EdgeInsets.all(8.0),
              child: TextField(
                controller: _name,
                decoration: InputDecoration(
                  border: OutlineInputBorder(),
                  labelText: 'Enter your Name'
                ),
              ),
            ),
            Padding(
              padding: const EdgeInsets.all(8.0),
              child: TextField(
                controller: _email,
                decoration: InputDecoration(
                    border: OutlineInputBorder(),
                    labelText: 'Enter your Email'
                ),
              ),
            ),
            Padding(
              padding: const EdgeInsets.all(8.0),
              child: TextField(
                controller: _phone,
                decoration: InputDecoration(
                    border: OutlineInputBorder(),
                    labelText: 'Enter your Phone No'
                ),
              ),
            ),
            ElevatedButton(onPressed: (){

              Navigator.of(context).push(MaterialPageRoute(builder: (context)=>WelcomePage(name: _name.text, email: _email.text, phone: _phone.text)));

            }, child: Text('Go Next Page'))
          ],
        ),
      ),
    );
  }
}

Flutter make call, open a URL website, Send SMS, Email – url_launcher

0
flutter url launcher

Hi Guys, Welcome to Proto Coders Point.

In this flutter tutorial, we will make use of url_launcher external package to perform below event.

  1. flutter make a phone call.
  2. flutter launch URL – Load a Website.
  3. flutter send SMS with message to a number.
  4. flutter send email with subject & body message.

So Let’s Begin

Here’s a complete video tutorial of URL_LAUNCHER.


url_launcher flutter package

Flutter url_launcher is a plugin for your flutter project, if you want to add feature in your app such as making a phone call, send a SMS, Email, opening a website(url launch) by taking input from your flutter app users.

Eg:

Make a call: Your app user can simply select a phone number from a list in app and make a direct call in flutter.

Send Email: User can select to whom to send email & enter text in subject & email body and send it.

Open URL from flutter app: Suppose your app display list of website address then user can simply select which website he want to visit and open the website.

Send SMS: A user can send SMS to a number with a message.

Installation of url_launcher

In flutter project open pubspec.yaml file & under dependencies section add url launcher package.

dependencies:
  url_launcher: # latest version

& hit put get button to download and add it.


IOS Setup

Add LSApplicationQueriesSchemes entries in your Info.plist file.

Project > ios > Runner > Info.plist
<key>LSApplicationQueriesSchemes</key>
<array>
  <string>https</string>
  <string>http</string>
</array>

Android Setup

A <queries> element should be added in AndroidManifest.xml

If your app is using https, tel and mailto then add below queries in manifest file.

Project > Android > app > src > main > AndroidManifest.xml
<queries>
  <!-- If your app opens https URLs -->
  <intent>
    <action android:name="android.intent.action.VIEW" />
    <data android:scheme="https" />
  </intent>
  <!-- If your app makes calls -->
  <intent>
    <action android:name="android.intent.action.DIAL" />
    <data android:scheme="tel" />
  </intent>
  <!-- If your app emails -->
  <intent>
    <action android:name="android.intent.action.SEND" />
    <data android:mimeType="*/*" />
  </intent>
</queries>

Import url_launcher.dart

Once you have added the package as external library and make all the platform setup, now you can simply use it just by importing it any where in your project Eg: main.dart

import 'package:url_launcher/url_launcher.dart';

How to use url launcher package in flutter

1] Open a URL in default browser – flutter

http://<url>, https://<url>; eg: https://protocoderspoint.com

launch('https://protocoderspoint.com/');

2] Flutter Make a Phone Call

tel:<phone number>; Eg: tel:+91 8755***8685

launch('tel:+91 88888888888');

3] Flutter send Email with subject and body

mailto:<email address>?subject=<subject>&body=<body>, e.g. mailto:smith@example.org?subject=News&body=New%20plugin

launch('mailto:rajatrrpalankar@gmail.com?subject=This is Subject Title&body=This is Body of Email');

4] Flutter send SMS with message

sms:<phone number>?body=<message>, e.g. sms:5550101234

launch('sms:+91888888888?body=Hi Welcome to Proto Coders Point');

Complete Code flutter url launcher

main.dart

import 'package:flutter/material.dart';
import 'package:url_launcher/url_launcher.dart';

void main() {
  runApp(MyApp());
}

class MyApp extends StatelessWidget {
  // This widget is the root of your application.
  @override
  Widget build(BuildContext context) {
    return MaterialApp(
      title: 'Flutter Demo',
      debugShowCheckedModeBanner: false,
      theme: ThemeData(
        primarySwatch: Colors.blue,
      ),
      home: MyHomePage(),
    );
  }
}

class MyHomePage extends StatefulWidget {
  const MyHomePage({Key? key}) : super(key: key);

  @override
  _MyHomePageState createState() => _MyHomePageState();
}

class _MyHomePageState extends State<MyHomePage> {
  @override
  Widget build(BuildContext context) {
    return Scaffold(
      body: Center(
        child: Column(
          mainAxisAlignment: MainAxisAlignment.center,
          children: [
            ElevatedButton(
              onPressed: (){
                launch('tel:+91 88888888888');
              },child: Text("Make A Call"),
            ),
            ElevatedButton(
              onPressed: (){
                launch('sms:+91888888888?body=Hi Welcome to Proto Coders Point');
              },child: Text("Send A SMS"),
            ),
            ElevatedButton(
              onPressed: (){
                launch('mailto:rajatrrpalankar@gmail.com?subject=This is Subject Title&body=This is Body of Email');
              },child: Text("Send A Email"),
            ),
            ElevatedButton(
              onPressed: (){
                launch('https://protocoderspoint.com/');
              },child: Text("Open a URL"),
            ),
          ],
        ),
      )
    );
  }
}